简介
通过eureka注册好各个微服务后,可以通过ribbon或feign进行服务间通信;两者均支持负载均衡;ribbon通过RestTemplate;feign是ribbon的封装,通过注解进行请求,推荐使用feign;
本篇基于eureka入门篇的项目内容;
前置内容:
SpringCloud极简入门>服务发现#eureka
实战
1、测试负载均衡效果
《server-account》测试接口返回端口值
@RestController
public class AccountController {

    @Value("${server.port}")
    private String port;

    @GetMapping("account")
    public String account() {
        return "account--" + new Date().toLocaleString() + ", port:" + port;
    }
}
用多个端口启动《server-account》
IDEA中勾选Allow parallel run,分别设置yml中server.port为7101和7102进行启动

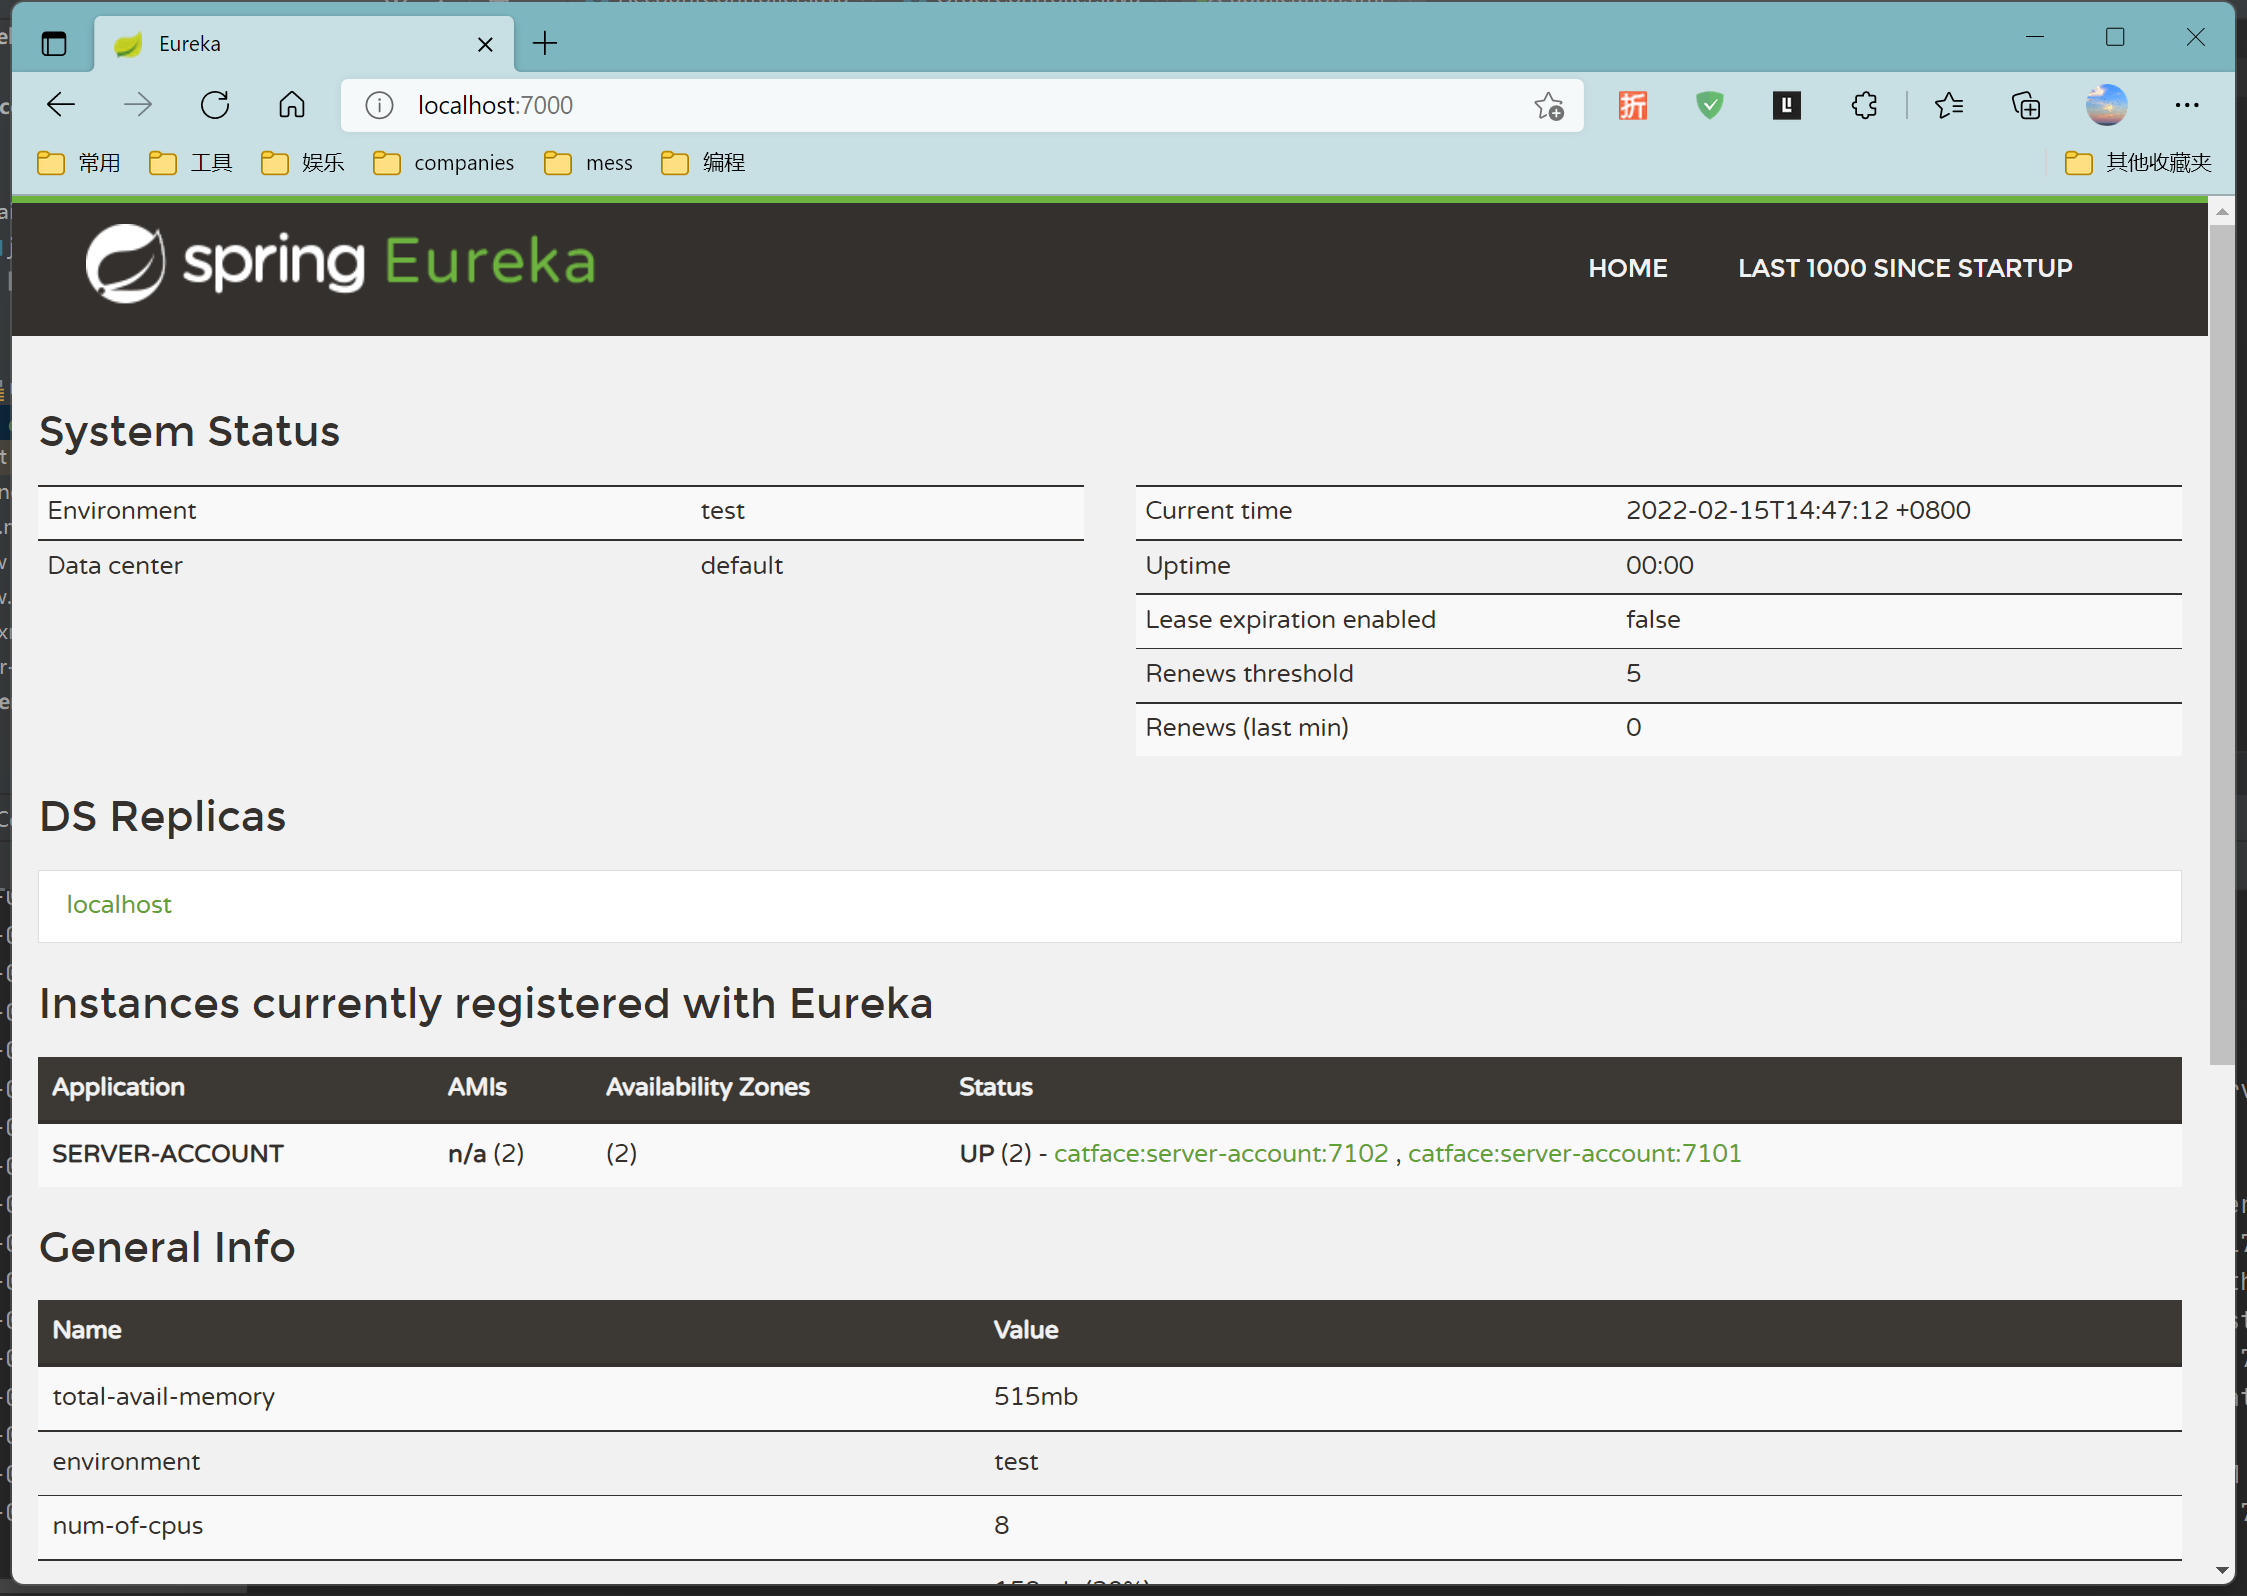
观察eureka管理页,发现刚启动的7101和7102端口的eureka client;
; 2、在《server-order》中使用ribbon
2.1、application中初始化RestTemplate,供ribbon使用;
@Bean
@LoadBalanced
RestTemplate restTemplate() {
    return new RestTemplate();
}
2.2、通过RestTemplate访问《server-account》服务
@Component
public class TestRibbon {

    @Autowired
    private RestTemplate restTemplate;

    public String getAccount() {

        return restTemplate.getForObject("http://SERVER-ACCOUNT/account", String.class);
    }
}
2.3、controller中添加测试接口
@Autowired
private TestRibbon testRibbon;

@GetMapping("testRibbon")
public String testRibbon() {
    return testRibbon.getAccount();
}
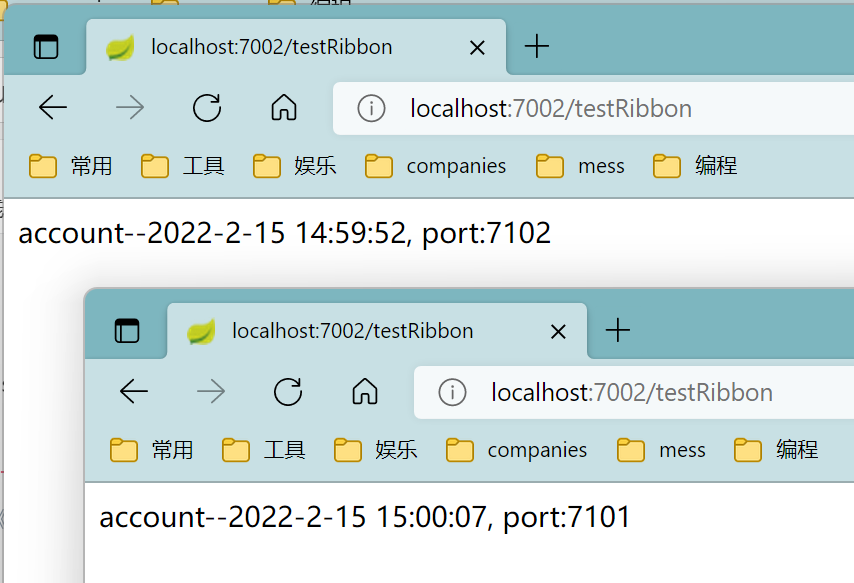
2.4、多次请求测试接口
可以看到依次从7101和7102端口获取数据,说明ribbon支持负载均衡;
; 3、在《server-order》中使用feign
3.1、添加openfeign依赖
    org.springframework.cloud
    spring-cloud-starter-openfeign
3.2、application声明注解@EnableFeignClients
3.3、通过feign访问《server-account》服务
@FeignClient(value = "SERVER-ACCOUNT")
public interface TestFeign {

    @GetMapping("account")
    String getAccount();
}
3.4、controller中添加测试接口
@Autowired
private TestFeign testFeign;

@GetMapping("testFeign")
public String testFeign() {
    return testFeign.getAccount();
}
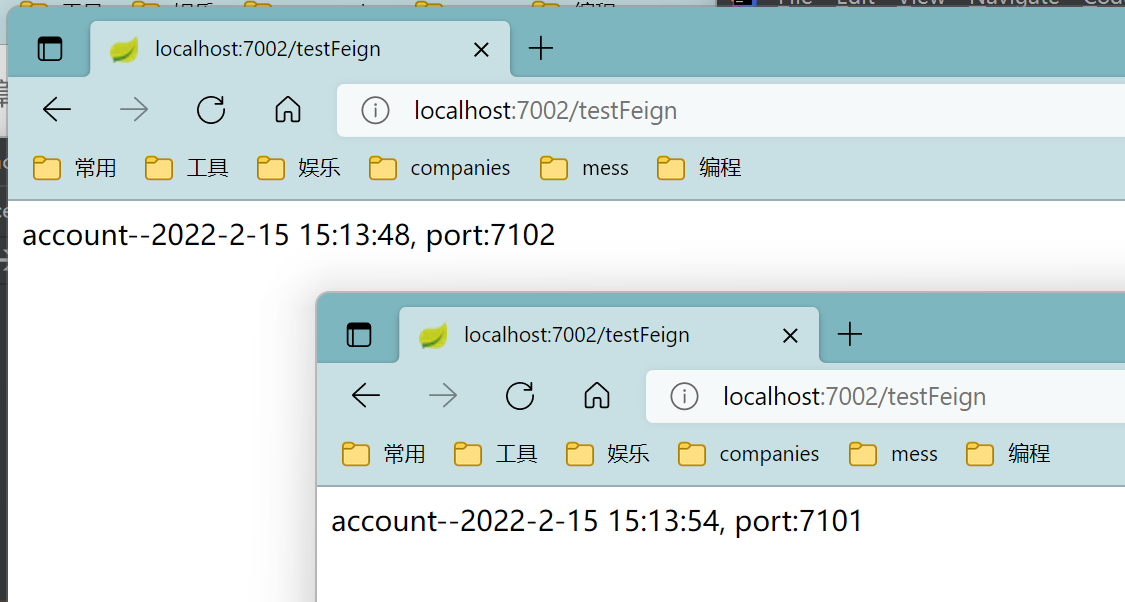
3.5、多次请求测试接口
; 总结
通过ribbon和feign都能进行服务间通信,ribbon使用RestTemplate,feign是ribbon的封装,通过注解形式编码,推荐使用feign;接下来使用zipkin追踪服务链路;
Original: https://blog.csdn.net/itCatface/article/details/122944354
Author: itCatface
Title: SpringCloud极简入门>服务通信#ribbon/feign