在本教程中,您将学习如何使用 OpenCV 和 Python 检测图像和实时视频流中的 ArUco 标记。
1.使用 OpenCV 和 Python 检测 ArUco 标记
在本教程的第一部分,您将了解 OpenCV 的 cv2.aruco 模块以及如何通过以下方式检测图像和实时视频流中的 ArUco 标记:
- 1.指定您的 ArUco 字典
- 2.为 ArUco 检测器创建参数(通常只是使用默认值的一行代码)
- 3.应用 cv2.aruco.detectMarkers 来检测图像或视频流中的 ArUco 标记
我们将查看我们的项目目录结构并实现两个 Python 脚本:
- 一种用于检测图像中 ArUco 标记的 Python 脚本
- 以及另一个用于检测实时视频流中的 ArUco 标记的 Python 脚本
2.OpenCV ArUCo 标记检测

OpenCV 库带有内置的 ArUco 支持,用于生成 ArUco 标记和检测它们。
使用 OpenCV 检测 ArUco 标记是通过 cv2.aruco 子模块三步过程实现的:
- 第 1 步:使用
cv2.aruco.Dictionary_get函数获取我们正在使用的ArUco标记字典。 - 第 2 步:使用
cv2.aruco.DetectorParameters_create定义ArUco检测参数。 - 第 3 步:通过
cv2.aruco.detectMarkers函数执行ArUco标记检测。
对我们来说最重要的是,我们需要学习如何使用 detectMarkers 函数。
; 3.理解 cv2.aruco.detectMarkers 函数
我们仅用 3-4 行代码定义一个 ArUco 标记检测程序:
arucoDict = cv2.aruco.Dictionary_get(cv2.aruco.DICT_6X6_50)
arucoParams = cv2.aruco.DetectorParameters_create()
(corners, ids, rejected) = cv2.aruco.detectMarkers(image, arucoDict,
    parameters=arucoParams)
cv2.aruco.detectMarkers 函数接受三个参数:
image:我们要在其中检测 ArUco 标记的输入图像arucoDict:我们正在使用的 ArUco 词典parameters:用于检测的ArUco参数(除非你有充分的理由修改参数,cv2.aruco.DetectorParameters_create返回的默认参数通常就足够了)
应用 ArUco 标签检测后, cv2.aruco.detectMarkers 方法返回三个值:
corners:包含我们检测到的 ArUco 标记的 (x, y) 坐标的列表ids:检测到的标记的 ArUco IDrejected:已找到但由于无法解析标记的内部代码而最终被拒绝的潜在标记列表(可视化被拒绝的标记对于调试目的通常很有用)
在本文后面,您将看到如何使用 cv2.aruco.detectMarkers 函数检测图像和实时视频流中的 ArUco 标记。
4.项目结构
在我们学习如何检测图像中的 ArUco 标签之前,让我们先回顾一下我们的项目目录结构,以便您对我们的项目是如何组织的以及我们将使用哪些 Python 脚本有一个很好的了解。

今天我们将回顾两个 Python 脚本:
detect_aruco_image.py:检测图像中的 ArUco 标签。我们将应用此脚本的示例图像放在 images/ 目录中。detect_aruco_video.py:将 ArUco 检测应用于实时视频流。
; 5.使用 OpenCV 检测图像中的 ArUco 标记
5.1代码实现
链接:https://pan.baidu.com/s/1bEPuiix0MrtL7Fu3paoRug
提取码:123a
import argparse
import imutils
import cv2
import sys

ap = argparse.ArgumentParser()
ap.add_argument("-i", "--image", required=True, help="Path to the input image containing the ArUCo tag")
ap.add_argument("-t", "--type", type=str, default="DICT_ARUCO_ORIGINAL", help="Tpe of ArUCo tag to detect")
args = vars(ap.parse_args())

ARUCO_DICT = {"DICT_4X4_50": cv2.aruco.DICT_4X4_50, "DICT_4X4_100": cv2.aruco.DICT_4X4_100,
              "DICT_4X4_250": cv2.aruco.DICT_4X4_250, "DICT_4X4_1000": cv2.aruco.DICT_4X4_1000,
              "DICT_5X5_50": cv2.aruco.DICT_5X5_50, "DICT_5X5_100": cv2.aruco.DICT_5X5_100,
              "DICT_5X5_250": cv2.aruco.DICT_5X5_250, "DICT_5X5_1000": cv2.aruco.DICT_5X5_1000,
              "DICT_6X6_50": cv2.aruco.DICT_6X6_50, "DICT_6X6_100": cv2.aruco.DICT_6X6_100,
              "DICT_6X6_250": cv2.aruco.DICT_6X6_250, "DICT_6X6_1000": cv2.aruco.DICT_6X6_1000,
              "DICT_7X7_50": cv2.aruco.DICT_7X7_50, "DICT_7X7_100": cv2.aruco.DICT_7X7_100,
              "DICT_7X7_250": cv2.aruco.DICT_7X7_250, "DICT_7X7_1000": cv2.aruco.DICT_7X7_1000,
              "DICT_ARUCO_ORIGINAL": cv2.aruco.DICT_ARUCO_ORIGINAL,
              "DICT_APRILTAG_16h5": cv2.aruco.DICT_APRILTAG_16h5,
              "DICT_APRILTAG_25h9": cv2.aruco.DICT_APRILTAG_25h9,
              "DICT_APRILTAG_36h10": cv2.aruco.DICT_APRILTAG_36h10,
              "DICT_APRILTAG_36h11": cv2.aruco.DICT_APRILTAG_36h11}

print("[INFO] Loading image...")
image = cv2.imread(args["image"])
image = imutils.resize(image, width=600)

if ARUCO_DICT.get(args["type"], None) is None:
    print("[INFO] ArUCo tag of '{}' is not supported!".format(args["type"]))
    sys.exit(0)

print("[INFO] Detecting '{}' tags...".format(args["type"]))
arucoDict = cv2.aruco.Dictionary_get(ARUCO_DICT[args["type"]])
arucoParams = cv2.aruco.DetectorParameters_create()
(corners, ids, rejected) = cv2.aruco.detectMarkers(image, arucoDict, parameters=arucoParams)

if len(corners) > 0:

    ids = ids.flatten()

    for (markerCorner, markerID) in zip(corners, ids):

        corners = markerCorner.reshape((4, 2))
        (topLeft, topRight, bottomRight, bottomLeft) = corners

        topRight = (int(topRight[0]), int(topRight[1]))
        bottomRight = (int(bottomRight[0]), int(bottomRight[1]))
        bottomLeft = (int(bottomLeft[0]), int(bottomLeft[1]))
        topLeft = (int(topLeft[0]), int(topLeft[1]))

        cv2.line(image, topLeft, topRight, (0, 255, 0), 2)
        cv2.line(image, topRight, bottomRight, (0, 255, 0), 2)
        cv2.line(image, bottomRight, bottomLeft, (0, 255, 0), 2)
        cv2.line(image, bottomLeft, topLeft, (0, 255, 0), 2)

        cX = int((topLeft[0] + bottomRight[0]) / 2.0)
        cY = int((topLeft[1] + bottomRight[1]) / 2.0)
        cv2.circle(image, (cX, cY), 4, (0, 0, 255), -1)

        cv2.putText(image, str(markerID), (topLeft[0], topLeft[1] - 15), cv2.FONT_HERSHEY_SIMPLEX, 0.5, (0, 255, 0), 2)
        print("[INFO] ArUco marker ID: {}".format(markerID))

        cv2.imshow("Image", image)
        cv2.waitKey(0)
5.2代码解析
打开项目目录中的 detect_aruco_image.py 文件,让我们开始工作:
import argparse
import imutils
import cv2
import sys
我们首先导入所需的 Python 包。
我们将使用 argparse 来解析我们的命令行参数,使用 imutils 来调整图像大小,使用 cv2 来预处理图像,以及在我们需要提前退出脚本的情况下使用 sys。
接下来是我们的命令行参数:
ap = argparse.ArgumentParser()
ap.add_argument("-i", "--image", required=True,
    help="path to input image containing ArUCo tag")
ap.add_argument("-t", "--type", type=str,
    default="DICT_ARUCO_ORIGINAL",
    help="type of ArUCo tag to detect")
args = vars(ap.parse_args())
我们有两个命令行参数需要解析:
image:包含我们想要检测的任何 ArUco 标签的输入图像的路径type:我们将检测的 ArUco 标签类型
正确设置 --type 参数对于成功检测输入图像中的 ArUco 标签绝对至关重要。
我们在此处提供的 --type 参数必须与用于在输入图像中生成标签的 ArUco 类型相同。如果使用一种类型生成 ArUco 标签,然后在尝试检测它们时使用不同的类型,则检测将失败,最终检测到的 ArUco 标签为零。
因此,您必须绝对确定用于生成 ArUco 标签的类型与您用于检测阶段的类型相同。
注意:不知道您使用什么 ArUco 字典来生成输入图像中的标签?别担心,我已经帮你解决了。下周我将向您展示我个人武器库中的一个 Python 脚本,当我无法识别给定的 ArUco 标签是什么类型时,我会使用它。该脚本自动识别 ArUco 标签类型。
接下来是我们的 ARUCO_DICT,它列举了 OpenCV 支持的每个 ArUco 标签类型:
ARUCO_DICT = {
    "DICT_4X4_50": cv2.aruco.DICT_4X4_50,
    "DICT_4X4_100": cv2.aruco.DICT_4X4_100,
    "DICT_4X4_250": cv2.aruco.DICT_4X4_250,
    "DICT_4X4_1000": cv2.aruco.DICT_4X4_1000,
    "DICT_5X5_50": cv2.aruco.DICT_5X5_50,
    "DICT_5X5_100": cv2.aruco.DICT_5X5_100,
    "DICT_5X5_250": cv2.aruco.DICT_5X5_250,
    "DICT_5X5_1000": cv2.aruco.DICT_5X5_1000,
    "DICT_6X6_50": cv2.aruco.DICT_6X6_50,
    "DICT_6X6_100": cv2.aruco.DICT_6X6_100,
    "DICT_6X6_250": cv2.aruco.DICT_6X6_250,
    "DICT_6X6_1000": cv2.aruco.DICT_6X6_1000,
    "DICT_7X7_50": cv2.aruco.DICT_7X7_50,
    "DICT_7X7_100": cv2.aruco.DICT_7X7_100,
    "DICT_7X7_250": cv2.aruco.DICT_7X7_250,
    "DICT_7X7_1000": cv2.aruco.DICT_7X7_1000,
    "DICT_ARUCO_ORIGINAL": cv2.aruco.DICT_ARUCO_ORIGINAL,
    "DICT_APRILTAG_16h5": cv2.aruco.DICT_APRILTAG_16h5,
    "DICT_APRILTAG_25h9": cv2.aruco.DICT_APRILTAG_25h9,
    "DICT_APRILTAG_36h10": cv2.aruco.DICT_APRILTAG_36h10,
    "DICT_APRILTAG_36h11": cv2.aruco.DICT_APRILTAG_36h11
}
该字典的关键是一个人类可读的字符串(即 ArUco 标签类型的名称)。然后键映射到值,这是 OpenCV 的 ArUco 标签类型的唯一标识符。
使用这个字典,我们可以获取输入的 --type 命令行参数,通过 ARUCO_DICT 传递它,然后获取 ArUco 标签类型的唯一标识符。
以下 Python shell 块向您展示了如何执行此查找操作的简单示例:
>>> print(args)
{'type': 'DICT_5X5_100'}
>>> arucoType = ARUCO_DICT[args["type"]]
>>> print(arucoType)
5
>>> 5 == cv2.aruco.DICT_5X5_100
True
>>>
接下来,让我们继续从磁盘加载输入图像:
print("[INFO] loading image...")
image = cv2.imread(args["image"])
image = imutils.resize(image, width=600)

if ARUCO_DICT.get(args["type"], None) is None:
    print("[INFO] ArUCo tag of '{}' is not supported".format(
        args["type"]))
    sys.exit(0)

print("[INFO] detecting '{}' tags...".format(args["type"]))
arucoDict = cv2.aruco.Dictionary_get(ARUCO_DICT[args["type"]])
arucoParams = cv2.aruco.DetectorParameters_create()
(corners, ids, rejected) = cv2.aruco.detectMarkers(image, arucoDict,
    parameters=arucoParams)
加载我们的输入图像,然后将其调整为 600 像素的宽度(这样图像可以很容易地适合我们的屏幕)。
如果你有一个高分辨率的输入图像,带有小的 ArUco 标签,你可能需要调整这个调整大小的操作;否则,在调整大小操作后,ArUco 标签可能太小而无法检测到。
检查 ARUCO_DICT 中是否存在 ArUco --type 名称。如果没有,那么我们退出脚本,因为我们没有可用于提供的 --type 的 ArUco 字典。
否则,我们:
- 使用
--type和ARUCO_DICT加载 ArUco 字典 - 实例化我们的 ArUco 探测器参数
- 使用
cv2.aruco.detectMarkers函数应用 ArUco 检测
cv2.aruco.detectMarkers 结果为三元组:
corners:我们检测到的 ArUco 标记的 (x, y) 坐标ids:ArUco 标记的标识符(即标记本身中编码的 ID)rejected:检测到但最终由于标记内的代码无法解析而被拒绝的潜在标记列表
现在让我们开始可视化我们检测到的 ArUco 标记:
if len(corners) > 0:

    ids = ids.flatten()

    for (markerCorner, markerID) in zip(corners, ids):

        corners = markerCorner.reshape((4, 2))
        (topLeft, topRight, bottomRight, bottomLeft) = corners

        topRight = (int(topRight[0]), int(topRight[1]))
        bottomRight = (int(bottomRight[0]), int(bottomRight[1]))
        bottomLeft = (int(bottomLeft[0]), int(bottomLeft[1]))
        topLeft = (int(topLeft[0]), int(topLeft[1]))
进行检查以确保至少检测到一个标记。如果是这样,我们继续展平 ArUco ids 列表,然后将每个 corners和 ids 一起循环。每个 markerCorner由四个 (x, y) 坐标列表表示。这些 (x, y) 坐标表示 ArUco 标签的左上角、右上角、右下角和左下角。此外,(x, y) 坐标始终按该顺序返回。
topRight、bottomRight、bottomLeft 和 topLeft 变量是 NumPy 数组;然而,我们需要将它们转换为整数值 (int),以便我们可以使用 OpenCV 的绘图函数来可视化图像上的标记。
使用整数类型的标记 (x, y) 坐标,我们可以在图像上绘制它们:
        cv2.line(image, topLeft, topRight, (0, 255, 0), 2)
        cv2.line(image, topRight, bottomRight, (0, 255, 0), 2)
        cv2.line(image, bottomRight, bottomLeft, (0, 255, 0), 2)
        cv2.line(image, bottomLeft, topLeft, (0, 255, 0), 2)

        cX = int((topLeft[0] + bottomRight[0]) / 2.0)
        cY = int((topLeft[1] + bottomRight[1]) / 2.0)
        cv2.circle(image, (cX, cY), 4, (0, 0, 255), -1)

        cv2.putText(image, str(markerID),
            (topLeft[0], topLeft[1] - 15), cv2.FONT_HERSHEY_SIMPLEX,
            0.5, (0, 255, 0), 2)
        print("[INFO] ArUco marker ID: {}".format(markerID))

        cv2.imshow("Image", image)
        cv2.waitKey(0)
在我们的图像上,使用 cv2.line 绘制 ArUco 标签的边界框。然后我们计算 ArUco 标记的中心 (x, y) 坐标并通过调用 cv2.circle 在图像上绘制中心。我们最后的可视化步骤是在图像上绘制标记 ID 并将其打印到我们的终端。
5.3OpenCV ArUco 标记检测结果


使 用 O p e n C V 检 测 输 入 图 像 中 的 A r U c o 标 签 使用 OpenCV 检测输入图像中的 ArUco 标签使用O p e n C V 检测输入图像中的A r U c o 标签
; 6.使用 OpenCV 检测实时视频流中的 ArUco 标记
6.1代码实现
from imutils.video import VideoStream
import argparse
import imutils
import time
import cv2
import sys

ap = argparse.ArgumentParser()
ap.add_argument("-t", "--type", type=str, default="DICT_ARUCO_ORIGINAL", help="Type of ArUCo tag to detect")
args = vars(ap.parse_args())

ARUCO_DICT = {"DICT_4X4_50": cv2.aruco.DICT_4X4_50, "DICT_4X4_100": cv2.aruco.DICT_4X4_100,
              "DICT_4X4_250": cv2.aruco.DICT_4X4_250, "DICT_4X4_1000": cv2.aruco.DICT_4X4_1000,
              "DICT_5X5_50": cv2.aruco.DICT_5X5_50, "DICT_5X5_100": cv2.aruco.DICT_5X5_100,
              "DICT_5X5_250": cv2.aruco.DICT_5X5_250, "DICT_5X5_1000": cv2.aruco.DICT_5X5_1000,
              "DICT_6X6_50": cv2.aruco.DICT_6X6_50, "DICT_6X6_100": cv2.aruco.DICT_6X6_100,
              "DICT_6X6_250": cv2.aruco.DICT_6X6_250, "DICT_6X6_1000": cv2.aruco.DICT_6X6_1000,
              "DICT_7X7_50": cv2.aruco.DICT_7X7_50, "DICT_7X7_100": cv2.aruco.DICT_7X7_100,
              "DICT_7X7_250": cv2.aruco.DICT_7X7_250, "DICT_7X7_1000": cv2.aruco.DICT_7X7_1000,
              "DICT_ARUCO_ORIGINAL": cv2.aruco.DICT_ARUCO_ORIGINAL,
              "DICT_APRILTAG_16h5": cv2.aruco.DICT_APRILTAG_16h5,
              "DICT_APRILTAG_25h9": cv2.aruco.DICT_APRILTAG_25h9,
              "DICT_APRILTAG_36h10": cv2.aruco.DICT_APRILTAG_36h10,
              "DICT_APRILTAG_36h11": cv2.aruco.DICT_APRILTAG_36h11}

if ARUCO_DICT.get(args["type"], None) is None:
    print("[INFO] ArUCo tag of '{}' is not supported".format(args["type"]))
    sys.exit(0)

print("[INFO] Detecting '{}' tags...".format(args["type"]))
arucoDict = cv2.aruco.Dictionary_get(ARUCO_DICT[args["type"]])
arucoParams = cv2.aruco.DetectorParameters_create()

print("[INFO] Starting video stream...")
vs = VideoStream(src=0).start()
time.sleep(2.0)

while True:

    frame = vs.read()
    frame = imutils.resize(frame, width=1000)

    (corners, ids, rejected) = cv2.aruco.detectMarkers(frame, arucoDict, parameters=arucoParams)

    if len(corners) > 0:

        ids = ids.flatten()

        for (markerCorner, markerID) in zip(corners, ids):

            corners = markerCorner.reshape((4, 2))
            (topLeft, topRight, bottomRight, bottomLeft) = corners

            topRight = (int(topRight[0]), int(topRight[1]))
            bottomRight = (int(bottomRight[0]), int(bottomRight[1]))
            bottomLeft = (int(bottomLeft[0]), int(bottomLeft[1]))
            topLeft = (int(topLeft[0]), int(topLeft[1]))

            cv2.line(frame, topLeft, topRight, (0, 255, 0), 2)
            cv2.line(frame, topRight, bottomRight, (0, 255, 0), 2)
            cv2.line(frame, bottomRight, bottomLeft, (0, 255, 0), 2)
            cv2.line(frame, bottomLeft, topLeft, (0, 255, 0), 2)

            cX = int((topLeft[0] + bottomRight[0]) / 2.0)
            cY = int((topLeft[1] + bottomRight[1]) / 2.0)
            cv2.circle(frame, (cX, cY), 4, (0, 0, 255), -1)

            cv2.putText(frame, str(markerID), (topLeft[0], topLeft[1] - 15),
                        cv2.FONT_HERSHEY_SIMPLEX, 0.5, (0, 255, 0), 2)

    cv2.imshow("Frame", frame)
    key = cv2.waitKey(1) & 0xFF

    if key == ord("q"):
        break

cv2.destroyAllWindows()
vs.stop()
6.2代码讲解
from imutils.video import VideoStream
import argparse
import imutils
import time
import cv2
import sys
导入我们需要的 Python 包。这些导入与我们之前的脚本相同,但有两个例外:
VideoStream:用于访问我们的网络摄像头time:插入一个小的延迟,让我们的相机传感器预热
现在让我们解析我们的命令行参数:
ap = argparse.ArgumentParser()
ap.add_argument("-t", "--type", type=str,
    default="DICT_ARUCO_ORIGINAL",
    help="type of ArUCo tag to detect")
args = vars(ap.parse_args())
我们在这里只需要一个命令行参数 --type,它是我们要在视频流中检测的 ArUco 标签的类型。接下来我们定义 ARUCO_DICT,用于将 --type 映射到 OpenCV 唯一的 ArUco 标签类型:
ARUCO_DICT = {
    "DICT_4X4_50": cv2.aruco.DICT_4X4_50,
    "DICT_4X4_100": cv2.aruco.DICT_4X4_100,
    "DICT_4X4_250": cv2.aruco.DICT_4X4_250,
    "DICT_4X4_1000": cv2.aruco.DICT_4X4_1000,
    "DICT_5X5_50": cv2.aruco.DICT_5X5_50,
    "DICT_5X5_100": cv2.aruco.DICT_5X5_100,
    "DICT_5X5_250": cv2.aruco.DICT_5X5_250,
    "DICT_5X5_1000": cv2.aruco.DICT_5X5_1000,
    "DICT_6X6_50": cv2.aruco.DICT_6X6_50,
    "DICT_6X6_100": cv2.aruco.DICT_6X6_100,
    "DICT_6X6_250": cv2.aruco.DICT_6X6_250,
    "DICT_6X6_1000": cv2.aruco.DICT_6X6_1000,
    "DICT_7X7_50": cv2.aruco.DICT_7X7_50,
    "DICT_7X7_100": cv2.aruco.DICT_7X7_100,
    "DICT_7X7_250": cv2.aruco.DICT_7X7_250,
    "DICT_7X7_1000": cv2.aruco.DICT_7X7_1000,
    "DICT_ARUCO_ORIGINAL": cv2.aruco.DICT_ARUCO_ORIGINAL,
    "DICT_APRILTAG_16h5": cv2.aruco.DICT_APRILTAG_16h5,
    "DICT_APRILTAG_25h9": cv2.aruco.DICT_APRILTAG_25h9,
    "DICT_APRILTAG_36h10": cv2.aruco.DICT_APRILTAG_36h10,
    "DICT_APRILTAG_36h11": cv2.aruco.DICT_APRILTAG_36h11
}
我们现在可以加载我们的 ArUco 字典:
if ARUCO_DICT.get(args["type"], None) is None:
    print("[INFO] ArUCo tag of '{}' is not supported".format(
        args["type"]))
    sys.exit(0)

print("[INFO] detecting '{}' tags...".format(args["type"]))
arucoDict = cv2.aruco.Dictionary_get(ARUCO_DICT[args["type"]])
arucoParams = cv2.aruco.DetectorParameters_create()

print("[INFO] starting video stream...")
vs = VideoStream(src=0).start()
time.sleep(2.0)
检查我们的 ARUCO_DICT 中是否存在 ArUco 标签 --type。如果没有,我们退出脚本。否则,我们加载 arucoDict 并获取检测器的 arucoParams。我们启动我们的 VideoStream 并让我们的相机传感器预热。
我们现在准备从我们的视频流中循环帧:
while True:

    frame = vs.read()
    frame = imutils.resize(frame, width=1000)

    (corners, ids, rejected) = cv2.aruco.detectMarkers(frame,
        arucoDict, parameters=arucoParams)
从我们的视频流中抓取一个帧,然后我们将其调整为 1000 像素的宽度。然后我们应用 cv2.aruco.detectMarkers 函数来检测当前帧中的 ArUco 标签。
现在让我们解析 ArUco 标签检测的结果:
    if len(corners) > 0:

        ids = ids.flatten()

        for (markerCorner, markerID) in zip(corners, ids):

            corners = markerCorner.reshape((4, 2))
            (topLeft, topRight, bottomRight, bottomLeft) = corners

            topRight = (int(topRight[0]), int(topRight[1]))
            bottomRight = (int(bottomRight[0]), int(bottomRight[1]))
            bottomLeft = (int(bottomLeft[0]), int(bottomLeft[1]))
            topLeft = (int(topLeft[0]), int(topLeft[1]))
我们有了:
- 验证至少检测到一个 ArUco 标签
- 展平 ArUco ids 列表
- 循环所有corners和 ids
- 按左上角、右上角、右下角和左下角顺序提取标记角
- 将角 (x, y) 坐标从 NumPy 数组数据类型转换为 Python 整数,以便我们可以使用 OpenCV 的绘图函数绘制坐标
这里的最后一步是绘制我们的 ArUco 标签边界框
            cv2.line(frame, topLeft, topRight, (0, 255, 0), 2)
            cv2.line(frame, topRight, bottomRight, (0, 255, 0), 2)
            cv2.line(frame, bottomRight, bottomLeft, (0, 255, 0), 2)
            cv2.line(frame, bottomLeft, topLeft, (0, 255, 0), 2)

            cX = int((topLeft[0] + bottomRight[0]) / 2.0)
            cY = int((topLeft[1] + bottomRight[1]) / 2.0)
            cv2.circle(frame, (cX, cY), 4, (0, 0, 255), -1)

            cv2.putText(frame, str(markerID),
                (topLeft[0], topLeft[1] - 15),
                cv2.FONT_HERSHEY_SIMPLEX,
                0.5, (0, 255, 0), 2)

    cv2.imshow("Frame", frame)
    key = cv2.waitKey(1) & 0xFF

    if key == ord("q"):
        break

cv2.destroyAllWindows()
vs.stop()
我们的可视化步骤包括:
- 在图像上绘制 ArUco 标签的轮廓
- 绘制 ArUco 标签的中心
- 显示检测到的 ArUco 标签的 ID
最后,我们将输出帧显示到我们的屏幕上。
如果在 OpenCV 打开的窗口处于活动状态时按下 q 键,我们将中断脚本并清理视频指针。
总结
在本教程中,您学习了如何使用 OpenCV 和 Python 检测图像和实时视频流中的 ArUco 标记。
使用 OpenCV 检测 ArUco 标记是一个三步过程:
- 设置您使用的 ArUco 字典。
- 定义 ArUco 检测器的参数(通常默认选项就足够了)。
- 使用 OpenCV 的ArUco 检测器的
cv2.aruco.detectMarkers函数 。
OpenCV 的 ArUco 标记速度非常快,正如我们的结果所示,能够实时检测 ArUco 标记。
在您自己的计算机视觉管道中使用 ArUco 标记时,请随意使用此代码作为起点。
但是,假设您正在开发一个计算机视觉项目来自动检测图像中的 ArUco 标记,但您不知道使用的是哪种标记类型,因此,您无法明确设置 ArUco 标记字典 - 您会做什么?
如果您不知道所使用的标记类型,您将如何检测 ArUco 标记?
我将在下一个博客文章中回答问题。
参考目录
https://www.pyimagesearch.com/2020/12/21/detecting-aruco-markers-with-opencv-and-python/
Original: https://blog.csdn.net/weixin_43229348/article/details/120565635
Author: 求则得之,舍则失之
Title: OpenCV基础(19)使用 OpenCV 和 Python 检测 ArUco 标记
相关阅读
Title: 八、Inception V1的网络结构代码实现
文章目录
*
- 前文
- 数据生成器+数据部分展示
- Inception V1
- Inception V1模型编译与拟合
- GitHub下载地址:
前文
- 一、Windows系统下安装Tensorflow2.x(2.6)
- 二、深度学习-读取数据
- 三、Tensorflow图像处理预算
- 四、线性回归模型的tensorflow实现
- 五、深度学习-逻辑回归模型
- 六、AlexNet实现中文字体识别——隶书和行楷
- 七、VGG16实现鸟类数据库分类
- 七、VGG16+BN(Batch Normalization)实现鸟类数据库分类
- 七、BatchNormalization使用技巧
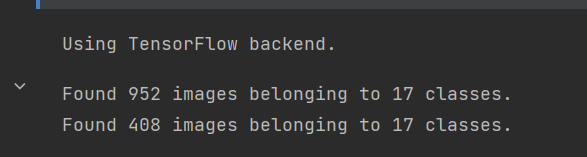
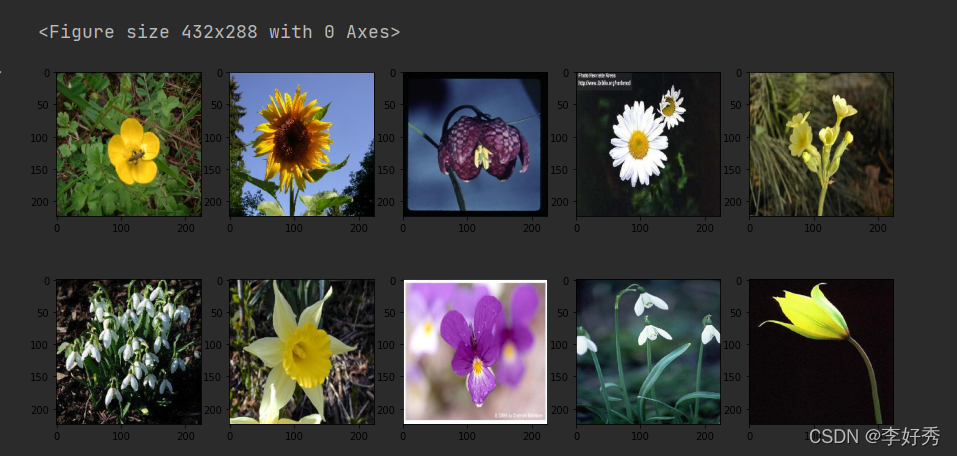
数据生成器+数据部分展示
from keras.preprocessing.image import ImageDataGenerator

IMSIZE = 224
train_generator = ImageDataGenerator(rescale=1. / 255).flow_from_directory('../../data/data_inception/train',
                                                                           target_size=(IMSIZE, IMSIZE),
                                                                           batch_size=100,
                                                                           class_mode='categorical'
                                                                           )

validation_generator = ImageDataGenerator(rescale=1. / 255).flow_from_directory('../../data/data_inception/test',
                                                                                target_size=(IMSIZE, IMSIZE),
                                                                                batch_size=100,
                                                                                class_mode='categorical')
from matplotlib import pyplot as plt

plt.figure()
fig, ax = plt.subplots(2, 5)
fig.set_figheight(7)
fig.set_figwidth(15)
ax = ax.flatten()
X, Y = next(train_generator)
for i in range(10): ax[i].imshow(X[i, :, :,: ])
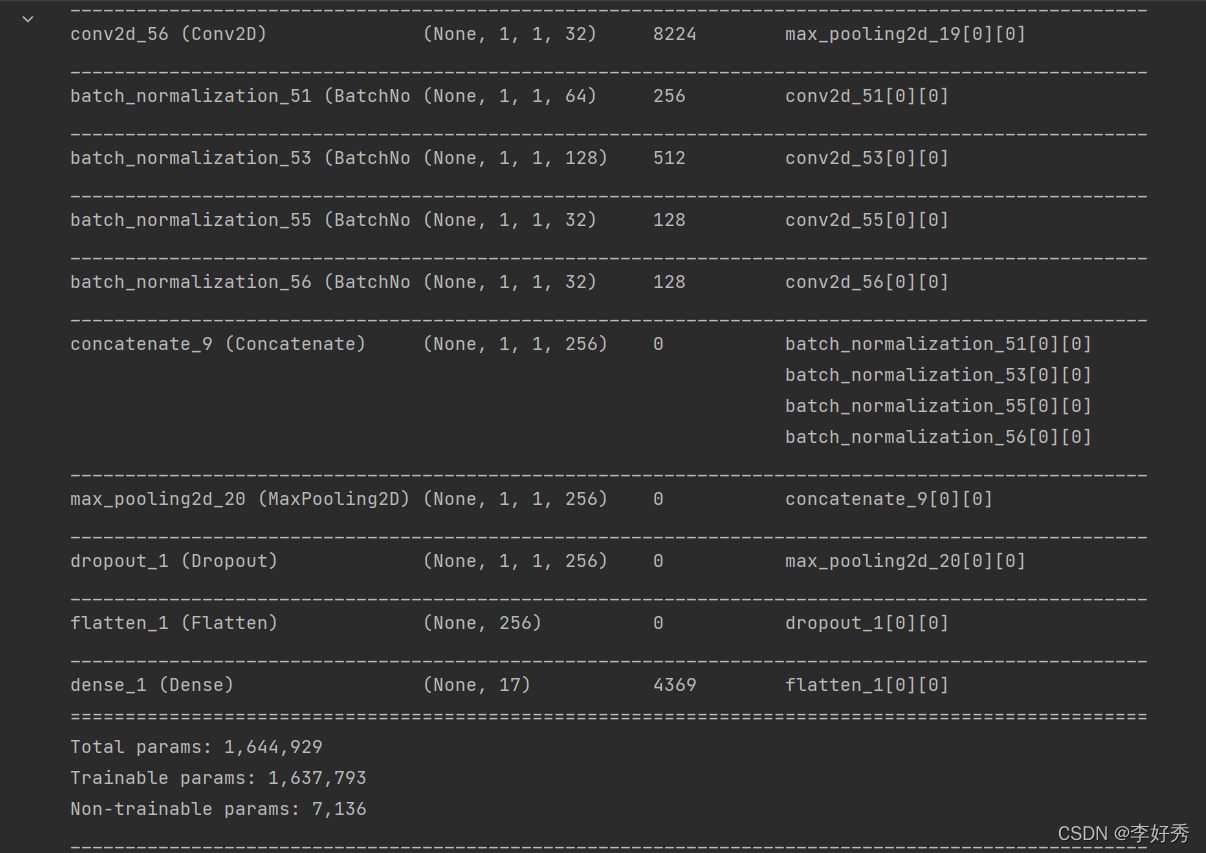
Inception V1
from keras.layers import Conv2D, BatchNormalization, MaxPooling2D
from keras.layers import Flatten, Dropout, Dense, Input, concatenate
from keras import Model

input_layer = Input([IMSIZE, IMSIZE, 3])
x = input_layer
x = Conv2D(64, (7, 7), strides=(2, 2), padding='same', activation='relu')(x)
x = BatchNormalization(axis=3)(x)
x = MaxPooling2D(pool_size=(3, 3), strides=(2, 2), padding='same')(x)

x = Conv2D(192, (3, 3), strides=(1, 1), padding='same', activation='relu')(x)
x = BatchNormalization(axis=3)(x)
x = MaxPooling2D(pool_size=(3, 3), strides=(2, 2), padding='same')(x)
x

for i in range(9):
    brach1x1 = Conv2D(64, (1, 1), strides=(1, 1), padding='same', activation='relu')(x)
    brach1x1 = BatchNormalization(axis=3)(brach1x1)
    brach3x3 = Conv2D(96, (1, 1), strides=(1, 1), padding='same', activation='relu')(x)
    brach3x3 = BatchNormalization(axis=3)(brach3x3)

    brach3x3 = Conv2D(128, (3, 3), strides=(1, 1), padding='same', activation='relu')(brach3x3)
    brach3x3 = BatchNormalization(axis=3)(brach3x3)

    brach5x5 = Conv2D(16, (1, 1), strides=(1, 1), padding='same', activation='relu')(x)
    brach5x5 = BatchNormalization(axis=3)(brach5x5)

    brach5x5 = Conv2D(32, (3, 3), strides=(1, 1), padding='same', activation='relu')(brach5x5)
    brach5x5 = BatchNormalization(axis=3)(brach5x5)

    branchpool = MaxPooling2D(pool_size=(3, 3), strides=(1, 1), padding='same')(x)
    branchpool = Conv2D(32, (1, 1), strides=(1, 1), padding='same', activation='relu')(branchpool)
    branchpool = BatchNormalization(axis=3)(branchpool)
    x = concatenate([brach1x1, brach3x3, brach5x5, branchpool], axis=3)
    x = MaxPooling2D(pool_size=(3, 3), strides=(2, 2), padding='same')(x)

x = Dropout(0.4)(x)
x = Flatten()(x)
x = Dense(17, activation='softmax')(x)
output_layer = x
model = Model(input_layer, output_layer)
model.summary()
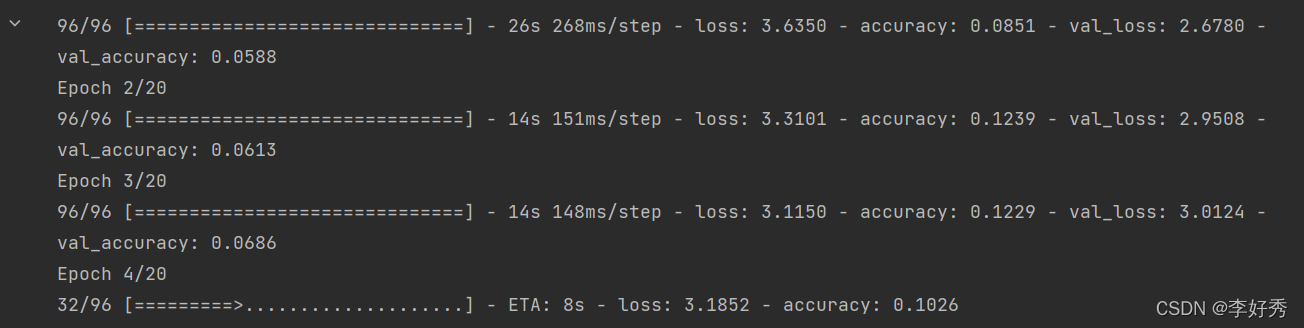
Inception V1模型编译与拟合
#运行
from keras.optimizers import Adam

model.compile(loss='categorical_crossentropy', optimizer=Adam(lr=0.001), metrics=['accuracy'])
model.fit_generator(train_generator, epochs=20, validation_data=validation_generator)
GitHub下载地址:
Original: https://blog.csdn.net/m0_52426915/article/details/121724939
Author: 李好秀
Title: 八、Inception V1的网络结构代码实现