强制类型转换
强制tensor转换为该数据类型
tf.cast(张量名, dtype=数据类型)
计算张量维度上元素的最大最小值
tf.reduce_max(张量名)
tf.reduce_min(张量名)
import tensorflow as tf
x1 = tf.constant([1, 2, 3], dtype=tf.float64)
print(x1)

x2 = tf.cast(x1, tf.int32)
print(x2)

print(tf.reduce_min(x2), tf.reduce_max(x2))

结果如下:
tf.Tensor([1. 2. 3.], shape=(3,), dtype=float64)
tf.Tensor([1 2 3], shape=(3,), dtype=int32)
tf.Tensor(1, shape=(), dtype=int32) tf.Tensor(3, shape=(), dtype=int32)
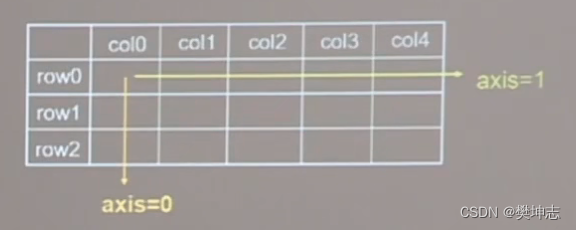
理解axis
axis可以指定操作的方向
对于一个二维张量,如果axis=0,表示对第一个维度进行操作,axis=1,表示对第二个维度进行操作。axis=0表示纵向操作,沿经度方向,axis=0表示横向操作,沿纬度方向
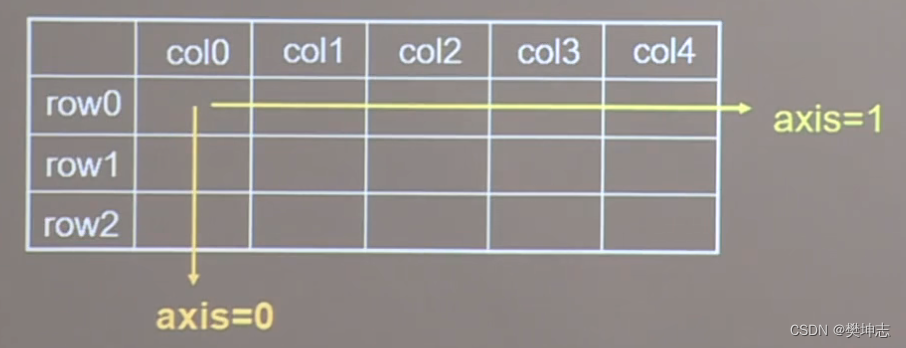
不指定axis则对所有元素进行操作
; 计算张量沿着指定维度的平均值
tf.reduce_mean(张量名, axis=操作轴)
计算张量沿着指定维度的和
tf.reduce_sum(张量名, axis=操作轴)
import tensorflow as tf
x = tf.constant([[1, 2, 3],
                  [2, 2, 3]])
print(x)
print(tf.reduce_mean(x))
print(tf.reduce_sum(x, axis=1))

结果如下:
tf.Tensor(
[[1 2 3]
 [2 2 3]], shape=(2, 3), dtype=int32)
tf.Tensor(2, shape=(), dtype=int32)
tf.Tensor([6 7], shape=(2,), dtype=int32)
标记可训练
tf.Variable()将变量标记为"可训练",被标记的变量会在反向传播中记录梯度信息。神经网络训练中,常用该函数标记待训练参数
tf.Variable(初始值)
w = tf.Variable(tf.random.normal([2, 2], mean=0, stddev=1))
随机生成正态分布随机数,再给生成的随机数标记为可训练,这样在反向传播中就可以通过梯度下降更新参数w了
Tensorflow中的数学运算
对应元素的四则运算:tf.add, tf.subtract, tf.multiply, tf.divide
平方、次方与开方:tf.square, tf.pow, tf.sqrt
矩阵乘:tf.matmul
只有维度相同的张量才可以做四则运算
import tensorflow as tf
a = tf.ones([1, 3])
b = tf.fill([1, 3], 3.)
print(a)
print(b)
print(tf.add(a, b))
print(tf.subtract(a, b))
print(tf.multiply(a, b))
print(tf.divide(a, b))

a = tf.fill([1, 2], 3.)
print(a)
print(tf.pow(a, 3))
print(tf.square(a))
print(tf.sqrt(a))

a = tf.ones([3, 2])
b = tf.fill([2, 3], 3.)
print(tf.matmul(a, b))

结果如下:
tf.Tensor([[1. 1. 1.]], shape=(1, 3), dtype=float32)
tf.Tensor([[3. 3. 3.]], shape=(1, 3), dtype=float32)
tf.Tensor([[4. 4. 4.]], shape=(1, 3), dtype=float32)
tf.Tensor([[-2. -2. -2.]], shape=(1, 3), dtype=float32)
tf.Tensor([[3. 3. 3.]], shape=(1, 3), dtype=float32)
tf.Tensor([[0.33333334 0.33333334 0.33333334]], shape=(1, 3), dtype=float32)

tf.Tensor([[3. 3.]], shape=(1, 2), dtype=float32)
tf.Tensor([[27. 27.]], shape=(1, 2), dtype=float32)
tf.Tensor([[9. 9.]], shape=(1, 2), dtype=float32)
tf.Tensor([[1.7320508 1.7320508]], shape=(1, 2), dtype=float32)

tf.Tensor(
[[6. 6. 6.]
 [6. 6. 6.]
 [6. 6. 6.]], shape=(3, 3), dtype=float32)
配对特征和标签
切分传入张量的第一维度,生成输入特征/标签对,构建数据集
data = tf.data.Dataset.from_tensor_slices((输入特征, 标签))
Numpy和Tensor格式都可用该语句读入数据
import tensorflow as tf
feature = tf.constant([12, 23, 10, 17])
labels = tf.constant([0, 1, 1, 0])
dataset = tf.data.Dataset.from_tensor_slices((feature, labels))
print(dataset)
for element in dataset:
    print(element)

结果如下:
<TensorSliceDataset shapes: ((), ()), types: (tf.int32, tf.int32)>
(<tf.Tensor: id=9, shape=(), dtype=int32, numpy=12>, <tf.Tensor: id=10, shape=(), dtype=int32, numpy=0>)
(<tf.Tensor: id=11, shape=(), dtype=int32, numpy=23>, <tf.Tensor: id=12, shape=(), dtype=int32, numpy=1>)
(<tf.Tensor: id=13, shape=(), dtype=int32, numpy=10>, <tf.Tensor: id=14, shape=(), dtype=int32, numpy=1>)
(<tf.Tensor: id=15, shape=(), dtype=int32, numpy=17>, <tf.Tensor: id=16, shape=(), dtype=int32, numpy=0>)
某个函数对指定参数的求导
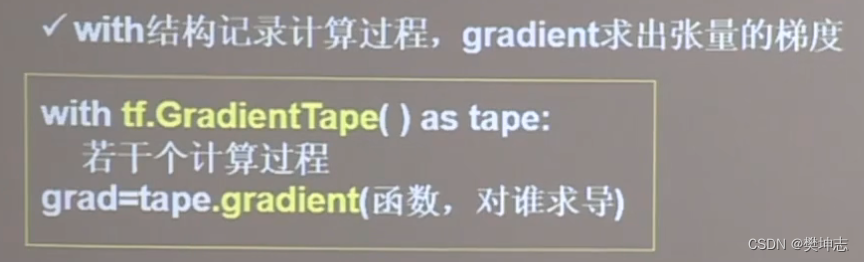
import tensorflow as tf
with tf.GradientTape() as tape:
    w = tf.Variable(tf.constant(3.0))
    loss = tf.pow(w, 2)
grad = tape.gradient(loss, w)
print(grad)

结果如下:
tf.Tensor(6.0, shape=(), dtype=float32)
枚举enumerate
它是python的内建函数,可遍历每个元素(如列表、元组或字符串),并在元素前配上对应的索引号,组合为:索引 元素,常在for循环中使用
seq = ['one', 'two', 'three']
for i, element in enumerate(seq):
    print(i, element)

结果如下:
0 one
1 two
2 three
分类问题常用独热码表示标签
tf.one_hot()函数将待转换数据,转换为one-hot形式的数据输出
tf.one_hot(待转换数据, depth=几分类)
import tensorflow as tf
classes = 3
labels = tf.constant([1, 0, 2])
output = tf.one_hot(labels, depth=classes)
print(output)

结果如下:
tf.Tensor(
[[0. 1. 0.]
 [1. 0. 0.]
 [0. 0. 1.]], shape=(3, 3), dtype=float32)
分类问题softmax
使输出符合概率分布
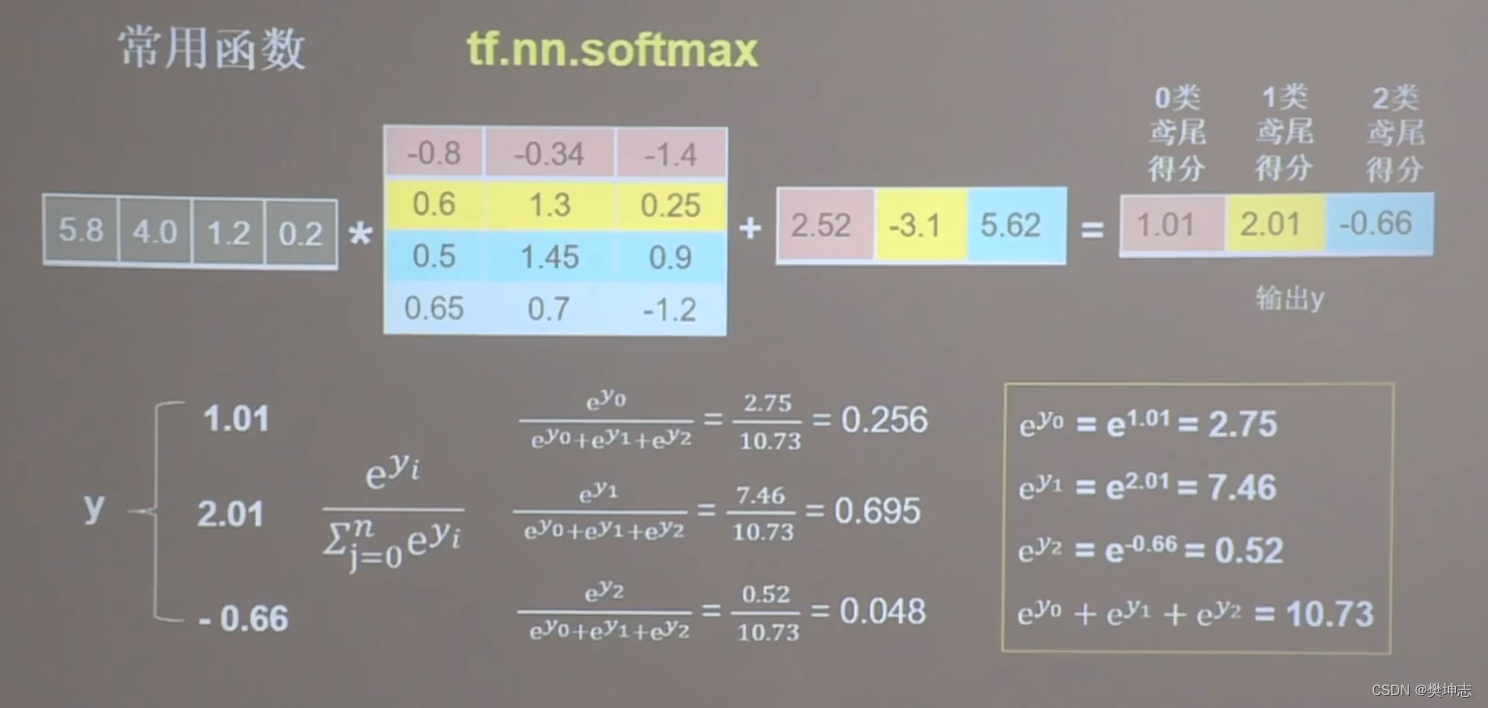
import tensorflow as tf

y = tf.constant([1.01, 2.01, -0.66])
y_pro = tf.nn.softmax(y)
print("After softmax, y_pro is:", y_pro)
print("The sum of y_pro:", tf.reduce_sum(y_pro))

结果如下:
After softmax, y_pro is: tf.Tensor([0.25598174 0.69583046 0.04818781], shape=(3,), dtype=float32)
The sum of y_pro: tf.Tensor(1.0, shape=(), dtype=float32)
参数的自更新
assign_sub函数常用于参数的自更新,等待自更新的参数w要先被指定为可更新可训练,也就是Variable类型
w.assign_sub(w要自减的内容)
import tensorflow as tf

x = tf.Variable(4)
x.assign_sub(1)
print("x:", x)

结果如下:
x: <tf.Variable 'Variable:0' shape=() dtype=int32, numpy=3>
指定操作轴方向最大值的索引
tf.argmax(张量名, axis=操作轴)
import numpy as np
import tensorflow as tf

test = np.array([[1, 2, 3], [2, 3, 4], [5, 4, 3], [8, 7, 2]])
print("test:\n", test)
print("每一列的最大值的索引:", tf.argmax(test, axis=0))
print("每一行的最大值的索引", tf.argmax(test, axis=1))

结果如下:
test:
 [[1 2 3]
 [2 3 4]
 [5 4 3]
 [8 7 2]]
每一列的最大值的索引: tf.Tensor([3 3 1], shape=(3,), dtype=int64)
每一行的最大值的索引 tf.Tensor([2 2 0 0], shape=(4,), dtype=int64)
tf.where()
条件语句真返回A,假返回B
tf.where(条件语句, 真返回A, 假返回B)
import tensorflow as tf

a = tf.constant([1,2,3,1,1])
b = tf.constant([0,1,3,4,5])
c = tf.where(tf.greater(a, b), a, b)
print("c:", c)

结果如下:
c: tf.Tensor([1 2 3 4 5], shape=(5,), dtype=int32)
np.random.RandomState.rand()
返回一个[0, 1)之间的随机数
np.random.RandomState.rand(维度) # 维度若为空,返回标量
import numpy as np

rdm = np.random.RandomState(seed=1)
a = rdm.rand()
b = rdm.rand(2, 3)

print("a:", a)
print("b:", b)

结果如下:
a: 0.417022004702574
b: [[7.20324493e-01 1.14374817e-04 3.02332573e-01]
 [1.46755891e-01 9.23385948e-02 1.86260211e-01]]
np.vstack()
将两个数组按垂直方向叠加
np.vstack(数组1, 数组2)
import numpy as np

a = np.array([1, 2, 3])
b = np.array([4, 5, 6])
c = np.vstack((a, b))
print("c:\n", c)

结果如下:
c:
 [[1 2 3]
 [4 5 6]]
np.mgrid[]、np.ravel()、np.c_[]
这三个函数经常一起使用,可以生成网格坐标点
1.np.mgrid[起始值:结束值:步长,起始值:结束值:步长,...]
返回若干组维度相同的等差数组,[起始值,结束值)前闭后开
2.x.ravel() 把多维数组变成一维数组,把x变量拉直
3.np.c_[] 把数组配对后输出
import numpy as np

x, y = np.mgrid[1:3:1, 2:4:0.5]

grid = np.c_[x.ravel(), y.ravel()]
print("x:\n", x)
print("y:\n", y)
print("x.ravel():\n", x.ravel())
print("y.ravel():\n", y.ravel())
print('grid:\n', grid)

结果如下:
x:
 [[1. 1. 1. 1.]
 [2. 2. 2. 2.]]
y:
 [[2.  2.5 3.  3.5]
 [2.  2.5 3.  3.5]]
x.ravel():
 [1. 1. 1. 1. 2. 2. 2. 2.]
y.ravel():
 [2.  2.5 3.  3.5 2.  2.5 3.  3.5]
grid:
 [[1.  2. ]
 [1.  2.5]
 [1.  3. ]
 [1.  3.5]
 [2.  2. ]
 [2.  2.5]
 [2.  3. ]
 [2.  3.5]]
学完了常用函数,接下来就可以愉快的自己敲代码啦!
Original: https://blog.csdn.net/weixin_45361800/article/details/124610680
Author: 樊坤志
Title: 二.Tensorflow2之常用函数
相关阅读1
Title: win10安装cuda,cudnn,tensorflow,tensorflow-gpu
通过n多天的努力我将cuda,cudnn等一些列配通,实属不易。ok,咱们直击主题,如何配置:
1. 查询自己的配置资源
首先打开英伟达控制面板
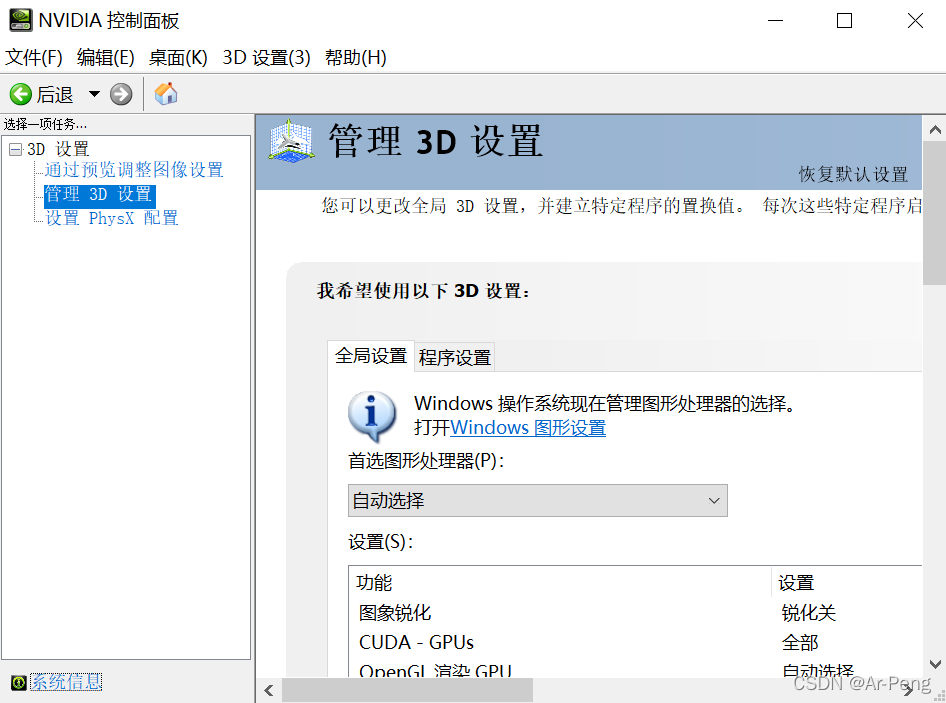
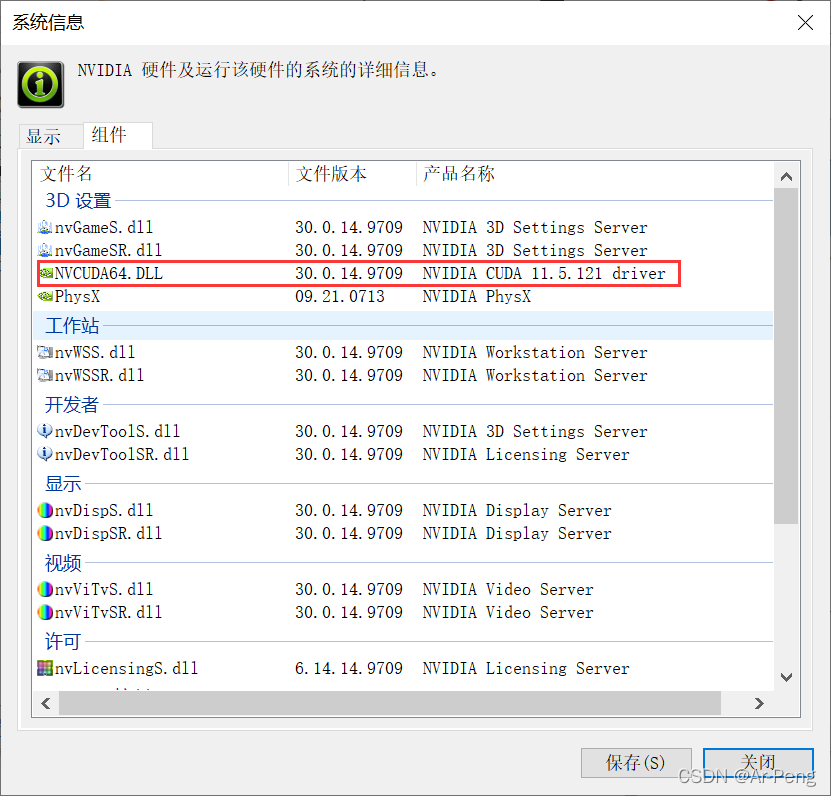
点击系统信息进入查看详细的服务器:
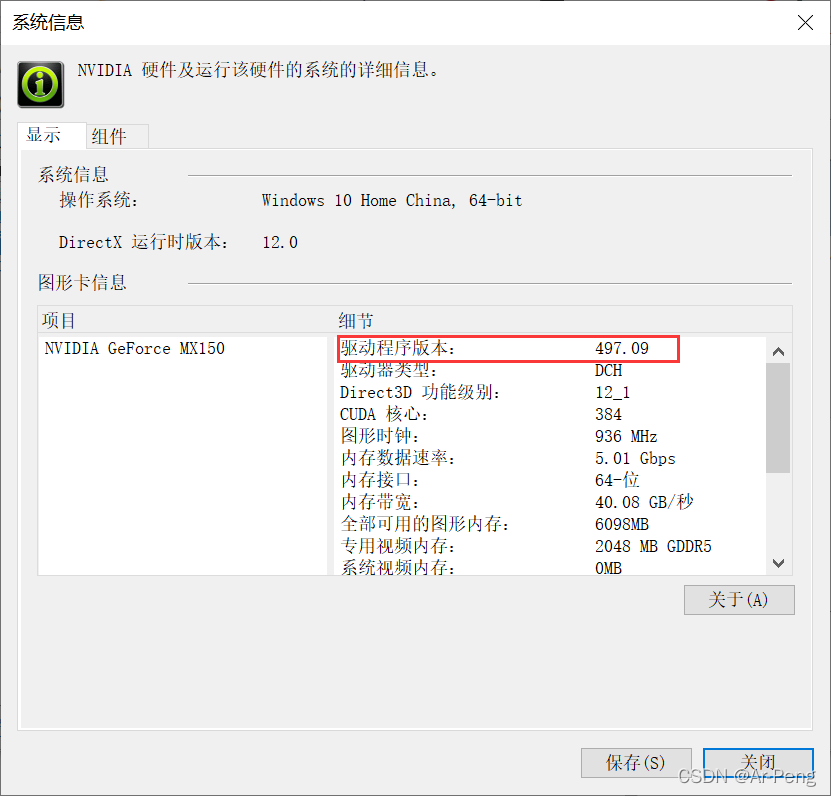
通过查看我们可以知道本机使用的是英伟达Geforce MX150,驱动程序的版本值为497。这个值说明我们可以按照497以下的cuda版本如图所示:(点击本链接查询最新版本号官网版本号查询 )
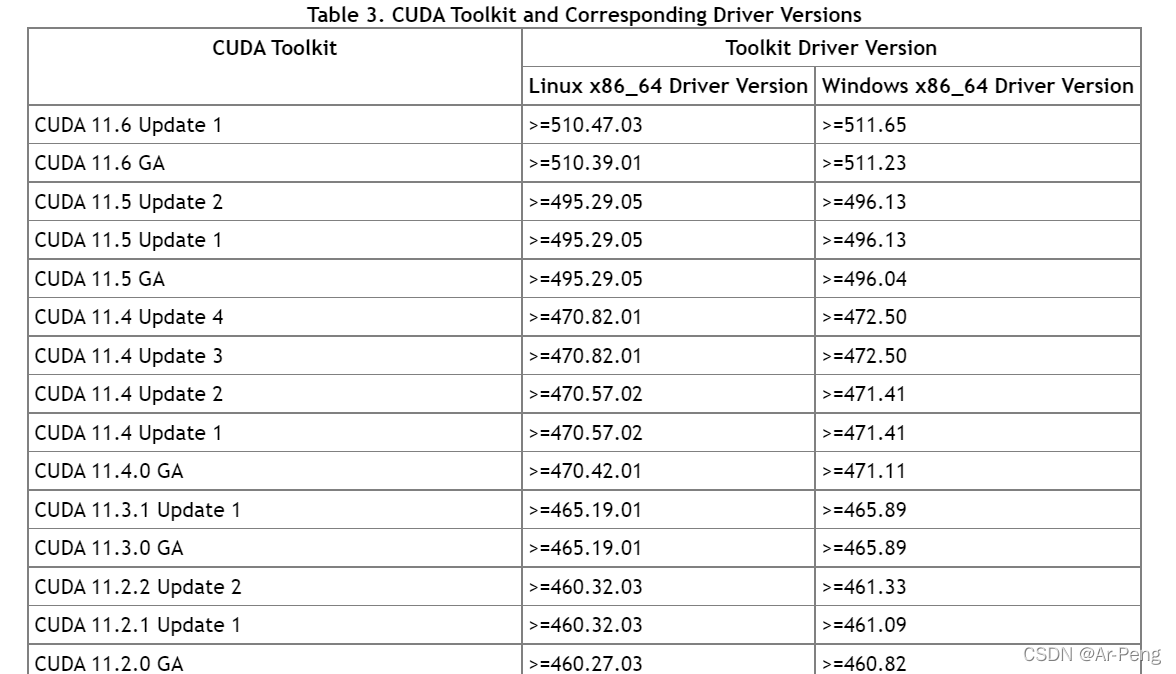
同时也可以点击组件查看支持的插件版本,本系统的因为更新过后,所以支持11.5的cuda驱动,那么说,11.5以下的cuda都可以支持使用。不建议使用那么高的版本驱动,对于本机来说负担太大,建议使用10.2版本的cuda。
如果打开控制面板发现是英伟达的支持驱动在300左右,说明没有更新驱动,这个时候是驱动不了大部分的cuda。我们可以进入官网下载对应的驱动程序:(驱动程序官网下载链接点击即可 )
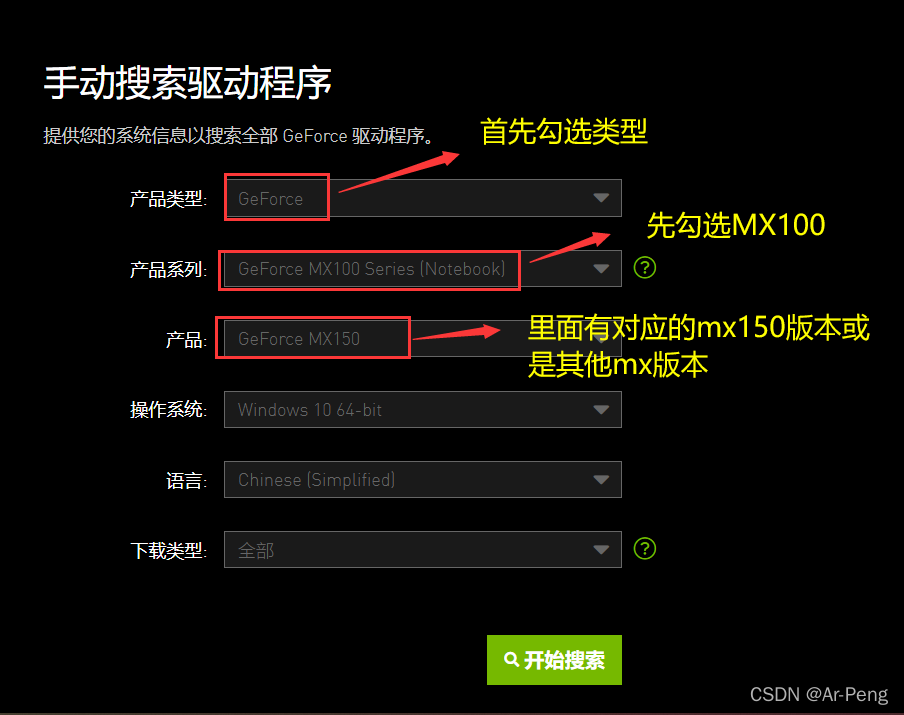
点击开始搜索后会有很多版本,因为英伟达更新速度非常快,可能当你进行点击下载发现就是上周才发布的版本,这个根据自己的需求下载对应版本。

安装好后重新启动一下电脑,查询本机的驱动版本号接下来进入下一步工作。
2. 安装cuda
对于cuda 的安装首先我们进入cuda下载地址:(因为上面已经讲过对应版本号,所以现在就需要下载所需的cuda 官网安装地址 )


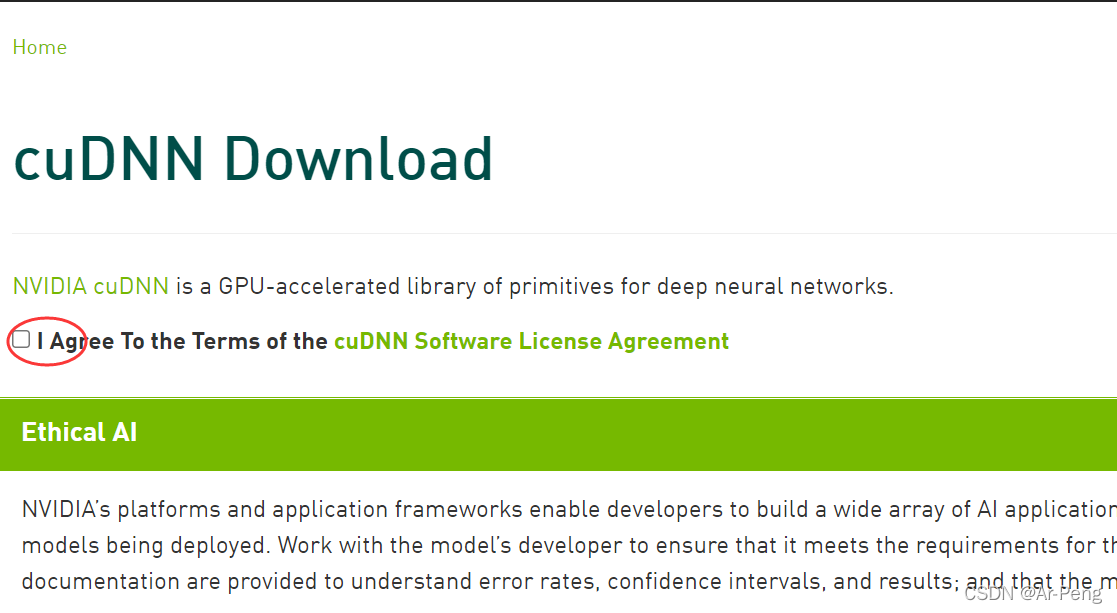
下载好后进入cudnn下载地址,下载cudnn需要注册一个账号,才可以到下载页面。https://developer.nvidia.com/rdp/cudnn-download

注册后的下载页面
根据自己的cuda选取对应的cudnn版本
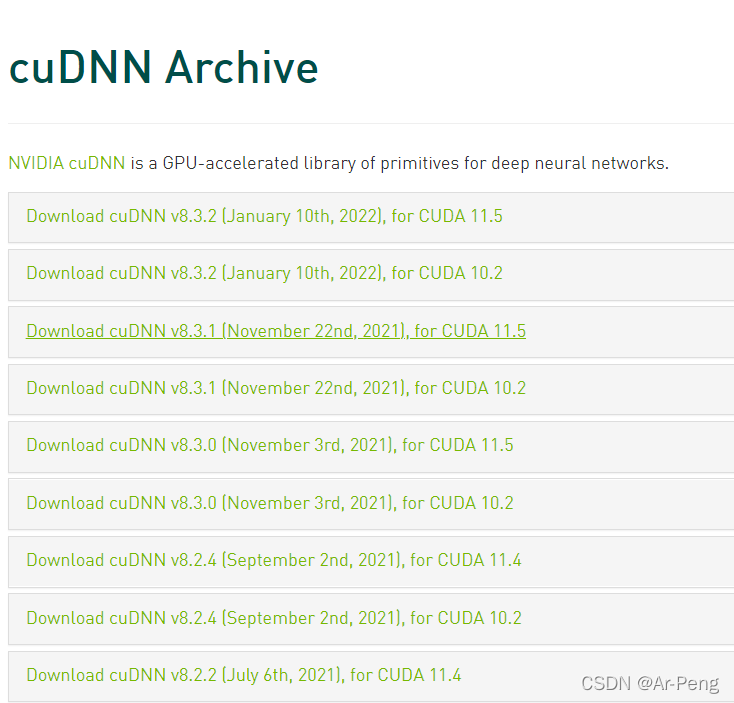
本博主选择的是cuda10.2,对应的cudnn7.6.5。
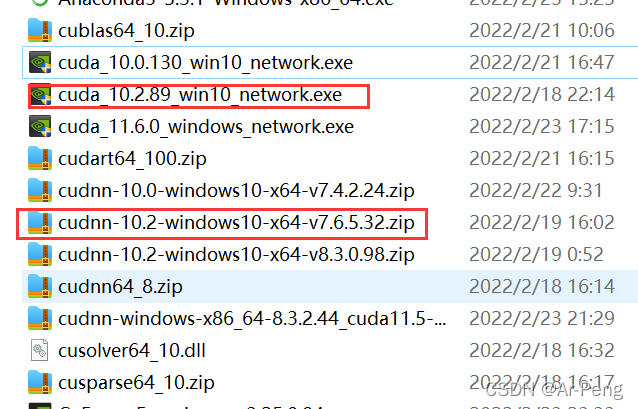
这两个更合适,将对应的cuda进行安装
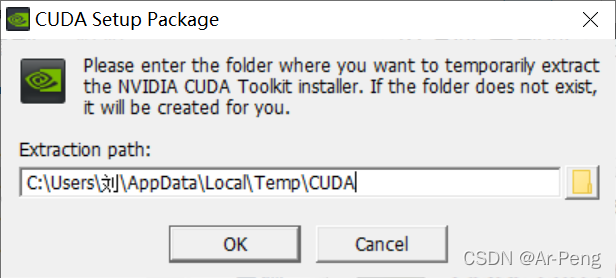
选择默认地址。
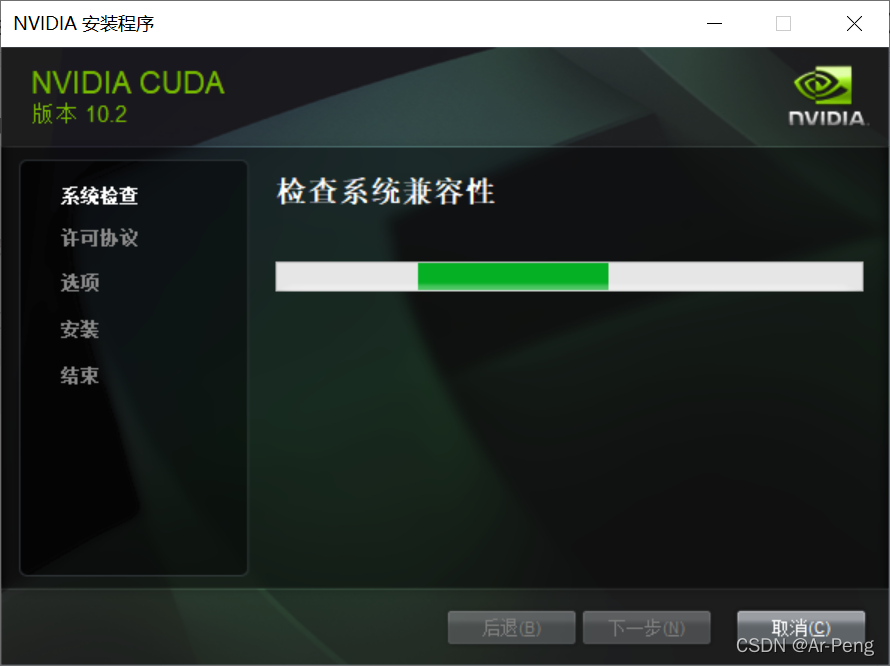
开始检查系统兼容问题

选择自定义安装,然后点开不要选Visual Studio Integration,即使选了也不能成功安装。
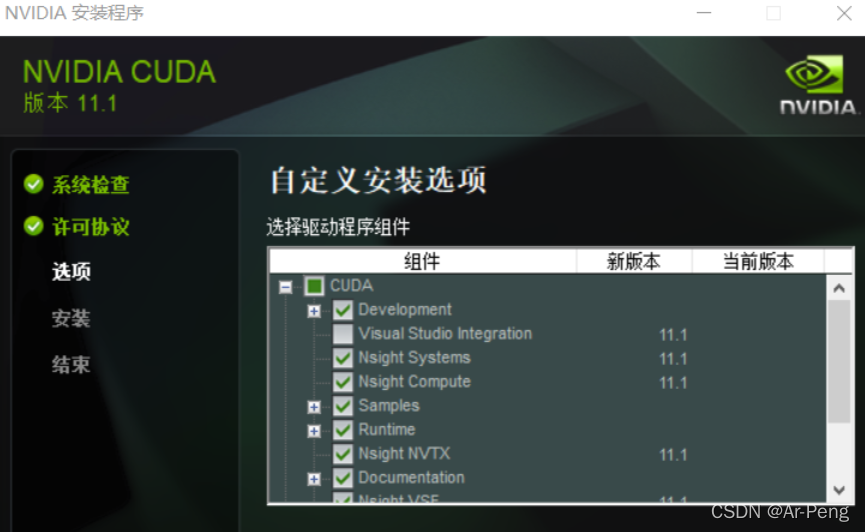
然后就坐等安装结束。之后将cudnn解压,将会得三个包如下:
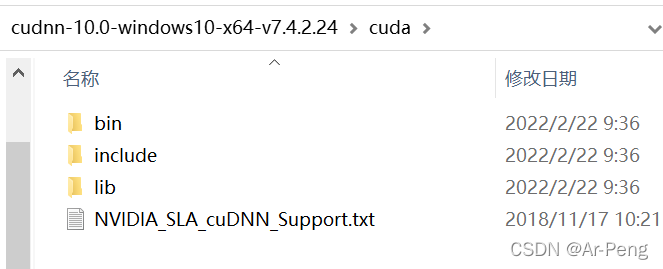
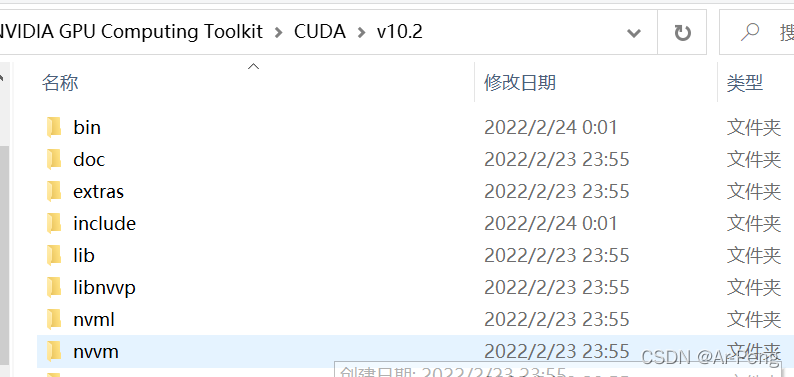
将对应的三个包分别放入cuda对应的文件下面:一般默认的cuda路径(C:\Program Files\NVIDIA GPU Computing Toolkit\CUDA\v10.2)
之后进行验证cuda的安装是否成功:
在cmd里面输入nvcc -V
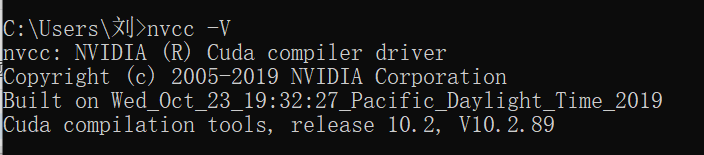
可以看见安装成功,接下来验证cudnn的安装情况:打开到demo-suite,在蓝色框里面输入cmd

然后输入.\bandwidthTest.exe发现pass说明可以。

在输入.\deviceQuery.exe发现返回pass说明ok。
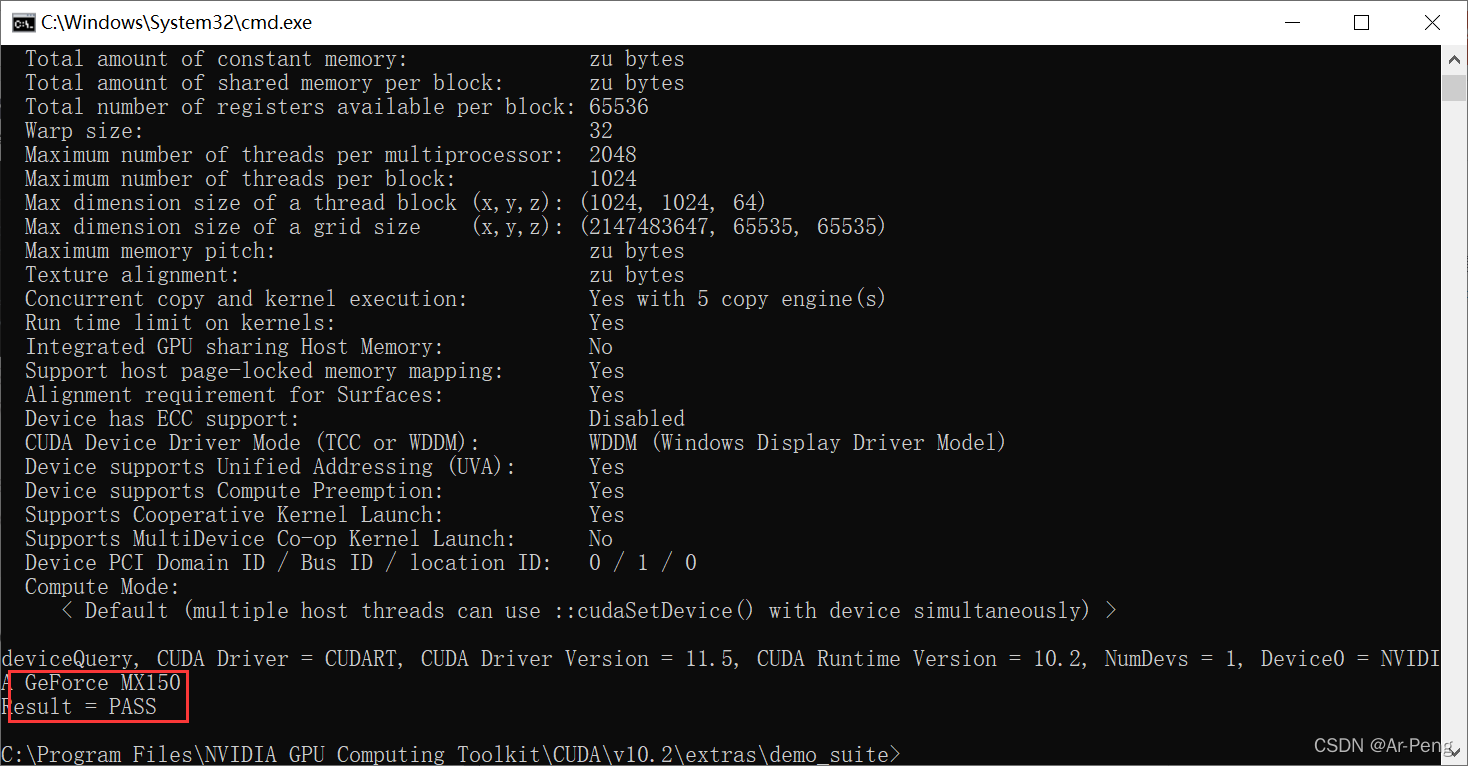
到现在cuda和cudnn已经成功安装。
3. 安装tensorflow和tensorflow-gpu
首先查看官网对应版本:https://tensorflow.google.cn/install/source_windows?hl=en#gpu
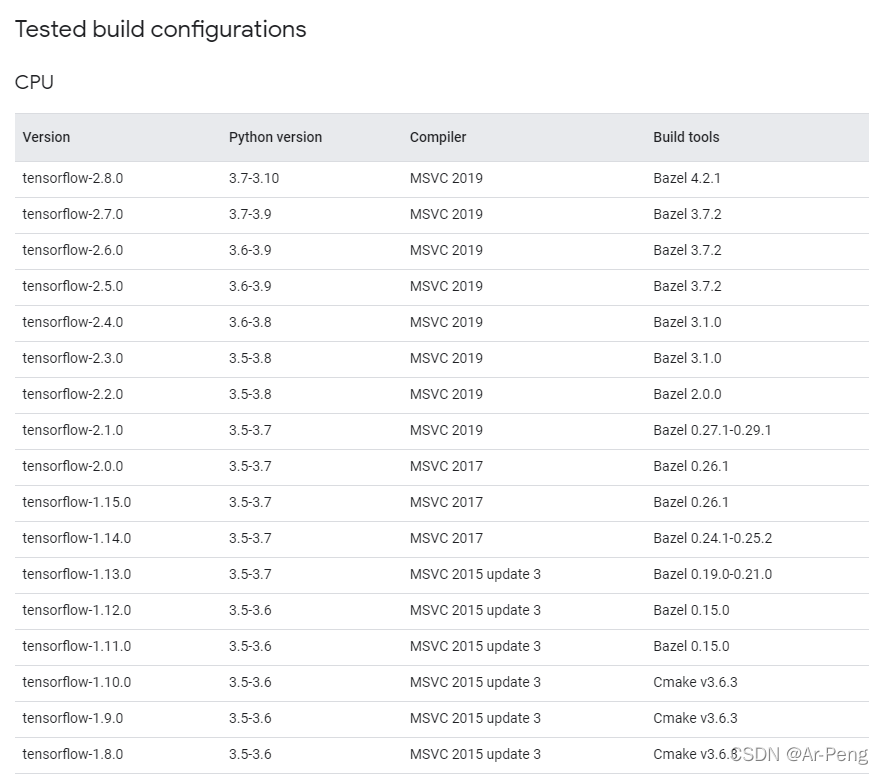
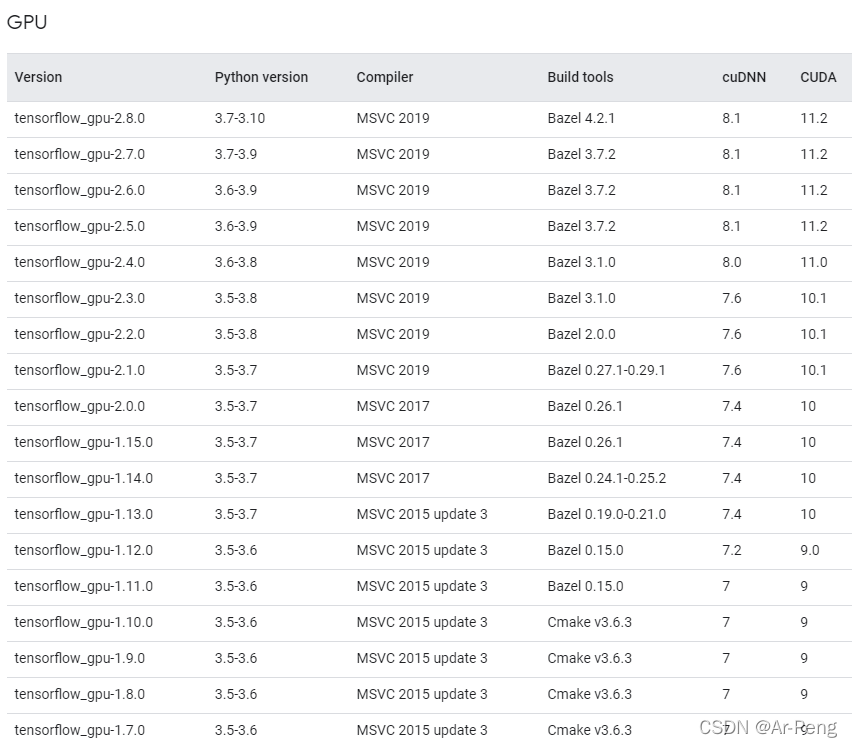
我们可以发现没有10.2对应的版本,通过摸索我发现使用3.0版本刚刚好合适cuda10.0。所以建议安装TensorFlow3.0版本,打开cmd面板输入:
pip install tensorflow-gpu3.0.0
pip install tensorflow3.0.0
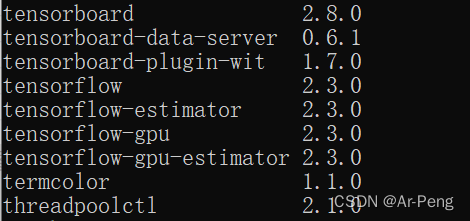
安装好后查看pip list**
使用代码进行测试:
import tensorflow as tf
a = tf.constant(1.)
b = tf.constant(2.)
print(a+b)
print('GPU:', tf.test.is_gpu_available())
x = tf.constant([[1., 2., 3.],
                 [4., 5., 6.]])
print(x)
print(x.shape)
print(x.dtype)
from tensorflow.python.client import device_lib
print(device_lib.list_local_devices())
结果如下:
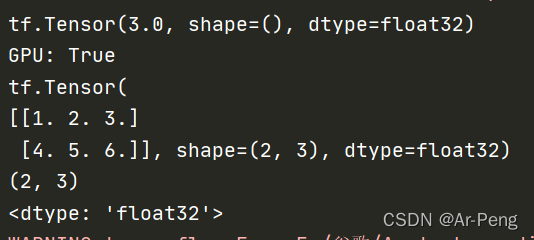
成功使用gpu进行一个运算。
在使用一个代码块查看详情:
import tensorflow
from tensorflow.python.client import device_lib
print(device_lib.list_local_devices())
打印出的加载信息
[name: "/device:CPU:0"
device_type: "CPU"
memory_limit: 268435456
locality {
}
incarnation: 2387664768994454296
, name: "/device:XLA_CPU:0"
device_type: "XLA_CPU"
memory_limit: 17179869184
locality {
}
incarnation: 16616890940845422423
physical_device_desc: "device: XLA_CPU device"
, name: "/device:GPU:0"
device_type: "GPU"
memory_limit: 1408043828
locality {
  bus_id: 1
  links {
  }
}
incarnation: 11148419749727069212
physical_device_desc: "device: 0, name: NVIDIA GeForce MX150, pci bus id: 0000:01:00.0, compute capability: 6.1"
, name: "/device:XLA_GPU:0"
device_type: "XLA_GPU"
memory_limit: 17179869184
locality {
}
incarnation: 2694327749361367721
physical_device_desc: "device: XLA_GPU device"
]
Process finished with exit code 0
结果显示成功的调用了gpu,说明配置成功。**
Original: https://blog.csdn.net/qq_48965301/article/details/123225658
Author: Ar-Peng
Title: win10安装cuda,cudnn,tensorflow,tensorflow-gpu
相关阅读2
Title: python opencv实现找到图像的轮廓,填充颜色
我想找到图片中的闭合圈,然后填充颜色
所需要的cv函数:
1。OpenCV提供的findContours()方法可以通过计算图像梯度来判断出图像的边缘,然后将边缘的点封装成数组返回。
contours,hierarchy = cv2.findContours(image,mode,methde)
image: 为检测的图像,必须是8位单通道二值图像。如果原图为彩色的,必须转为灰度图,并通过二值化阈值处理。
mode: 轮廓的检索模式,具体如下。
参数值含义cv2.RETR_EXTERNAL只检测外轮廓cv2.RETR_LIST 检测所有轮廓,但不建立层次关系cv2.RETR_CCOMP检测所有轮廓,并建立俩级层次关系cv2.RETR_TREE检测所有轮廓,并建立树状结构的层次关系
methode:检测轮廓时使用的方法,具体如下
参数值含义cv2.CHAIN_APPROX_NONE存储轮廓上的所有点cv2.CHAIN_APPROX_SIMPLE只保存水平,垂直或对角线轮廓的端点cv2.CHAIN_APPROX_TC89_L1Ten-Chinl 近似算法中的一种cv2.CHAIN_APPROX_TC89_KCOSTen-Chinl 近似算法中的一种
返回值:
contours:检测出的所有轮廓,list类型,每一个元素都是某个轮廓的像素坐标点
hierarchy:轮廓之间的层次关系
2 。 OpenCV提供了drawContours()方法专门来绘制这些轮廓。drawContours()方法如下:
image = cv2.drawContours(image, contours, contourIdx, color, thickness, lineTypee, hierarchy, offse)
参数说明:
image:被绘制轮廓的原始图像,可以是多通道图像
contours:findContours()方法得出的轮廓列表
contourIdx:绘制轮廓的索引,如果为-1则绘制所有轮廓
color:绘制的颜色,使用BGR格式
thickness:可选参数,画笔的粗细程度,如果为 -1 则绘制实心圆
lineTypee:可选参数,绘制轮廓的线型
hierarchy:可选参数,findContours()方法得出的层次关系
maxLevel:可选参数,绘制轮廓的层次深度,最深绘制第maxlevel 层
offse:可选参数,偏移量,可以改变绘制结果的位置
返回值:
image:同参数中的image,方法执行后原始图像中就包含绘制的轮廓了,可以 不适用此返回值保存结果。
原图

填充后的图像
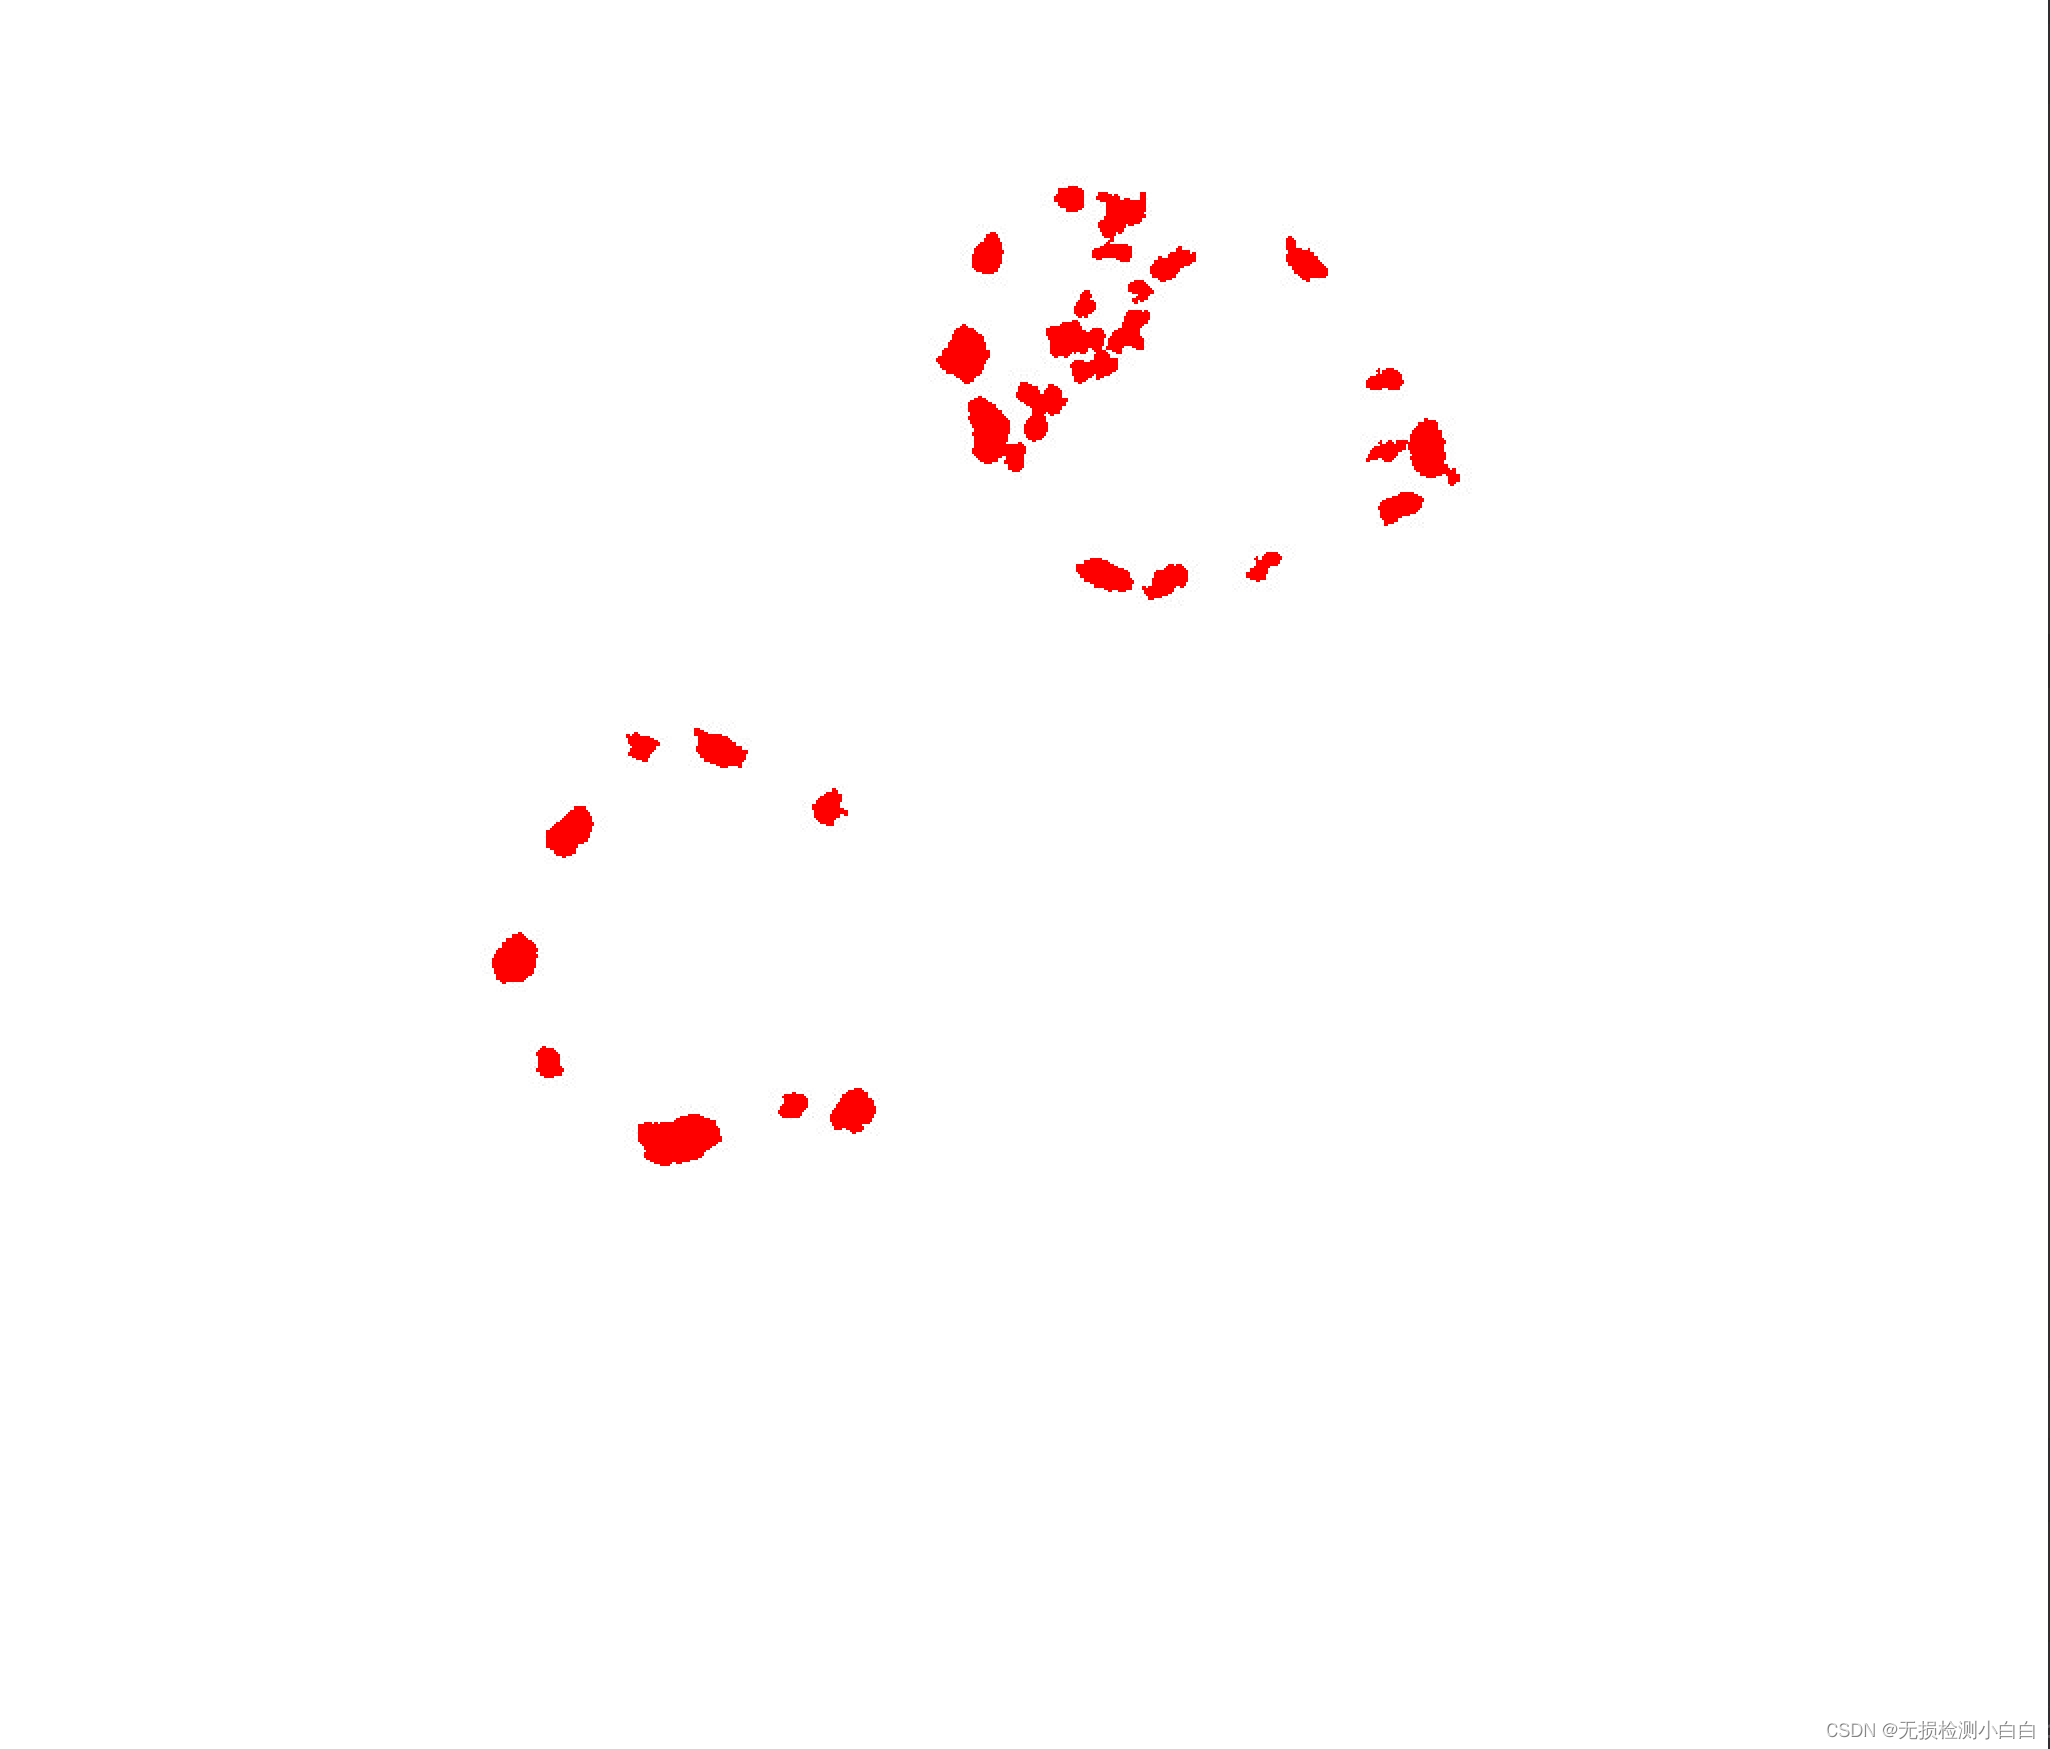
程序实现
import cv2
import numpy as np
img = cv2.imread('1/2.jpg')

# 反转 黑白变换  一般不需要这一步,我这张图片是在找轮廓的时候有图像的四个边也会
# 被当成轮廓,所以我先反转一下黑白交换

black = 255 - img

# 彩图转为灰度图
gray = cv2.cvtColor(black, cv2.COLOR_BGR2GRAY)
# 转为二值图像
t, binary = cv2.threshold(gray, 127, 255, cv2.THRESH_BINARY)

# 找到所有轮廓,记录轮廓的每一个点
contours, hierarchy = cv2.findContours(binary, cv2.RETR_LIST, cv2.CHAIN_APPROX_NONE)

area = []
for k in range(len(contours)):
    area.append(cv2.contourArea(contours[k]))
# 轮廓索引
max_idx = np.argsort(np.array(area))
mask = img.copy()
# 按轮廓索引填充颜色
for idx in max_idx:
    # 填充轮廓
    mask = cv2.drawContours(mask, contours, idx, (0, 0,255), cv2.FILLED)

cv2.imshow('mask', mask)
cv2.waitKey()
cv2.destroyAllWindows()
Original: https://blog.csdn.net/qq_42046837/article/details/125172680
Author: 无损检测小白白
Title: python opencv实现找到图像的轮廓,填充颜色
相关阅读3
Title: 利用transformers包加载预训练好的Bert模型
利用transformers包加载预训练好的Bert模型得到句子Embedding
- 1. transformers包加载预训练好的Bert模型
- 2. 得到句子Embedding
* - (1)encode()方法:仅返回input_ids
- (2)encode_plus()方法:返回所有的编码信息
- 3. Eg:以上代码整理,可跑
1. transformers包加载预训练好的Bert模型
import torch
from transformers import BertTokenizer

model_name = 'bert-base-uncased'

tokenizer = BertTokenizer.from_pretrained(model_name)
sentence = "A very clean and well decorated empty bathroom."
2. 得到句子Embedding
(1)encode()方法:仅返回input_ids
def encode(
        self,
        text: Union[TextInput, PreTokenizedInput, EncodedInput],
        text_pair: Optional[Union[TextInput, PreTokenizedInput, EncodedInput]] = None,
        add_special_tokens: bool = True,
        padding: Union[bool, str, PaddingStrategy] = False,
        truncation: Union[bool, str, TruncationStrategy] = False,
        max_length: Optional[int] = None,
        stride: int = 0,
        return_tensors: Optional[Union[str, TensorType]] = None,
        **kwargs
    )
(2)encode_plus()方法:返回所有的编码信息
 def encode_plus(
        self,
        text: Union[TextInput, PreTokenizedInput, EncodedInput],
        text_pair: Optional[Union[TextInput, PreTokenizedInput, EncodedInput]] = None,
        add_special_tokens: bool = True,
        padding: Union[bool, str, PaddingStrategy] = False,
        truncation: Union[bool, str, TruncationStrategy] = False,
        max_length: Optional[int] = None,
        stride: int = 0,
        is_split_into_words: bool = False,
        pad_to_multiple_of: Optional[int] = None,
        return_tensors: Optional[Union[str, TensorType]] = None,
        return_token_type_ids: Optional[bool] = None,
        return_attention_mask: Optional[bool] = None,
        return_overflowing_tokens: bool = False,
        return_special_tokens_mask: bool = False,
        return_offsets_mapping: bool = False,
        return_length: bool = False,
        verbose: bool = True,
        **kwargs
    )
一般返回参数如下:
- input_ids:表示单词在词典中的编码id
- token_type_ids:区分两个句子的编码id(上句全为0,下句全为1)
-
attention_mask:指定对哪些单词id进行self-Attention操作
-
举例如下:
- (1)encode()方法
print(tokenizer.encode(sentence))
- (2)encode_plus()方法
print(tokenizer.encode_plus(sentence))
- (3)encode_plus()里面参数自定义
print(tokenizer.encode_plus(sentence, max_length=15, padding='max_length', return_attention_mask=True, return_token_type_ids=True, truncation=True))
3. Eg:以上代码整理,可跑
import torch
from transformers import BertTokenizer

model_name = 'bert-base-uncased'

tokenizer = BertTokenizer.from_pretrained(model_name)
sentence = "A very clean and well decorated empty bathroom."

print(tokenizer.encode(sentence))

print(tokenizer.encode_plus(sentence))
print(tokenizer.encode_plus(sentence, max_length=15, padding='max_length', return_attention_mask=True, return_token_type_ids=True, truncation=True))
Original: https://blog.csdn.net/qq_37486501/article/details/122202828
Author: Laura_Wangzx
Title: 利用transformers包加载预训练好的Bert模型