使用 tf.train.saver()保存模型时会产生多个文件,会把计算图的结构和图上参数取值分成了不同的文件存储。这种方法是在TensorFlow中是最常用的保存方式。例如:下面的代码运行后,会在save目录下保存了四个文件:
import tensorflow as tf

v1 = tf.Variable(tf.random_normal([1, 2]), name="v1")
v2 = tf.Variable(tf.random_normal([2, 3]), name="v2")
init_op = tf.global_variables_initializer()
saver = tf.train.Saver()
with tf.Session() as sess:
    sess.run(init_op)
    saver_path = saver.save(sess, "save/model.ckpt")
tensorflow 训练模型过程中保存的4个文件。
checkpoint model.ckpt.data-00000-of-00001 model.ckpt.index model.ckpt.meta
其中,checkpoint 是检查点文件,文件保存了一个目录下所有的模型文件列表;
model.ckpt.meta 是压缩后的protobuf格式文件,用来保存图结构
ckpt.data 保存模型中每个变量(weights, biases, placeholders, gradients, hyper-parameters etc)的取值
ckpt.index 保存了模型计算图k-v字典,k为序列化的tensor名,v为其在data文件的地址
很多时候,我们需要将TensorFlow的模型导出为单个文件(同时包含模型结构的定义与权重),方便推理和部署(如在Android中部署网络)。利用tf.train.write_graph()默认情况下只导出了网络的定义(没有权重),而利用tf.train.Saver().save()导出的文件graph_def与权重是分离的,因此需要采用别的方法。
其实, 还有另一种称为 pb 的模型格式,pb 指的是 Protocol Buffers,它是跨语言,跨平台的序列化协议,用于不同应用或进程之间的通信。 PB 广泛用于模型部署,例如快速推断工具TensorRT。尽管 pb 格式模型似乎很重要,但 tensorflow 官网缺少如何保存、加载和推断pb格式模型的系列教程。
Frozen Graph
Frozen Graph 将 tensorflow 导出的模型的权重都 freeze 住,使得其都变为常量,并且模型参数和网络结构保存在同一个文件中。这里有两种方式来 freeze 计算图:
第一种方法需要手动完成序列化: TensoFlow为我们提供了convert_variables_to_constants()方法,该方法可以固化模型结构,将计算图中的变量取值以常量的形式保存,而且保存的模型可以移植到Android平台。将 ckpt 转换成 pb 格式的文件的过程可简述如下:
- 通过传入 ckpt 模型的路径得到模型的图和变量数据
- 通过 import_meta_graph 导入模型中的图
- 通过 saver.restore 从模型中恢复图中各个变量的数据
- 通过 graph_util.convert_variables_to_constants 将模型持久化
- 保存冻结的计算图和模型参数
def freeze_graph(input_checkpoint,output_graph):
    '''
    :param input_checkpoint:
    :param output_graph: PB模型保存路径
    :return:
    '''

    output_node_names = "InceptionV3/Logits/SpatialSqueeze"
    saver = tf.train.import_meta_graph(input_checkpoint + '.meta', clear_devices=True)
    graph = tf.get_default_graph()
    input_graph_def = graph.as_graph_def()

    with tf.Session() as sess:
        saver.restore(sess, input_checkpoint)
        output_graph_def = graph_util.convert_variables_to_constants(
            sess=sess,
            input_graph_def=input_graph_def,
            output_node_names=output_node_names.split(","))

        with tf.gfile.GFile(output_graph, "wb") as f:
            f.write(output_graph_def.SerializeToString())
        print("%d ops in the final graph." % len(output_graph_def.node))
1、函数freeze_graph中,最重要的就是要确定"指定输出的节点名称",这个节点名称必须是原模型中存在的节点,对于freeze操作,我们需要定义输出结点的名字。因为网络其实是比较复杂的,定义了输出结点的名字,那么freeze的时候就只把输出该结点所需要的子图都固化下来,其他无关的就舍弃掉。因为我们freeze模型的目的是接下来做预测。所以,output_node_names一般是网络模型最后一层输出的节点名称,或者说就是我们预测的目标。
2、在保存的时候,通过convert_variables_to_constants函数来指定需要固化的节点名称,对于鄙人的代码,需要固化的节点只有一个:output_node_names。注意节点名称与张量的名称的区别,例如:"input:0"是张量的名称,而"input"表示的是节点的名称。
3、源码中通过graph = tf.get_default_graph()获得默认的图,这个图就是由saver = tf.train.import_meta_graph(input_checkpoint + '.meta', clear_devices=True)恢复的图,因此必须先执行tf.train.import_meta_graph,再执行tf.get_default_graph() 。
调用方法很简单,输入ckpt模型路径,输出pb模型的路径即可:
input_checkpoint='models/model.ckpt-10000'

out_pb_path="models/pb/frozen_model.pb"

freeze_graph(input_checkpoint,out_pb_path)
freeze_graph(input_graph=FLAGS.prototxt_file,
                        input_saver='',
                        input_binary=False,
                        input_checkpoint=FLAGS.ckpt_file,
                        output_node_names=output_node_names,
                        restore_op_name='save/restore_all',
                        filename_tensor_name='save/Const:0',
                        output_graph=FLAGS.output_pb_file,
                        clear_devices=True,
                        initializer_nodes='',
                        variable_names_blacklist='')
- input_graph:(必选)模型文件,可以是二进制的pb文件或meta文件,用input_binary来指定区分(见下面说明)
- input_saver:(可选)Saver解析器。保存模型和权限时,Saver也可以自身序列化保存,以便在加载时应用合适的版本。主要用于版本不兼容时使用。可以为空,为空时用当前版本的Saver。
- input_binary:(可选)配合input_graph用,为true时,input_graph为二进制文件时,为false时,input_graph为可读文件。默认False
- input_checkpoint:(必选)模型参数数据文件。训练时,给Saver用于保存权重、偏置等变量值。这时用于模型恢复变量值。
- output_node_names:(必选)输出节点的名字,有多个时用逗号分开。用于指定输出节点,将没有在输出线上的其它节点剔除。
- restore_op_name:(可选)从模型恢复节点的名字。默认:save/restore_all
- filename_tensor_name:(可选)已弃用。默认:save/Const:0
- output_graph:(必选)用来保存整合后的模型输出文件。
- clear_devices:(可选),默认True。指定是否清除训练时节点指定的运算设备(如cpu、gpu、tpu。cpu是默认)
- initializer_nodes:(可选)默认空。权限加载后,可通过此参数来指定需要初始化的节点,用逗号分隔多个节点名字。
- variable_names_blacklist:(可先)默认空。变量黑名单,用于指定不用恢复值的变量,用逗号分隔多个变量名字。
with tf.Graph().as_default() as graph:
    dataset = dataset_factory.get_dataset(FLAGS.dataset_name, 'train',
                                        FLAGS.dataset_dir)
    network_fn = nets_factory.get_network_fn(
        FLAGS.model_name,
        num_classes=(dataset.num_classes - FLAGS.labels_offset),
        is_training=FLAGS.is_training)
    image_size = FLAGS.image_size or network_fn.default_image_size
    num_channels = 1 if FLAGS.use_grayscale else 3

    input_shape = [FLAGS.batch_size, image_size, image_size, num_channels]
    placeholder = tf.placeholder(name='input', dtype=tf.float32,
                                shape=input_shape)
    network_fn(placeholder)

    graph_def = graph.as_graph_def()
    if FLAGS.write_text_graphdef:
        tf.io.write_graph(
            graph_def,
            os.path.dirname(FLAGS.output_prototxt_file),
            os.path.basename(FLAGS.output_prototxt_file),
            as_text=True)
    else:
        with gfile.GFile(FLAGS.output_prototxt_file, 'wb') as f:
            f.write(graph_def.SerializeToString())

freeze_graph.freeze_graph(input_graph=FLAGS.output_prototxt_file,
                        input_saver='',
                        input_binary=False,
                        input_checkpoint=FLAGS.ckpt_file,
                        output_node_names=output_node_names[FLAGS.model_name],
                        restore_op_name='save/restore_all',
                        filename_tensor_name='save/Const:0',
                        output_graph=FLAGS.output_pb_file,
                        clear_devices=True,
                        initializer_nodes='',
                        variable_names_blacklist='')
How to use the frozen model
将计算图模型成功 freeze 之后, 下一步就是如何加载和使用保存的 pb 文件(模型是以ProtoBuf的形式保存)。
- Import a graph_def ProtoBuf first
- Load this graph_def into an actual Graph
import tensorflow as tf

def load_graph(frozen_graph_filename):

    with tf.gfile.GFile(frozen_graph_filename, "rb") as f:
        graph_def = tf.GraphDef()
        graph_def.ParseFromString(f.read())

    with tf.Graph().as_default() as graph:

        tf.import_graph_def(graph_def, name="prefix")
    return graph
Replace Input Node
当我们使用 pb 文件进行推理时, 如果 graph 中的 输入节点和实际的节点名称不一致,也可以对输入节点进行修改。
original_model_path="original_model.pb"
original_input_name="input_node"
new_input_name="input"
new_input_shape=[1,224,224,3],
output_graph_path="new_model.pb"

with tf.gfile.GFile(original_model_path, "rb") as f:
    graph_def = tf.GraphDef()
    graph_def.ParseFromString(f.read())

print(['name: '+ n.name + ', op: ' + n.op for n in graph_def.node])

new_input_node = tf.placeholder(tf.float32,
                                shape=new_input_shape,
                                name=new_input_name)

graph = tf.import_graph_def(graph_def,
                            input_map={original_input_name: new_input_node},
                            name=''

with tf.Session(graph=imported_graph) as sess:
    input_graph_def = tf.get_default_graph().as_graph_def()
    output_graph_def = graph_util.convert_variables_to_constants(sess, input_graph_def, output_node_names=['labels_softmax'])
    tf.train.write_graph(output_graph_def, './', output_graph_path, False)
Optimize the Graph
在进行推理时, 原来保存的计算图里面有很多计算节点应该是不需要的,因此可以通过剪枝对模型进行优化,可以减少额外的计算优化性能。
-
Removing training-only operations like checkpoint saving.
-
Stripping out parts of the graph that are never reached.
-
Removing debug operations like CheckNumerics.
-
Folding batch normalization ops into the pre-calculated weights.
-
Fusing common operations into unified versions.
This script takes either a frozen binary GraphDef file (where the weight variables have been converted into constants by the freeze_graph script), or a text GraphDef proto file (the weight variables are stored in a separate checkpoint file), and outputs a new GraphDef with the optimizations applied. If the input graph is a text graph file, make sure to include the node that restores the variable weights in output_names. That node is usually named "restore_all".
from tensorflow.tools.graph_transforms import TransformGraph

def optimize_graph(original_graph_def,
                   input_node_names=['placeholder'],
                   output_node_names=['outputs'],
                   remove_node_names=['Identity']):
    remove_op_names = ','.join(['op=%s' % node for node in remove_node_names])
    return TransformGraph(original_graph_def,
                          inputs=input_node_names,
                          outputs=output_node_names,
                          transforms = ['remove_nodes(%s)' % remove_op_names,
                                        'merge_duplicate_nodes',
                                        'strip_unused_nodes',
                                        'fold_constants(ignore_errors=true)',
                                        'fold_batch_norms',
                                        'quantize_weights'])

def export_from_frozen_graph(frozen_graph_filename,
                             input_node_names=['placeholder'],
                             output_node_names=['output'],
                             output_filename='frozen_graph.pb',
                             optimize=True):
    tf.reset_default_graph()
    graph_def = tf.GraphDef()

    with tf.gfile.GFile(frozen_graph_filename, "rb") as f:
        graph_def.ParseFromString(f.read())
        print("%d ops in original graph." % len(graph_def.node))

        if optimize:
            graph_def = optimize_graph(graph_def,
                                     input_node_names,
                                     output_node_names)
            print("%d ops in optimized graph." % len(graph_def.node))

        if output_filename:
            with tf.gfile.GFile(output_filename, "wb") as f:
                f.write(graph_def.SerializeToString())

    return graph_def
Original: https://blog.csdn.net/weixin_43953700/article/details/123698953
Author: 子韵如初
Title: Tensorflow各种推理格式转换以及代码
相关阅读1
Title: 第三篇 树莓派的串口通信和语音识别模块
目录
①代码阅读工具:Souces Insight4.0安装、激活、汉化等
一、串口(UART)
全双工: 通信允许数据在两个方向上同时地双向传输。
半双工:数据传输指数据可以在两个方向上传输,但不同时。
(串口通信属于全双工通信)
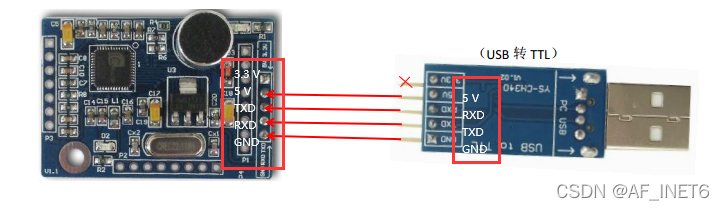
- *树莓派的串口
①主串口(/dev/serial0):可以通过引脚实现通信
②辅助串口(/dev/serial1):不能使用GPIO通信(默认分配给蓝牙)
(默认mini是禁用状态,无论指定为主uart还是辅助uart)
树莓派3/4B的外设包括两个串口 :
①串口设备(/dev/ttyAMA0):由硬件实现,有单独的波特率时钟源,性能高且可靠。
②mini串口设备(/dev/ttyS0):性能较低,功能简单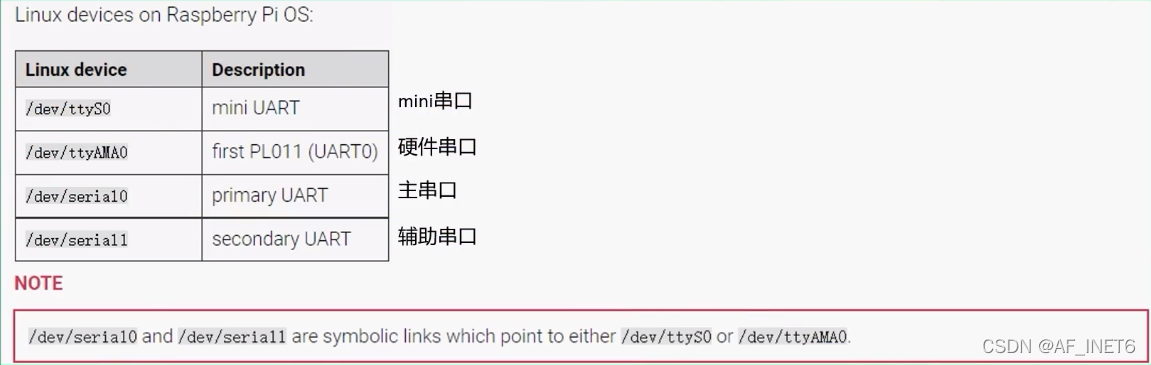
(官网提供图片)
二、 wiringPi提供的串口API
函数原型参数或功能解释返回值int
serialOpen
(char *device ,int baud)
device:串口设备文件
(/dev/ttyAMA0)
baud:波特率
成功:返回所打开的文件描述符fd;
失败:返回-1
void
serialClose
(int fd)fd:文件描述符无返回值void
serialPutchar
(int fd, unsigned char c)发送一个字符到串口无返回值void
serialPuts
(int fd, char *s)
发送字符串到串口
(字符串s要以' \0 '结束)
无返回值
int
serialDataAvail
(int fd)获取串口中可读数据的字节数
成功:串口中可以读取的字节数;
失败:返回-1
int
serialGetchar
(int fd)
读取串口的数据
(读取之前判断是否有数据)
返回值:实际读取到的字节数
另外,Linux下的标准I/O函数也可使用(需包含头文件 inlcude
size_t write (int fd,const void * buf,size_t count)
size_t read(int fd,void * buf ,size_t count)
三、语音识别模块
1、阅读模块代码
①代码阅读工具:Souces Insight4.0安装、激活、汉化
提取码:48a3(含安装、激活、汉化教程)
② 语音识别(口令模式)源码框架(按main.c 的顺序阅读)
a. 基本的初始化
Led_test( ) ; //单片机指示灯闪烁3次
MCU_init( ); //初始化单片机I/O口特殊功能寄存器p0~p4,置为高电平;
//设置LD_MOOE为低电平,并行模式读写;
//打开中断控制寄存器。
LD_Reset( );//复位LD模块
UartIni(); //串口初始化
接着赋值表示ASR状态的变量nAsrStatus=LD_ASR_NONE;
此时没有在做ASR识别。

b. 实现主要功能的代码
switch(nAsrStatue)执行各分支语句:
①case LD_ASR_RUNING:
case LD_ASR_ERROR:
break;
(正在识别和识别错误时,不作处理)
②case LD_ASR_NONE:(表示ASR空闲中)
执行:将ASR状态赋值为running;再启动识别,调用runASR( )
runASR( )的主要功能:初始化ASR,添加关键词,启动ASR运算,内部大致包括:LD_AsrStart( )、LD_AsrAddFixed( )、LD_AsrRun( )、LD_GetResult( )。(初始化、添加关键词、启动运行、获取识别结果。LDChip.c中),ASR启动成功后,asrflag=1,等待LD3320的中断信号
③case LD_ASR_FOUNDOK:(表示识别完成)
执行:调用LD_GetResult( )获取识别结果,对获取的结果根据用户需要实现对应功能User_handle( ),处理完后再将ASR的状态置为LD_ASR_NONE(空闲状态)
④case LD_ASR_FOUNDZERO:(表示没有识别出结果)
执行:将ASR的状态置为LD_ASR_NONE
2、修改代码
阅读完模块代码,了解其基本架构后,即可根据需求进行修改。
示例:语音识别开、关灯
(由于我的树莓派凉了,此处略)
Original: https://blog.csdn.net/weixin_54429787/article/details/122456069
Author: AF_INET6
Title: 第三篇 树莓派的串口通信和语音识别模块
相关阅读2
Title: 为了搞大创我都干了啥之跑一下Mask RCNN demo
目录
3. pip3 install -r requirements.txt (每次都要吗?)好像不用
4. 运行安装程序 python3 setup.py install
5. 在tensorflow环境下运行jupyter notebook
5. 把Mask_RCNN-master\samples\demo.ipynb整上去跑一跑
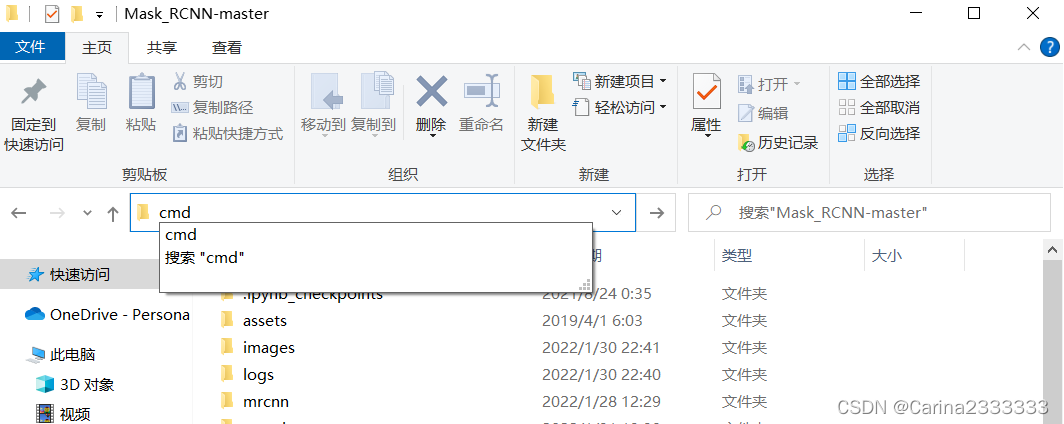
命令
1. 在项目中启动命令行cmd
2. activate tensorflow
3. pip3 install -r requirements.txt (每次都要吗?)好像不用
4. 运行安装程序 python3 setup.py install
5. 在tensorflow环境下运行jupyter notebook
忘了这写的是啥:
import tensorflow as tf 出现如下一堆乱七八糟的东西;把错的按照它的提示改掉就可。
正片:
1. cmd输入命令
activate tensorflow
python3 setup.py install
jupyter notebook
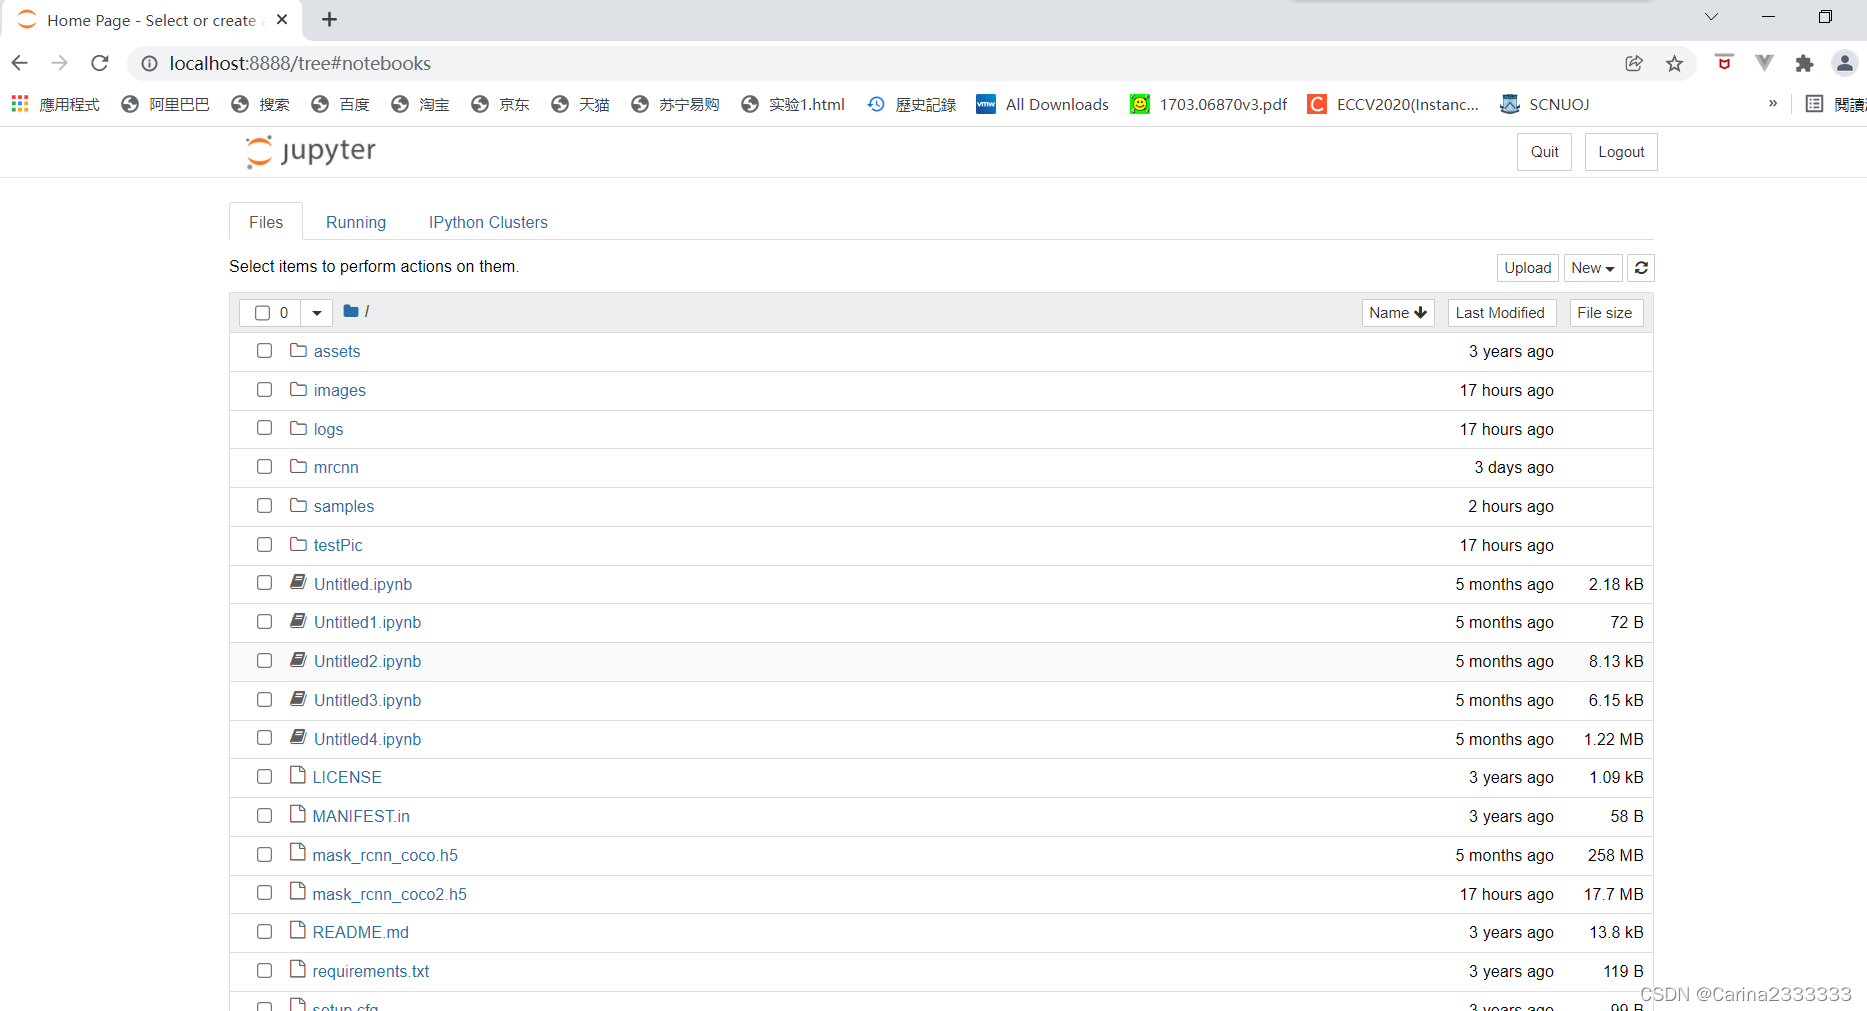
2. 输入以上命令后: 
3. 弹出了jupyter:
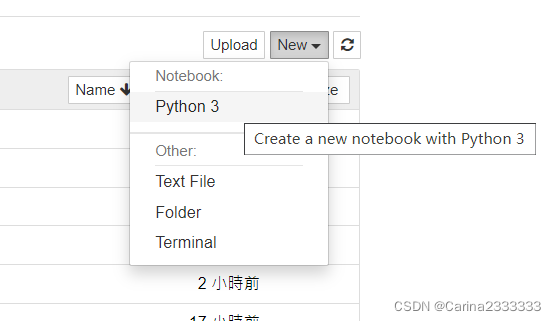
4. new 一个 python3:
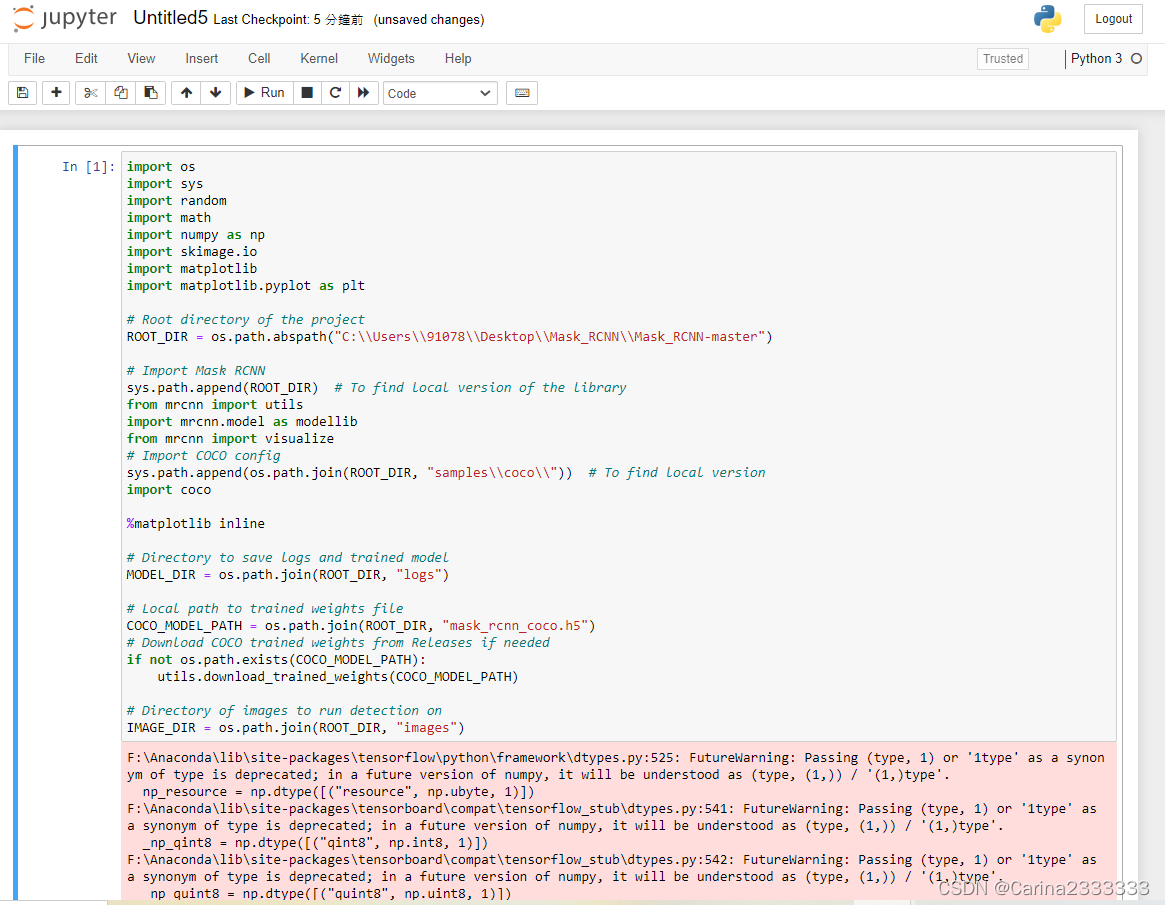
5. 把Mask_RCNN-master\samples\demo.ipynb整上去跑一跑
import os
import sys
import random
import math
import numpy as np
import skimage.io
import matplotlib
import matplotlib.pyplot as plt

# Root directory of the project
ROOT_DIR = os.path.abspath("C:\\Users\\91078\\Desktop\\Mask_RCNN\\Mask_RCNN-master")

# Import Mask RCNN
sys.path.append(ROOT_DIR)  # To find local version of the library
from mrcnn import utils
import mrcnn.model as modellib
from mrcnn import visualize
# Import COCO config
sys.path.append(os.path.join(ROOT_DIR, "samples\\coco\\"))  # To find local version
import coco

%matplotlib inline

# Directory to save logs and trained model
MODEL_DIR = os.path.join(ROOT_DIR, "logs")

# Local path to trained weights file
COCO_MODEL_PATH = os.path.join(ROOT_DIR, "mask_rcnn_coco.h5")
# Download COCO trained weights from Releases if needed
if not os.path.exists(COCO_MODEL_PATH):
    utils.download_trained_weights(COCO_MODEL_PATH)

# Directory of images to run detection on
IMAGE_DIR = os.path.join(ROOT_DIR, "images")
class InferenceConfig(coco.CocoConfig):
    # Set batch size to 1 since we'll be running inference on
    # one image at a time. Batch size = GPU_COUNT * IMAGES_PER_GPU
    GPU_COUNT = 1
    IMAGES_PER_GPU = 1

config = InferenceConfig()
config.display()

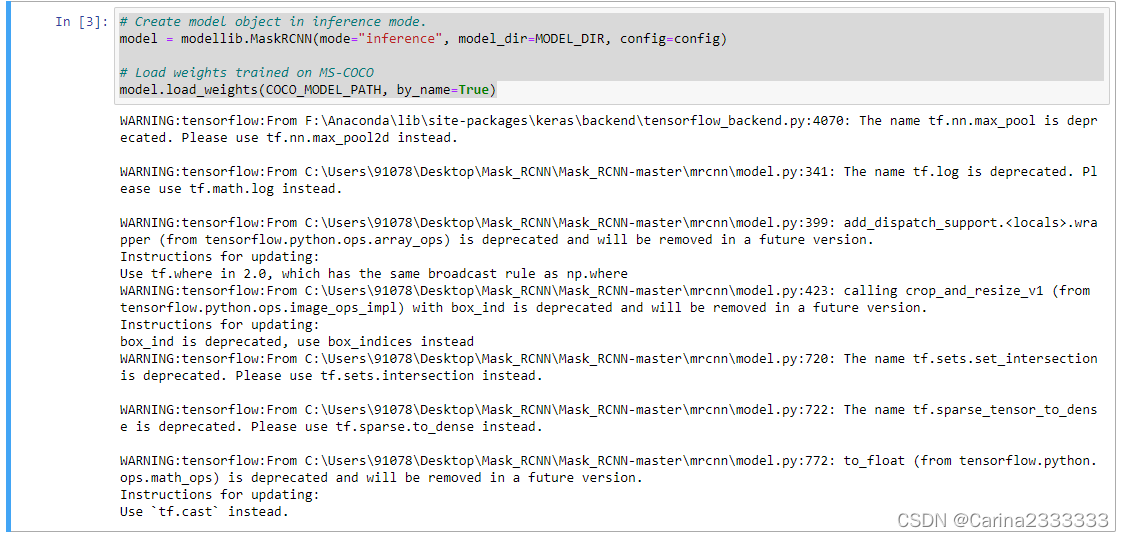
# Create model object in inference mode.

model = modellib.MaskRCNN(mode="inference", model_dir=MODEL_DIR, config=config)

# Load weights trained on MS-COCO
model.load_weights(COCO_MODEL_PATH, by_name=True)
# COCO Class names
# Index of the class in the list is its ID. For example, to get ID of
# the teddy bear class, use: class_names.index('teddy bear')
class_names = ['BG', 'person', 'bicycle', 'car', 'motorcycle', 'airplane',
               'bus', 'train', 'truck', 'boat', 'traffic light',
               'fire hydrant', 'stop sign', 'parking meter', 'bench', 'bird',
               'cat', 'dog', 'horse', 'sheep', 'cow', 'elephant', 'bear',
               'zebra', 'giraffe', 'backpack', 'umbrella', 'handbag', 'tie',
               'suitcase', 'frisbee', 'skis', 'snowboard', 'sports ball',
               'kite', 'baseball bat', 'baseball glove', 'skateboard',
               'surfboard', 'tennis racket', 'bottle', 'wine glass', 'cup',
               'fork', 'knife', 'spoon', 'bowl', 'banana', 'apple',
               'sandwich', 'orange', 'broccoli', 'carrot', 'hot dog', 'pizza',
               'donut', 'cake', 'chair', 'couch', 'potted plant', 'bed',
               'dining table', 'toilet', 'tv', 'laptop', 'mouse', 'remote',
               'keyboard', 'cell phone', 'microwave', 'oven', 'toaster',
               'sink', 'refrigerator', 'book', 'clock', 'vase', 'scissors',
               'teddy bear', 'hair drier', 'toothbrush']
# Load a random image from the images folder
file_names = next(os.walk(IMAGE_DIR))[2]
image = skimage.io.imread(os.path.join(IMAGE_DIR, random.choice(file_names)))
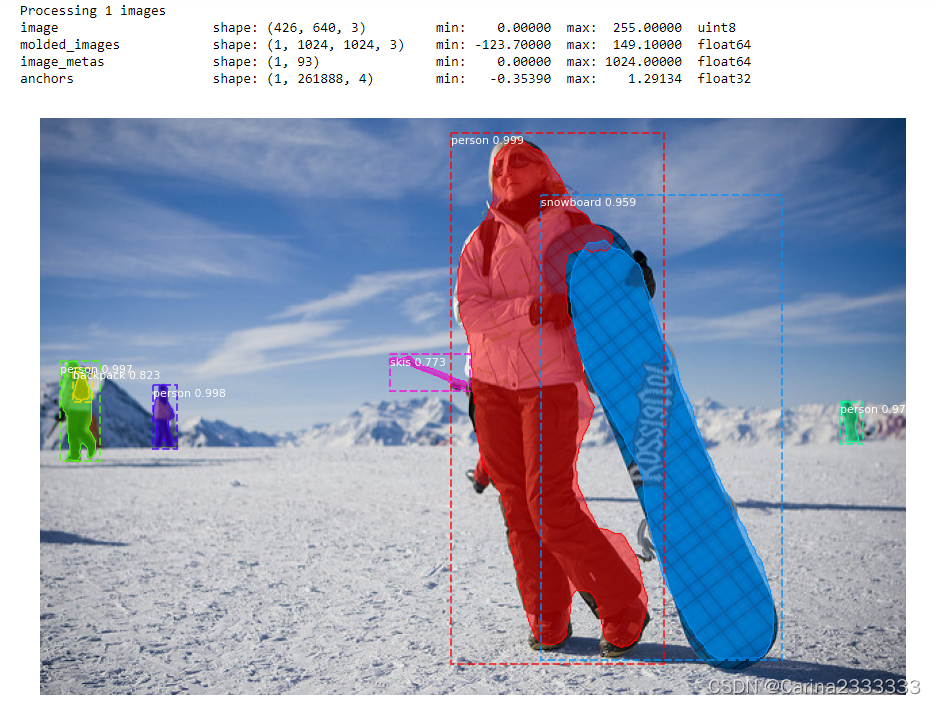
# Run detection
results = model.detect([image], verbose=1)
# Visualize results
r = results[0]
visualize.display_instances(image, r['rois'], r['masks'], r['class_ids'],
class_names, r['scores'])
总结:
activate tensorflow
python3 setup.py install
jupyter notebook
Original: https://blog.csdn.net/weixin_46106424/article/details/122760158
Author: Carina2333333
Title: 为了搞大创我都干了啥之跑一下Mask RCNN demo
相关阅读3
Title: Tensoflow c++ so编译 基于bazel
每日一歌,分享好心情:叶卡捷琳娜战歌
一、起点
- 为什么编译tensorfflow?
nvidia 2020年发布的Ampere架构gpu支持TF32,为了比对TF32、FP32推理速度,而公司现在用的Tensorflow版本太老,不支持TF32, so,升级TF。
2. 编译环境怎么选?
由于我需要编译支持GPU的tensorflow,所以需要在cuda环境编译。一般是选择nvidia官方devel镜像(关于这方面有很多有趣的话题,在以后的文章中聊吧),结合我的GPU硬件情况,选择nvidia/cuda:11.4.2-cudnn8-devel-ubuntu18.04, 编译过程都在此docker中进行(话说,在企业中离了docker真过不了~~)
二、环境准备
- 下载tf源码
没什么可说的,clone吧 ,附上github源码地址: https://github.com/tensorflow/tensorflow
我使用最新的2.8.0版本(2022-04-29)。 - 安装编译工具bazel
这里有个小坑,不同版本的tf对bazel版本要求不同。
下载完源码后,在源码顶层目录configure.py文件中有对bazel的要求,
_TF_MIN_BAZEL_VERSION = '4.2.1'
_TF_MAX_BAZEL_VERSION = '4.99.0'
本次编译选择 4.2.1版本,bazel安装过程嘛,可以按照tf官方给的教程https://www.tensorflow.org/install/source#install_bazel,其实,直接下载bazel可执行程序更简单,下载地址(https://github.com/bazelbuild/bazel/releases/download/4.2.1/bazel-4.2.1-linux-x86_64),下载完成后加入PATH路径,再ln一下,ok~~

; 三、编译配置
- 配置build
在源码顶层目录下,运行
./configure
配置过程中最重要的步骤是开启GPU支持以及设置计算能力
ps:计算能力这个被nvidia造出来的概念也会在后续文章中聊聊,比如怎么识别gpu的计算能力、计算能力一般用在哪里、怎样在计算能力是7.5的环境中编译出支持8.0的库...。
- 选择python版本:

- 开启gpu支持:

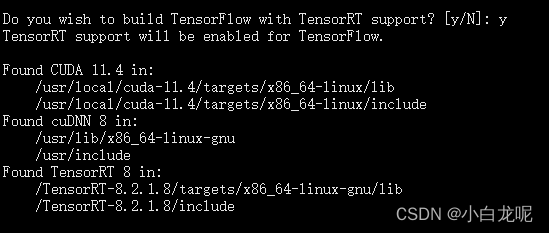
- 开启TF-TRT支持:
如果需要的话就开启,一般是需要滴...毕竟TRT是老黄的嫡系呀,加速真是杠杠的...
这里需要提前下载好TensorRT 官方build包(晕,坑有点多,还需要去nvidia官网注册个会员),附上地址https://developer.nvidia.com/nvidia-tensorrt-8x-download
下载好,我直接解压到根目录了,毕竟咱是在自己的docker中嘛,随便折腾...
后面编译需要用到TRT,那就得让TF知道TRT在哪儿呀,so,设置环境变量
export TENSORRT_INSTALL_PATH=/TensorRT-8.2.1.8/
ps: 感兴趣的话,你可以在源码里可以看一下这个环境是什么时候起作用的,,我就不说了,说多了都是泪呀
- 设置计算能力:
这一步需要根据自己编译出来的库的gpu运行环境设置,我这里因为需要运行在安培架构的GPU上,需要额外设置,不能用默认的,其实也可以,只不过inference速度会慢一丢丢,具体设置步骤参考: 《计算能力那些事儿》。

其他选项使用默认即可。
其实,./configure程序会根据我们的输入产生一个叫.tf_configure.bazelrc的配置文件(如果你是大牛或者疯子,直接编辑这个文件也可以).
以下是此次生成的文件内容:
build --action_env PYTHON_BIN_PATH="/usr/bin/python3"
build --action_env PYTHON_LIB_PATH="/usr/lib/python3/dist-packages"
build --python_path="/usr/bin/python3"
build --config=tensorrt
build --action_env CUDA_TOOLKIT_PATH="/usr/local/cuda-11.4"
build --action_env TENSORRT_INSTALL_PATH="/TensorRT-8.2.1.8/"
build --action_env TF_CUDA_COMPUTE_CAPABILITIES="6.1,7.0,7.5,8.0,8.6"
build --action_env LD_LIBRARY_PATH="/workspace/third_party/source/w16/third_party/prebuilt/tensorrt8_install/linux-x64-cuda114/lib:/workspace/third_party/source/w16/third_party/prebuilt/openvino_install/linux-x64-cuda114/lib/intel64:/workspace/third_party/source/w16/third_party/prebuilt/caffe_install/linux-x64-cuda114/lib:/workspace/third_party/source/w16/third_party/prebuilt/pytorch_install/linux-x64-cuda114/lib:/workspace/third_party/source/w16/third_party/prebuilt/onnx_install/linux-x64-cuda114/lib:/workspace/third_party/source/w16/third_party/prebuilt/ncnn_install/linux-x64-cuda114/lib"
build --action_env GCC_HOST_COMPILER_PATH="/usr/bin/x86_64-linux-gnu-gcc-7"
build --config=cuda
build:opt --copt=-Wno-sign-compare
build:opt --host_copt=-Wno-sign-compare
test --flaky_test_attempts=3
test --test_size_filters=small,medium
test --test_env=LD_LIBRARY_PATH
test:v1 --test_tag_filters=-benchmark-test,-no_oss,-no_gpu,-oss_serial
test:v1 --build_tag_filters=-benchmark-test,-no_oss,-no_gpu
test:v2 --test_tag_filters=-benchmark-test,-no_oss,-no_gpu,-oss_serial,-v1only
test:v2 --build_tag_filters=-benchmark-test,-no_oss,-no_gpu,-v1only
四、开始真正的编译
提前说好,这是一个漫长的过程
在tensorflow源码顶层目录,运行
bazel build --config=opt --config=cuda --verbose_failures //tensorflow:libtensorflow_cc.so //tensorflow:install_headers
如果你不了解bazel编译的话,这个命令乍看起来可能有点晕,这里只简单介绍以下,后续文章再详谈bazel编译系统。
- –config=cuda: 指定编译配置,至于cuda都包含哪些配置,可以查看.bazelrc
- –verbose_failures: 你懂的
- //tensorflow:libtensorflow_cc.so:指定编译/tensorflow目录下的libtensorflow_cc.so目标(因为我需要tf的c++接口嘛)
- //tensorflow:install_headers: 指定编译/tensorflow目录下的install_headers目标
让bazel飞一会儿...耐心等待...
编译过程是真的慢,用到了很多第三方库,我大胆预测,这将是你程序猿生丫编译程序最long的一次~~
下面是我的编译日志,贴出来吧,没啥用,就是为了纪念这次编译。
Starting local Bazel server and connecting to it...

WARNING: The following configs were expanded more than once: [cuda]. For repeatable flags, repeats are counted twice and may lead to unexpected behavior.

INFO: Options provided by the client:
  Inherited 'common' options: --isatty=0 --terminal_columns=80
INFO: Reading rc options for 'build' from /workspace/tf/tensorflow-2.8.0/.bazelrc:
  Inherited 'common' options: --experimental_repo_remote_exec
INFO: Reading rc options for 'build' from /workspace/tf/tensorflow-2.8.0/.bazelrc:
  'build' options: --define framework_shared_object=true --java_toolchain=@tf_toolchains//toolchains/java:tf_java_toolchain --host_java_toolchain=@tf_toolchains//toolchains/java:tf_java_toolchain --define=use_fast_cpp_protos=true --define=allow_oversize_protos=true --spawn_strategy=standalone -c opt --announce_rc --define=grpc_no_ares=true --noincompatible_remove_legacy_whole_archive --enable_platform_specific_config --define=with_xla_support=true --config=short_logs --config=v2 --define=no_aws_support=true --define=no_hdfs_support=true --experimental_cc_shared_library
INFO: Reading rc options for 'build' from /workspace/tf/tensorflow-2.8.0/.tf_configure.bazelrc:
  'build' options: --action_env PYTHON_BIN_PATH=/usr/bin/python3 --action_env PYTHON_LIB_PATH=/usr/lib/python3/dist-packages --python_path=/usr/bin/python3 --config=tensorrt --action_env CUDA_TOOLKIT_PATH=/usr/local/cuda-11.4 --action_env TENSORRT_INSTALL_PATH=/TensorRT-8.2.1.8/ --action_env TF_CUDA_COMPUTE_CAPABILITIES=3.5,6.1,7.0,7.5,8.6 --action_env LD_LIBRARY_PATH=/usr/local/nvidia/lib:/usr/local/nvidia/lib64:/TensorRT-8.2.1.8/lib:/opt/aibee/protobuf/lib/ --action_env GCC_HOST_COMPILER_PATH=/usr/bin/x86_64-linux-gnu-gcc-7 --config=cuda
INFO: Reading rc options for 'build' from /workspace/tf/tensorflow-2.8.0/.bazelrc:
  'build' options: --deleted_packages=tensorflow/compiler/mlir/tfrt,tensorflow/compiler/mlir/tfrt/benchmarks,tensorflow/compiler/mlir/tfrt/jit/python_binding,tensorflow/compiler/mlir/tfrt/jit/transforms,tensorflow/compiler/mlir/tfrt/python_tests,tensorflow/compiler/mlir/tfrt/tests,tensorflow/compiler/mlir/tfrt/tests/analysis,tensorflow/compiler/mlir/tfrt/tests/jit,tensorflow/compiler/mlir/tfrt/tests/lhlo_to_tfrt,tensorflow/compiler/mlir/tfrt/tests/tf_to_corert,tensorflow/compiler/mlir/tfrt/tests/tf_to_tfrt_data,tensorflow/compiler/mlir/tfrt/tests/saved_model,tensorflow/compiler/mlir/tfrt/transforms/lhlo_gpu_to_tfrt_gpu,tensorflow/core/runtime_fallback,tensorflow/core/runtime_fallback/conversion,tensorflow/core/runtime_fallback/kernel,tensorflow/core/runtime_fallback/opdefs,tensorflow/core/runtime_fallback/runtime,tensorflow/core/runtime_fallback/util,tensorflow/core/tfrt/common,tensorflow/core/tfrt/eager,tensorflow/core/tfrt/eager/backends/cpu,tensorflow/core/tfrt/eager/backends/gpu,tensorflow/core/tfrt/eager/core_runtime,tensorflow/core/tfrt/eager/cpp_tests/core_runtime,tensorflow/core/tfrt/fallback,tensorflow/core/tfrt/gpu,tensorflow/core/tfrt/run_handler_thread_pool,tensorflow/core/tfrt/runtime,tensorflow/core/tfrt/saved_model,tensorflow/core/tfrt/saved_model/tests,tensorflow/core/tfrt/tpu,tensorflow/core/tfrt/utils
INFO: Found applicable config definition build:short_logs in file /workspace/tf/tensorflow-2.8.0/.bazelrc: --output_filter=DONT_MATCH_ANYTHING
INFO: Found applicable config definition build:v2 in file /workspace/tf/tensorflow-2.8.0/.bazelrc: --define=tf_api_version=2 --action_env=TF2_BEHAVIOR=1
INFO: Found applicable config definition build:tensorrt in file /workspace/tf/tensorflow-2.8.0/.bazelrc: --repo_env TF_NEED_TENSORRT=1
INFO: Found applicable config definition build:cuda in file /workspace/tf/tensorflow-2.8.0/.bazelrc: --repo_env TF_NEED_CUDA=1 --crosstool_top=@local_config_cuda//crosstool:toolchain --@local_config_cuda//:enable_cuda
INFO: Found applicable config definition build:opt in file /workspace/tf/tensorflow-2.8.0/.tf_configure.bazelrc: --copt=-Wno-sign-compare --host_copt=-Wno-sign-compare
INFO: Found applicable config definition build:cuda in file /workspace/tf/tensorflow-2.8.0/.bazelrc: --repo_env TF_NEED_CUDA=1 --crosstool_top=@local_config_cuda//crosstool:toolchain --@local_config_cuda//:enable_cuda
INFO: Found applicable config definition build:linux in file /workspace/tf/tensorflow-2.8.0/.bazelrc: --copt=-w --host_copt=-w --define=PREFIX=/usr --define=LIBDIR=$(PREFIX)/lib --define=INCLUDEDIR=$(PREFIX)/include --define=PROTOBUF_INCLUDE_PATH=$(PREFIX)/include --cxxopt=-std=c++14 --host_cxxopt=-std=c++14 --config=dynamic_kernels --distinct_host_configuration=false --experimental_guard_against_concurrent_changes
INFO: Found applicable config definition build:dynamic_kernels in file /workspace/tf/tensorflow-2.8.0/.bazelrc: --define=dynamic_loaded_kernels=true --copt=-DAUTOLOAD_DYNAMIC_KERNELS
Loading:  (1 packages loaded)
Loading: 1 packages loaded
Analyzing: 2 targets (2 packages loaded, 0 targets configured)
Analyzing: 2 targets (68 packages loaded, 218 targets configured)
Analyzing: 2 targets (149 packages loaded, 4788 targets configured)
Analyzing: 2 targets (215 packages loaded, 13237 targets configured)
Analyzing: 2 targets (241 packages loaded, 28753 targets configured)
INFO: Analyzed 2 targets (241 packages loaded, 28758 targets configured).

INFO: Found 2 targets...

[0 / 7] [Prepa] BazelWorkspaceStatusAction stable-status.txt
[376 / 3,292] checking cached actions
[624 / 3,584] Linking external/nsync/libnsync_cpp.so; 0s local
[791 / 3,589] Linking external/nsync/libnsync_cpp.so; 2s local ... (2 actions, 1 running)
[1,069 / 3,761] Linking external/nsync/libnsync_cpp.so; 6s local ... (2 actions running)
[1,315 / 3,888] Linking external/nsync/libnsync_cpp.so; 8s local ... (2 actions running)
[1,636 / 6,949] Linking external/com_google_absl/absl/base/libmalloc_internal.so; 1s local
[2,051 / 9,341] checking cached actions
[2,612 / 10,002] checking cached actions
[11,328 / 15,022] [Prepa] Writing file tensorflow/core/kernels/mlir_generated/libminimum_gpu_i8_i8_kernel_generator.so-2.params
[13,148 / 17,690] checking cached actions
[16,206 / 22,395] checking cached actions
[20,075 / 28,871] Linking external/llvm-project/mlir/libX86VectorToLLVMIRTranslation.so; 0s local ... (2 actions running)
[22,736 / 30,167] checking cached actions
[24,208 / 30,167] checking cached actions
[25,739 / 30,167] checking cached actions
[26,947 / 30,167] Linking tensorflow/core/kernels/linalg/libmatrix_set_diag_op_gpu.so; 0s local ... (2 actions, 1 running)
[28,002 / 30,167] Linking tensorflow/compiler/mlir/tfr/libgraph_decompose_pass.so; 0s local ... (6 actions, 5 running)
[30,165 / 30,167] [Prepa] Executing genrule //tensorflow:libtensorflow_cc.so.2_sym
INFO: Elapsed time: 284.425s, Critical Path: 156.23s
INFO: 6111 processes: 4073 internal, 2038 local.

INFO: Build completed successfully, 6111 total actions
INFO: Build completed successfully, 6111 total actions
五、整理库目录
编译完了,我们需要将编译成功的库拷贝出来给别人用,
下面将so及头文件整理一下
mkdir -p  tf_install/include/
mkdir -p  tf_install/lib/
cp -rd bazel-bin/tensorflow/include/* tf_install/include/
cp -rd  bazel-bin/tensorflow/libtensorflow* tf_install/lib/
include 目录:

lib目录:

ok,万事大吉~~干饭
六、题外话
如果漂亮国真禁用github或者限个龟速,吾辈休矣!
Original: https://blog.csdn.net/wohenibdxt/article/details/123557428
Author: 小白龙呢
Title: Tensoflow c++ so编译 基于bazel