- 简介
SuperPoint: Self-Supervised Interest Point Detection and Description (CVPR 2018)
论文地址
代码地址
SuperGlue: Learning Feature Matching with Graph Neural Networks (CVPR 2020)
论文地址
代码地址
两篇论文都出自 Magic Leap 团队,SuperPoint 提取特征点及描述符,SuperGlue 做特征点匹配
- SuperPoint
2.1 网络结构


网络结构如上图所示,基本就是特征提取网络加两个分支,一个分支输出特征点的位置和得分(置信度),另一个分支输出特征点的描述符。网络中的计算操作都比较常规,检测分支里的第65个通道代表无特征点,NMS的具体细节见 SuperPoint 特征点 NMS 代码分析。
; 2.2 训练总流程
SuperPoint 的网络结构并不复杂,而难点在于如何训练网络,尤其是如何得到训练数据,如何在自然图像上标注特征点(论文中说,与人体关键点检测等任务相比,无法清晰地定义特征点检测的概念;个人理解就是即使用人为标注,也没法得到一个基本统一的 ground truth)。
论文中给出了自监督的解决方案,具体流程如下:

(a)用简单的几何形状(特征点坐标明确)创建一个名为 Synthetic Shapes 的合成数据集,来训练一个全卷积网络作为 Base Detector。文中把这个训练好的检测器称为 MagicPoint,MagicPoint 在 Synthetic Shapes 数据集上明显优于传统算法,在真实图像上表现也很好,但是会漏掉一些潜在的特征点。
(b)为了弥补在真实图像上的性能差距,开发了 Homographic Adaptation 技术,实现检测器的自监督训练,提升 MagicPoint 的性能,并在自然图像上生成伪 ground truth 。
(c)事实上在b阶段完成后,已经得到了 SuperPoint 的特征点检测部分,之后就是通过对图像做变换得到特征点的对应关系作为 ground-truth 来训练 SuperPoint 的描述符部分。
2.3 SuperPoint 损失函数
L ( X , X ′ , D , D ′ ; Y , Y ′ , S ) = L p ( X , Y ) + L p ( X ′ , Y ′ ) + λ L d ( D , D ′ , S ) \mathcal{L}\left(\mathcal{X}, \mathcal{X}^{\prime}, \mathcal{D}, \mathcal{D}^{\prime} ; Y, Y^{\prime}, S\right)=\mathcal{L}{p}(\mathcal{X}, Y)+\mathcal{L}{p}\left(\mathcal{X}^{\prime}, Y^{\prime}\right)+\lambda \mathcal{L}_{d}\left(\mathcal{D}, \mathcal{D}^{\prime}, S\right)L (X ,X ′,D ,D ′;Y ,Y ′,S )=L p (X ,Y )+L p (X ′,Y ′)+λL d (D ,D ′,S )
整个 l o s s loss l o s s 由两部分组成,L p \mathcal{L}{p}L p 计算特征点位置损失,L d \mathcal{L}{d}L d 计算特征点描述符损失。
L p ( X , Y ) = 1 H c W c ∑ h = 1 w = 1 H c , W c l p ( x h w ; y h w ) \mathcal{L}{p}(\mathcal{X}, Y)=\frac{1}{H{c} W_{c}} \sum\limits_{h=1 \atop w=1}^{H_{c}, W_{c}} l_{p}\left(\mathbf{x}{h w} ; y{h w}\right)L p (X ,Y )=H c W c 1 w =1 h =1 ∑H c ,W c l p (x h w ;y h w )
l p ( x h w ; y ) = − log ( exp ( x h w y ) ∑ k = 1 65 exp ( x h w k ) ) l_{p}\left(\mathbf{x}{h w} ; y\right)=-\log \left(\frac{\exp \left(\mathbf{x}{h w y}\right)}{\sum_{k=1}^{65} \exp \left(\mathbf{x}_{h w k}\right)}\right)l p (x h w ;y )=−lo g (∑k =1 6 5 exp (x h w k )exp (x h w y ))
输入图像大小为 H , W H,W H ,W,公式中 H c = H / 8 , W c = W / 8 H_{c}=H/8,W_{c}=W/8 H c =H /8 ,W c =W /8,而 L p \mathcal{L}{p}L p 就是计算一个交叉熵损失。论文中有个细节,在一个 h w hw h w 的区域里面如果存在多个特征点,会随机取一个作为 ground-truth。这样每个区域就是做个65类分类问题。
L d ( D , D ′ , S ) = 1 ( H c W c ) 2 ∑ h = 1 w = 1 H c , W c ∑ h ′ = 1 w ′ = 1 H c , W c l d ( d h w , d h ′ w ′ ′ ; s h w h ′ w ′ ) \mathcal{L}{d}\left(\mathcal{D}, \mathcal{D}^{\prime}, S\right)=\frac{1}{\left(H_{c} W_{c}\right)^{2}} \sum\limits_{h=1 \atop w=1}^{H_{c}, W_{c}} \sum\limits_{h^{\prime}=1 \atop w^{\prime}=1}^{H_{c}, W_{c}} l_{d}\left(\mathbf{d}{h w}, \mathbf{d}{h^{\prime} w^{\prime}}^{\prime} ; s_{h w h^{\prime} w^{\prime}}\right)L d (D ,D ′,S )=(H c W c )2 1 w =1 h =1 ∑H c ,W c w ′=1 h ′=1 ∑H c ,W c l d (d h w ,d h ′w ′′;s h w h ′w ′)
l d ( d , d ′ ; s ) = λ d ∗ s ∗ max ( 0 , m p − d T d ′ ) + ( 1 − s ) ∗ max ( 0 , d T d ′ − m n ) l_{d}\left(\mathbf{d}, \mathbf{d}^{\prime} ; s\right) =\lambda_{d} * s * \max \left(0, m_{p}-\mathbf{d}^{T} \mathbf{d}^{\prime}\right)+(1-s) * \max \left(0, \mathbf{d}^{T} \mathbf{d}^{\prime}-m_{n}\right)l d (d ,d ′;s )=λd ∗s ∗max (0 ,m p −d T d ′)+(1 −s )∗max (0 ,d T d ′−m n )
s h w h ′ w ′ = { 1 , if ∥ H p h w ^ − p h ′ w ′ ∥ ≤ 8 0 , otherwise s_{h w h^{\prime} w^{\prime}}=\left{\begin{array}{ll} 1, & \text { if }\left\|\widehat{\mathcal{H} \mathbf{p}{h w}}-\mathbf{p}{h^{\prime} w^{\prime}}\right\| \leq 8 \ 0, & \text { otherwise } \end{array}\right.s h w h ′w ′={1 ,0 ,if ∥∥∥H p h w −p h ′w ′∥∥∥≤8 otherwise
出于计算量的考虑,描述符的损失在低分辨率 H c , W c H_{c},W_{c}H c ,W c 上计算。p h w \mathbf{p}{h w}p h w 为对应区域的中心点坐标,H p h w ^ \widehat{\mathcal{H} \mathbf{p}{h w}}H p h w 是对 p h w \mathbf{p}{h w}p h w 做单应性变换 H \mathcal{H}H,s h w h ′ w ′ s{h w h^{\prime} w^{\prime}}s h w h ′w ′ 代表两个区域是否匹配。L d \mathcal{L}{d}L d 就是计算一个 hinge loss,正边界 positive margin 取 m p m{p}m p ,负边界 negative margin 取 m n m_{n}m n ;因为正负样本不平衡,用 λ d \lambda_{d}λd 平衡一下。
论文参数:λ d = 250 , m p = 1 , m n = 0.2 , λ = 0.0001 \lambda_{d}=250,m_{p}=1,m_{n}=0.2,\lambda=0.0001 λd =2 5 0 ,m p =1 ,m n =0 .2 ,λ=0 .0 0 0 1
2.4 MagicPoint
(1)合成数据集 Synthetic Shapes

利用简单的几何形状创建合成数据集,合成图像在训练输入时会做动态随机单应性变换,网络不会输入重复图像(一般来说训练网络每个 epoch 的数据集是一样的,这里论文的意思应该是每个epoch的数据都是不同的,论文前面也说 Synthetic Shapes 有数百万个图像,后面说训练 MagicPoint 迭代了20w次)。虽然合成数据集中的特征点只是现实世界所有潜在特征点的一个子集,但是用来训练特征检测器时实践效果很好。
MagicPoint 的网络结构就是 SuperPoint 去掉描述符的分支。MagicPoint 在合成数据集上表现很好,在推广到真实图像时表现也很好,特别是在有角状结构的场景上(桌子、椅子、窗户)。但是视角变化时同一位置的特征点容易检测不到(Unfortunately in the space of all natural images, it underperforms when compared to the same classical detectors on repeatability under viewpoint changes.)。因此提出了在真实图像上的自监督训练方法 Homographic Adaptation。
(2)Homographic Adaptation

基本流程是对图像(此数据集为 MSCOCO2014 训练集分割生成 8w 个 240 × 320 240\times320 2 4 0 ×3 2 0 的灰度图像,这个数据集也用来训练 SuperPoint,单应性变换的选择比这里更严格)做多个随机单应性变换检测特征点,然后把所有的特征点结合作为标签。单应性变换也不是随便一个都行,要比较像相机从不同视角拍摄,如下图由多个简单的单应性变换组合而成。随机单应性变换的总数量 N h N_h N h 通过实验取100性价比最高。

通过反复使用 Homographic Adaptation 迭代优化 MagicPoint,在 HPatches 上的性能提升效果如下图所示。

; 2.5 残留细节问题
官方不提供 SuperPoint 的训练和评估代码,以及合成数据集 Synthetic Shapes,SuperPoint 的训练数据也没看到,这些都是复现 SuperPoint 的核心。
(1)Homographic Adaptation 中对特征点结合的方法
原文中只看到一句:When applying Homographic Adaptation to an image, we use the average response across a large number of homographic warps of the input image. 也许是对置信度取平均再用阈值筛选出最终的特征点坐标(很可能也没那么简单)。从上面 Homographic Adaptation 在 HPatches 上的效果提升图上也可以看出,不仅仅能够额外提取出一些潜在点,还会去掉一些冗余点,在质量和数量上同步提升效果。
(2)SuperPoint 和 Homographic Adaptation 的训练集单应性变换生成方法
The joint training of SuperPoint is also done on 240×320 grayscale COCO images. For each training example, a homography is randomly sampled. It is sampled from a more restrictive set of homographies than during Homographic Adaptation to better model the target application of pairwise matching (e.g., we avoid sampling extreme in-plane rotations as they are rarely seen in HPatches).
文中并没有具体说怎样条件的单应性变换算一个合适的。
- SuperGlue
SuperGlue 的论文里面涉及到了图神经网络、最优运输问题、Transformer、注意力机制等不是特别了解的领域。看了一轮代码发现,其实这个匹配任务跟图像也没什么关系,网络的输入只需要两幅图像的特征点位置、置信度和描述符,图像本身的信息只需要个尺寸用来做标准化,(根据对NLP的粗浅了解)感觉完全可以把特征点当做词向量。
后续单独写一篇 SuperGlue
Original: https://blog.csdn.net/weixin_43605641/article/details/119826319
Author: 秋山丶雪绪
Title: SuperPoint 与 SuperGlue 详解(一)
相关阅读1
Title: Tomcat高级配置(应用场景总结及示例)
本文将解决以下问题:
- 如何将Linux下任意位置的项目(虚拟目录)部署到tomcat?
- 如何将项目部署到服务器特定端口?
- 如何在一个服务器上部署多个web应用?
本例中 系统: Linux version 3.10.0-514.el7.x86_64、tomcat版本: 8.0.30.0、jdk 版本: jdk1.8.0
场景实例
实现方法: 修改/增加 server.xml文件中以下配置
<host name="localhost" appbase="webapps" unpackwars="true" autodeploy="true">
        <context path docbase="/root/tomcat/apache-tomcat-8.0.30/fantasy" debug="0" privileged="true" reloadable="true">
        <valve classname="org.apache.catalina.valves.AccessLogValve" directory="logs" prefix="localhost_access_log" suffix=".txt" pattern="%h %l %u %t "%r" %s %b">
</valve></context></host>
解释 :
- ntext元素:每个Context元素代表了运行在虚拟主机上的单个Web应用
- docBase 属性:自己web应用的路径,可以是相对路径也可以是绝对路径,相对路径是相对于host的webapps,绝对路径如上例。
- path 属性:即要建立的虚拟目录,是tomcat访问这个应用的URL路径,如果为空则代表访问路径为web应用的根目录,访问路径:
http://ip:port、如果非空则访问路径:http://ip:port/path。 - reloadable:如果这个属性设为true,Tomcat服务器在运行状态下会监视在
WEB-INF/classes和Web-INF/lib目录CLASS文件的改变,如果监视到有class文件被更新,服务器自动重新加载Web应用,这样我们可以在不重启tomcat的情况下改变应用程序
实现方法: 修改server.sml文件中Connector 的 port 属性,访问方式同上
<connector port="2727" protocol="HTTP/1.1" connectiontimeout="20000" redirectport="8445">
</connector>
解释:
- port 属性:指定web应用端口(暴露一个socket端口来accept客户端的链接)
- protocol 属性:使用的网络协议,表示tomcat使用何种方式来接受和处理client端请求,
HTTP/1.1是默认值,等效于org.apache.coyote.http11.Http11Protocol - connectionTimeout 属性:当client与tomcat建立连接之后,在"connectionTimeout"时间之内,仍然没有得到client的请求数据,此时连接将会被断开.此值的设定需要考虑到网络稳定型,同时也有性能的考虑.它和tcp的配置选项中的"socket_timeout"仍有区别,connectionTimeout只会在链接建立之后,得到client发送http-request信息前有效.
实现方法: server.sml文件中增加service元素
<service name="Catalina2">
    <connector port="2727" protocol="HTTP/1.1" connectiontimeout="20000" redirectport="8445">
    <connector port="8010" protocol="AJP/1.3" redirectport="8445">
    <engine name="Catalina" defaulthost="localhost">
        <realm classname="org.apache.catalina.realm.LockOutRealm">
        <realm classname="org.apache.catalina.realm.UserDatabaseRealm" resourcename="UserDatabase">
        </realm>
        <host name="localhost" appbase="fantasy" unpackwars="true" autodeploy="true">
        <context path docbase="/root/tomcat/apache-tomcat-8.0.30/fantasy" debug="0" privileged="true" reloadable="true">
        <valve classname="org.apache.catalina.valves.AccessLogValve" directory="logs" prefix="localhost_access_log" suffix=".txt" pattern="%h %l %u %t "%r" %s %b">
        </valve></context></host>
    </realm></engine>
</connector></connector></service>
解释:
一个 service 代表一个web应用实例 ;同一个 server.xml 文件中每个 service 的 name 值不能相同;同一个 server.xml 文件中每个 service 的 redirectPort 、port 值不能相同
完整配置
<?xml version="1.0" encoding="UTF-8"?>

<server port="8005" shutdown="SHUTDOWN">
  <listener classname="org.apache.catalina.startup.VersionLoggerListener">
  <listener classname="org.apache.catalina.core.AprLifecycleListener" sslengine="on">
  <listener classname="org.apache.catalina.core.JreMemoryLeakPreventionListener">
  <listener classname="org.apache.catalina.mbeans.GlobalResourcesLifecycleListener">
  <listener classname="org.apache.catalina.core.ThreadLocalLeakPreventionListener">
  <globalnamingresources>
    <resource name="UserDatabase" auth="Container" type="org.apache.catalina.UserDatabase" description="User database that can be updated and saved" factory="org.apache.catalina.users.MemoryUserDatabaseFactory" pathname="conf/tomcat-users.xml">
  </resource></globalnamingresources>
  <service name="Catalina">
    <connector port="80" protocol="HTTP/1.1" connectiontimeout="20000" redirectport="8443">
    <connector port="8009" protocol="AJP/1.3" redirectport="8443">
    <engine name="Catalina" defaulthost="localhost">
      <realm classname="org.apache.catalina.realm.LockOutRealm">
        <realm classname="org.apache.catalina.realm.UserDatabaseRealm" resourcename="UserDatabase">
      </realm>
      <host name="localhost" appbase="webapps" unpackwars="true" autodeploy="true">
        <context path docbase="/root/tomcat/apache-tomcat-8.0.30/webapps/ROOT" debug="0" privileged="true" reloadable="true">
        <valve classname="org.apache.catalina.valves.AccessLogValve" directory="logs" prefix="localhost_access_log" suffix=".txt" pattern="%h %l %u %t "%r" %s %b">
      </valve></context></host>
    </realm></engine>
  </connector></connector></service>
   <service name="Catalina2">
    <connector port="2727" protocol="HTTP/1.1" connectiontimeout="20000" redirectport="8445">
    <connector port="8010" protocol="AJP/1.3" redirectport="8445">
    <engine name="Catalina" defaulthost="localhost">
      <realm classname="org.apache.catalina.realm.LockOutRealm">
        <realm classname="org.apache.catalina.realm.UserDatabaseRealm" resourcename="UserDatabase">
      </realm>
      <host name="localhost" appbase="fantasy" unpackwars="true" autodeploy="true">
        <context path docbase="/root/tomcat/apache-tomcat-8.0.30/fantasy" debug="0" privileged="true" reloadable="true">
        <valve classname="org.apache.catalina.valves.AccessLogValve" directory="logs" prefix="localhost_access_log" suffix=".txt" pattern="%h %l %u %t "%r" %s %b">
      </valve></context></host>
    </realm></engine>
  </connector></connector></service>
</listener></listener></listener></listener></listener></server>
Original: https://www.cnblogs.com/ifantasy/p/16040141.html
Author: 丿风色幻想
Title: Tomcat高级配置(应用场景总结及示例)
相关阅读2
Title: vue网页小程序实现七牛云图片文件上传以及原生组件video显示不出问题
七牛云图片、文件上传
⭐vue网页端
在methods里面定义一个方法 getQiniuToken
// 获取七牛云上传参数
getQiniuToken{
    // 这里采用axios调取接口, baseUrl即为接口请求服务器地址
 this.$axios.post(baseUrl+'api/upload_qiniu_get_token',{
    }).then((res) => {
     // 下面保存参数,视具体接口而变
    var data = res.data;
    if(data.error_code == 0){
        this.uploadData = {
            token:data.token // 获取上传token
        }
        this.img_domain = data.host; // 保存图片前缀
    }
    }).catch((err) => {

    });
}
action参数:根据存储区域会有相应的上传地址,
data参数: 上传所需参数即 {token: xxx}
handleSuccess(res){
    this.img = this.img_domain + res.key;
    // res.key是上传七牛云服务器后换来的凭证,拼接图片前缀,即可展示图片
}
⭐小程序版
// 获取七牛云参数
  getQiniuToken(){
    let that = this
    // 请求接口
    request.request('get','api/upload_qiniu_get_token',{

    },function(res){
      console.log(res)
      if (res.error_code == 0) {
        that.setData({
          token: res.data.token  // 将上传token保存下来
        })
      }
      else{
        wx.showToast({
          title: res.error_message,
          icon : 'none'
        })
      }
    },(err)=>{
    })
  },
uploadImg方法
// 调用微信选择图片api
uploadImg() {
    let that = this
    wx.chooseImage({
      count: 9,
      success (res) {
          console.log(res)
          // tempFilePath可以作为img标签的src属性显示图片
          const tempFilePaths = res.tempFilePaths
          // 显示加载
           wx.showLoading({
            title: '玩命加载中',
          })
          // 实现多图片上传
          for(let i=0;i
previewImg预览图片
// 点击放大预览图片
previewImg(e){
     var index = e.currentTarget.dataset.index;
     wx.previewImage({
        current: this.data.imgs[index],
        urls: this.data.imgs
    })
}
delImg删除图片
  // 删除图片
  delImg(e){
    var index = e.currentTarget.dataset.index;
    this.data.imgs.splice(index,1);
    this.setData({
        imgs: this.data.imgs
    })
  },
与上传图片类似,这里就贴一下上传的方法好啦
 // 上传视频
  uploadVideo(e){
    let that = this
    wx.chooseVideo({
      success (res) {
          const tempFilePaths = res.tempFilePath
          console.log(res)
          // 显示加载
           wx.showLoading({
            title: '玩命加载中',
          })
          wx.uploadFile({
              url: 'https://upload-z2.qiniup.com',
              filePath: tempFilePaths,
              name: 'file',
              formData: {
                  'token': that.data.token
              },
              success (res){
                  console.log(res)
                  let domain = that.data.video_domain
                  const data = JSON.parse(res.data)
                  that.data.videos.push(domain + data.key)
                  that.setData({
                      videos: that.data.videos
                  })
              },
              complete(){
                  wx.hideLoading()
              }
          })
      }
    })
  },
有些时候会遇到直接点击 video微信原生组件会出现黑屏或不显示问题,这边推荐使用小程序的 previewMedia 接口来实现预览
 // 预览视频
  onPreviewVideo(e){
    // 获取视频地址
    let urls = e.currentTarget.dataset.url
    console.log(urls)
    wx.previewMedia({
      sources: [{
        url: urls,
        type: 'video',
        poster:'https://i.loli.net/2021/08/26/vhdxCoH3wUq9nZz.png' // 预览图,随喜好来,不写也没事
      }],
      current: 0,
      fail() {
        wx.showToast({ title: '预览视频失败', icon: 'none' });
      },
    });
  },
Original: https://www.cnblogs.com/Jlay/p/qi_niu_yun_upload.html
Author: J1ay
Title: vue网页小程序实现七牛云图片文件上传以及原生组件video显示不出问题
相关阅读3
Title: Tensoflow c++ so编译 基于bazel
每日一歌,分享好心情:叶卡捷琳娜战歌
一、起点
- 为什么编译tensorfflow?
nvidia 2020年发布的Ampere架构gpu支持TF32,为了比对TF32、FP32推理速度,而公司现在用的Tensorflow版本太老,不支持TF32, so,升级TF。
2. 编译环境怎么选?
由于我需要编译支持GPU的tensorflow,所以需要在cuda环境编译。一般是选择nvidia官方devel镜像(关于这方面有很多有趣的话题,在以后的文章中聊吧),结合我的GPU硬件情况,选择nvidia/cuda:11.4.2-cudnn8-devel-ubuntu18.04, 编译过程都在此docker中进行(话说,在企业中离了docker真过不了~~)
二、环境准备
- 下载tf源码
没什么可说的,clone吧 ,附上github源码地址: https://github.com/tensorflow/tensorflow
我使用最新的2.8.0版本(2022-04-29)。 - 安装编译工具bazel
这里有个小坑,不同版本的tf对bazel版本要求不同。
下载完源码后,在源码顶层目录configure.py文件中有对bazel的要求,
_TF_MIN_BAZEL_VERSION = '4.2.1'
_TF_MAX_BAZEL_VERSION = '4.99.0'
本次编译选择 4.2.1版本,bazel安装过程嘛,可以按照tf官方给的教程https://www.tensorflow.org/install/source#install_bazel,其实,直接下载bazel可执行程序更简单,下载地址(https://github.com/bazelbuild/bazel/releases/download/4.2.1/bazel-4.2.1-linux-x86_64),下载完成后加入PATH路径,再ln一下,ok~~

; 三、编译配置
- 配置build
在源码顶层目录下,运行
./configure
配置过程中最重要的步骤是开启GPU支持以及设置计算能力
ps:计算能力这个被nvidia造出来的概念也会在后续文章中聊聊,比如怎么识别gpu的计算能力、计算能力一般用在哪里、怎样在计算能力是7.5的环境中编译出支持8.0的库...。
- 选择python版本:

- 开启gpu支持:

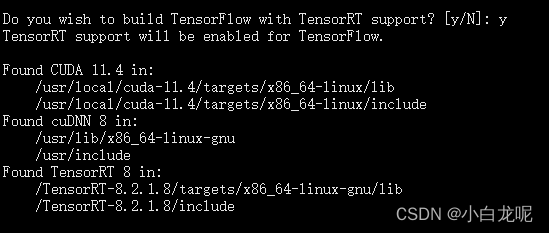
- 开启TF-TRT支持:
如果需要的话就开启,一般是需要滴...毕竟TRT是老黄的嫡系呀,加速真是杠杠的...
这里需要提前下载好TensorRT 官方build包(晕,坑有点多,还需要去nvidia官网注册个会员),附上地址https://developer.nvidia.com/nvidia-tensorrt-8x-download
下载好,我直接解压到根目录了,毕竟咱是在自己的docker中嘛,随便折腾...
后面编译需要用到TRT,那就得让TF知道TRT在哪儿呀,so,设置环境变量
export TENSORRT_INSTALL_PATH=/TensorRT-8.2.1.8/
ps: 感兴趣的话,你可以在源码里可以看一下这个环境是什么时候起作用的,,我就不说了,说多了都是泪呀
- 设置计算能力:
这一步需要根据自己编译出来的库的gpu运行环境设置,我这里因为需要运行在安培架构的GPU上,需要额外设置,不能用默认的,其实也可以,只不过inference速度会慢一丢丢,具体设置步骤参考: 《计算能力那些事儿》。

其他选项使用默认即可。
其实,./configure程序会根据我们的输入产生一个叫.tf_configure.bazelrc的配置文件(如果你是大牛或者疯子,直接编辑这个文件也可以).
以下是此次生成的文件内容:
build --action_env PYTHON_BIN_PATH="/usr/bin/python3"
build --action_env PYTHON_LIB_PATH="/usr/lib/python3/dist-packages"
build --python_path="/usr/bin/python3"
build --config=tensorrt
build --action_env CUDA_TOOLKIT_PATH="/usr/local/cuda-11.4"
build --action_env TENSORRT_INSTALL_PATH="/TensorRT-8.2.1.8/"
build --action_env TF_CUDA_COMPUTE_CAPABILITIES="6.1,7.0,7.5,8.0,8.6"
build --action_env LD_LIBRARY_PATH="/workspace/third_party/source/w16/third_party/prebuilt/tensorrt8_install/linux-x64-cuda114/lib:/workspace/third_party/source/w16/third_party/prebuilt/openvino_install/linux-x64-cuda114/lib/intel64:/workspace/third_party/source/w16/third_party/prebuilt/caffe_install/linux-x64-cuda114/lib:/workspace/third_party/source/w16/third_party/prebuilt/pytorch_install/linux-x64-cuda114/lib:/workspace/third_party/source/w16/third_party/prebuilt/onnx_install/linux-x64-cuda114/lib:/workspace/third_party/source/w16/third_party/prebuilt/ncnn_install/linux-x64-cuda114/lib"
build --action_env GCC_HOST_COMPILER_PATH="/usr/bin/x86_64-linux-gnu-gcc-7"
build --config=cuda
build:opt --copt=-Wno-sign-compare
build:opt --host_copt=-Wno-sign-compare
test --flaky_test_attempts=3
test --test_size_filters=small,medium
test --test_env=LD_LIBRARY_PATH
test:v1 --test_tag_filters=-benchmark-test,-no_oss,-no_gpu,-oss_serial
test:v1 --build_tag_filters=-benchmark-test,-no_oss,-no_gpu
test:v2 --test_tag_filters=-benchmark-test,-no_oss,-no_gpu,-oss_serial,-v1only
test:v2 --build_tag_filters=-benchmark-test,-no_oss,-no_gpu,-v1only
四、开始真正的编译
提前说好,这是一个漫长的过程
在tensorflow源码顶层目录,运行
bazel build --config=opt --config=cuda --verbose_failures //tensorflow:libtensorflow_cc.so //tensorflow:install_headers
如果你不了解bazel编译的话,这个命令乍看起来可能有点晕,这里只简单介绍以下,后续文章再详谈bazel编译系统。
- –config=cuda: 指定编译配置,至于cuda都包含哪些配置,可以查看.bazelrc
- –verbose_failures: 你懂的
- //tensorflow:libtensorflow_cc.so:指定编译/tensorflow目录下的libtensorflow_cc.so目标(因为我需要tf的c++接口嘛)
- //tensorflow:install_headers: 指定编译/tensorflow目录下的install_headers目标
让bazel飞一会儿...耐心等待...
编译过程是真的慢,用到了很多第三方库,我大胆预测,这将是你程序猿生丫编译程序最long的一次~~
下面是我的编译日志,贴出来吧,没啥用,就是为了纪念这次编译。
Starting local Bazel server and connecting to it...

WARNING: The following configs were expanded more than once: [cuda]. For repeatable flags, repeats are counted twice and may lead to unexpected behavior.

INFO: Options provided by the client:
  Inherited 'common' options: --isatty=0 --terminal_columns=80
INFO: Reading rc options for 'build' from /workspace/tf/tensorflow-2.8.0/.bazelrc:
  Inherited 'common' options: --experimental_repo_remote_exec
INFO: Reading rc options for 'build' from /workspace/tf/tensorflow-2.8.0/.bazelrc:
  'build' options: --define framework_shared_object=true --java_toolchain=@tf_toolchains//toolchains/java:tf_java_toolchain --host_java_toolchain=@tf_toolchains//toolchains/java:tf_java_toolchain --define=use_fast_cpp_protos=true --define=allow_oversize_protos=true --spawn_strategy=standalone -c opt --announce_rc --define=grpc_no_ares=true --noincompatible_remove_legacy_whole_archive --enable_platform_specific_config --define=with_xla_support=true --config=short_logs --config=v2 --define=no_aws_support=true --define=no_hdfs_support=true --experimental_cc_shared_library
INFO: Reading rc options for 'build' from /workspace/tf/tensorflow-2.8.0/.tf_configure.bazelrc:
  'build' options: --action_env PYTHON_BIN_PATH=/usr/bin/python3 --action_env PYTHON_LIB_PATH=/usr/lib/python3/dist-packages --python_path=/usr/bin/python3 --config=tensorrt --action_env CUDA_TOOLKIT_PATH=/usr/local/cuda-11.4 --action_env TENSORRT_INSTALL_PATH=/TensorRT-8.2.1.8/ --action_env TF_CUDA_COMPUTE_CAPABILITIES=3.5,6.1,7.0,7.5,8.6 --action_env LD_LIBRARY_PATH=/usr/local/nvidia/lib:/usr/local/nvidia/lib64:/TensorRT-8.2.1.8/lib:/opt/aibee/protobuf/lib/ --action_env GCC_HOST_COMPILER_PATH=/usr/bin/x86_64-linux-gnu-gcc-7 --config=cuda
INFO: Reading rc options for 'build' from /workspace/tf/tensorflow-2.8.0/.bazelrc:
  'build' options: --deleted_packages=tensorflow/compiler/mlir/tfrt,tensorflow/compiler/mlir/tfrt/benchmarks,tensorflow/compiler/mlir/tfrt/jit/python_binding,tensorflow/compiler/mlir/tfrt/jit/transforms,tensorflow/compiler/mlir/tfrt/python_tests,tensorflow/compiler/mlir/tfrt/tests,tensorflow/compiler/mlir/tfrt/tests/analysis,tensorflow/compiler/mlir/tfrt/tests/jit,tensorflow/compiler/mlir/tfrt/tests/lhlo_to_tfrt,tensorflow/compiler/mlir/tfrt/tests/tf_to_corert,tensorflow/compiler/mlir/tfrt/tests/tf_to_tfrt_data,tensorflow/compiler/mlir/tfrt/tests/saved_model,tensorflow/compiler/mlir/tfrt/transforms/lhlo_gpu_to_tfrt_gpu,tensorflow/core/runtime_fallback,tensorflow/core/runtime_fallback/conversion,tensorflow/core/runtime_fallback/kernel,tensorflow/core/runtime_fallback/opdefs,tensorflow/core/runtime_fallback/runtime,tensorflow/core/runtime_fallback/util,tensorflow/core/tfrt/common,tensorflow/core/tfrt/eager,tensorflow/core/tfrt/eager/backends/cpu,tensorflow/core/tfrt/eager/backends/gpu,tensorflow/core/tfrt/eager/core_runtime,tensorflow/core/tfrt/eager/cpp_tests/core_runtime,tensorflow/core/tfrt/fallback,tensorflow/core/tfrt/gpu,tensorflow/core/tfrt/run_handler_thread_pool,tensorflow/core/tfrt/runtime,tensorflow/core/tfrt/saved_model,tensorflow/core/tfrt/saved_model/tests,tensorflow/core/tfrt/tpu,tensorflow/core/tfrt/utils
INFO: Found applicable config definition build:short_logs in file /workspace/tf/tensorflow-2.8.0/.bazelrc: --output_filter=DONT_MATCH_ANYTHING
INFO: Found applicable config definition build:v2 in file /workspace/tf/tensorflow-2.8.0/.bazelrc: --define=tf_api_version=2 --action_env=TF2_BEHAVIOR=1
INFO: Found applicable config definition build:tensorrt in file /workspace/tf/tensorflow-2.8.0/.bazelrc: --repo_env TF_NEED_TENSORRT=1
INFO: Found applicable config definition build:cuda in file /workspace/tf/tensorflow-2.8.0/.bazelrc: --repo_env TF_NEED_CUDA=1 --crosstool_top=@local_config_cuda//crosstool:toolchain --@local_config_cuda//:enable_cuda
INFO: Found applicable config definition build:opt in file /workspace/tf/tensorflow-2.8.0/.tf_configure.bazelrc: --copt=-Wno-sign-compare --host_copt=-Wno-sign-compare
INFO: Found applicable config definition build:cuda in file /workspace/tf/tensorflow-2.8.0/.bazelrc: --repo_env TF_NEED_CUDA=1 --crosstool_top=@local_config_cuda//crosstool:toolchain --@local_config_cuda//:enable_cuda
INFO: Found applicable config definition build:linux in file /workspace/tf/tensorflow-2.8.0/.bazelrc: --copt=-w --host_copt=-w --define=PREFIX=/usr --define=LIBDIR=$(PREFIX)/lib --define=INCLUDEDIR=$(PREFIX)/include --define=PROTOBUF_INCLUDE_PATH=$(PREFIX)/include --cxxopt=-std=c++14 --host_cxxopt=-std=c++14 --config=dynamic_kernels --distinct_host_configuration=false --experimental_guard_against_concurrent_changes
INFO: Found applicable config definition build:dynamic_kernels in file /workspace/tf/tensorflow-2.8.0/.bazelrc: --define=dynamic_loaded_kernels=true --copt=-DAUTOLOAD_DYNAMIC_KERNELS
Loading:  (1 packages loaded)
Loading: 1 packages loaded
Analyzing: 2 targets (2 packages loaded, 0 targets configured)
Analyzing: 2 targets (68 packages loaded, 218 targets configured)
Analyzing: 2 targets (149 packages loaded, 4788 targets configured)
Analyzing: 2 targets (215 packages loaded, 13237 targets configured)
Analyzing: 2 targets (241 packages loaded, 28753 targets configured)
INFO: Analyzed 2 targets (241 packages loaded, 28758 targets configured).

INFO: Found 2 targets...

[0 / 7] [Prepa] BazelWorkspaceStatusAction stable-status.txt
[376 / 3,292] checking cached actions
[624 / 3,584] Linking external/nsync/libnsync_cpp.so; 0s local
[791 / 3,589] Linking external/nsync/libnsync_cpp.so; 2s local ... (2 actions, 1 running)
[1,069 / 3,761] Linking external/nsync/libnsync_cpp.so; 6s local ... (2 actions running)
[1,315 / 3,888] Linking external/nsync/libnsync_cpp.so; 8s local ... (2 actions running)
[1,636 / 6,949] Linking external/com_google_absl/absl/base/libmalloc_internal.so; 1s local
[2,051 / 9,341] checking cached actions
[2,612 / 10,002] checking cached actions
[11,328 / 15,022] [Prepa] Writing file tensorflow/core/kernels/mlir_generated/libminimum_gpu_i8_i8_kernel_generator.so-2.params
[13,148 / 17,690] checking cached actions
[16,206 / 22,395] checking cached actions
[20,075 / 28,871] Linking external/llvm-project/mlir/libX86VectorToLLVMIRTranslation.so; 0s local ... (2 actions running)
[22,736 / 30,167] checking cached actions
[24,208 / 30,167] checking cached actions
[25,739 / 30,167] checking cached actions
[26,947 / 30,167] Linking tensorflow/core/kernels/linalg/libmatrix_set_diag_op_gpu.so; 0s local ... (2 actions, 1 running)
[28,002 / 30,167] Linking tensorflow/compiler/mlir/tfr/libgraph_decompose_pass.so; 0s local ... (6 actions, 5 running)
[30,165 / 30,167] [Prepa] Executing genrule //tensorflow:libtensorflow_cc.so.2_sym
INFO: Elapsed time: 284.425s, Critical Path: 156.23s
INFO: 6111 processes: 4073 internal, 2038 local.

INFO: Build completed successfully, 6111 total actions
INFO: Build completed successfully, 6111 total actions
五、整理库目录
编译完了,我们需要将编译成功的库拷贝出来给别人用,
下面将so及头文件整理一下
mkdir -p  tf_install/include/
mkdir -p  tf_install/lib/
cp -rd bazel-bin/tensorflow/include/* tf_install/include/
cp -rd  bazel-bin/tensorflow/libtensorflow* tf_install/lib/
include 目录:

lib目录:

ok,万事大吉~~干饭
六、题外话
如果漂亮国真禁用github或者限个龟速,吾辈休矣!
Original: https://blog.csdn.net/wohenibdxt/article/details/123557428
Author: 小白龙呢
Title: Tensoflow c++ so编译 基于bazel