文章目录
一、系统环境
操作系统:Windows7 64位,
Python环境:Python3.7;conda 4.10.3
目标版本:TensorFlow1.14.0
二、安装步骤
预处理:在开始安装之前,建议检查一下环境变量是否配置正常,在Path中查看
D:\anaconda\condabin
D:\anaconda\Scripts
D:\anaconda\Library\bin
D:\anaconda\
如果后面出现"WARNING: pip is configured with locations that require TLS/SSL, however the ssl module in Python is not available"异常,大概率是环境变量问题。
1.如果先前配置过清华等镜像地址,建议首先执行
conda config --remove-key channels
将Anaconda的源恢复为默认
出现报错
CondaKeyError: 'channels': key 'channels' is not in the config file
即为恢复成功。
关于源的配置在"C:\Users\Administrator.condarc"文件中,恢复成功后可以看到:
show_channel_urls: true
2.然后需要配置源
conda config --add channels http://mirrors.tuna.tsinghua.edu.cn/anaconda/cloud/msys2/win-64
conda config --add channels http://mirrors.tuna.tsinghua.edu.cn/anaconda/cloud/conda-forge/win-64
conda config --add channels http://mirrors.tuna.tsinghua.edu.cn/anaconda/pkgs/free/win-64
conda config --add channels http://mirrors.tuna.tsinghua.edu.cn/anaconda/pkgs/main/win-64
conda config --set show_channel_urls yes
注意,这里要配置位http,配置https会出现关于ssl异常的报错
此外,在镜像地址后都添加了/win-64,这是根据清华镜像文件存放位置决定的,清华镜像地址为:https://mirrors.tuna.tsinghua.edu.cn/anaconda/pkgs/main/
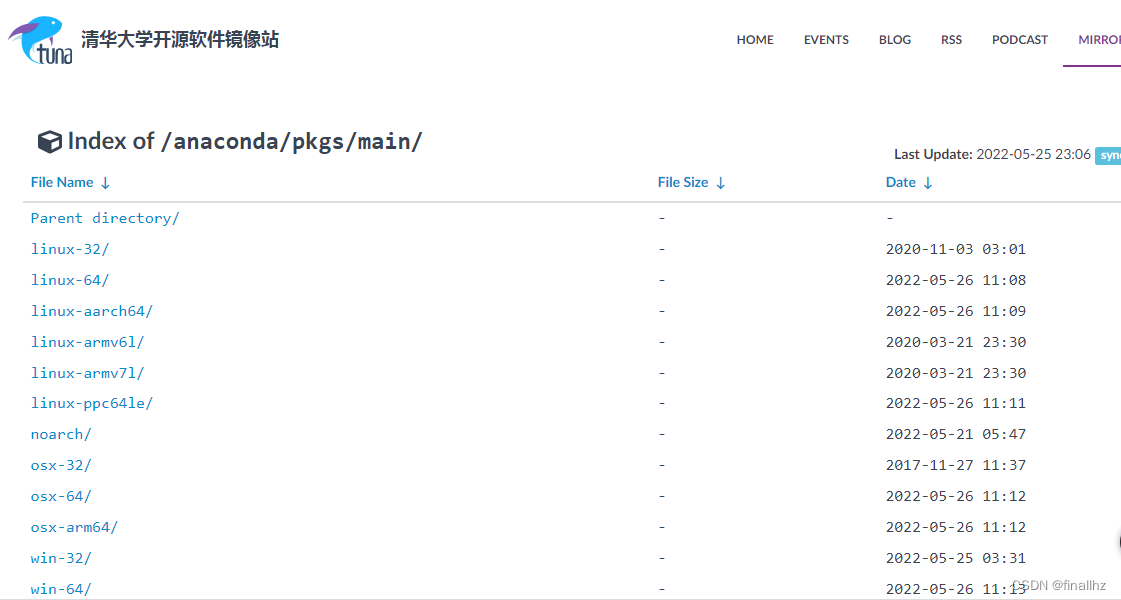
如果pip某些包发生"当前平台不存在该文件"异常,可以通过镜像目录查找文件地址
配置完成后,同样可以进入"C:\Users\Administrator.condarc"文件中进行确认
show_channel_urls: true
channels:
  - http://mirrors.tuna.tsinghua.edu.cn/anaconda/pkgs/main/win-64
  - http://mirrors.tuna.tsinghua.edu.cn/anaconda/pkgs/free/win-64
  - http://mirrors.tuna.tsinghua.edu.cn/anaconda/cloud/conda-forge/win-64
  - http://mirrors.tuna.tsinghua.edu.cn/anaconda/cloud/msys2/win-64
如果存在"- default",请进行删除
3.上面两步都是针对镜像源的配置,接下来才是TensorFlow的流程。首先要配置虚拟环境。
conda create -n
如果出现了"CondaHTTPError: HTTP 000 CONNECTION FAILED for url"异常,就是上两步配置错了,就不要继续下面的步骤了。(这里主要考虑镜像地址问题,还有http问题)
4.安装完成后,需要激活虚拟环境,我这里是
activate tensorflow
有些人是"conda activate tensorflow",但我这里会报错,找不到该命令。
然后对TensorFlow进行安装,我这里网络安装没有成功,所以直接下载了TensorFlow1.14.0文件
从镜像源处下载tensorflow并安装,镜像源地址:
https://mirrors.tuna.tsinghua.edu.cn/pypi/web/simple/tensorflow/
找到对应自己python版本的文件
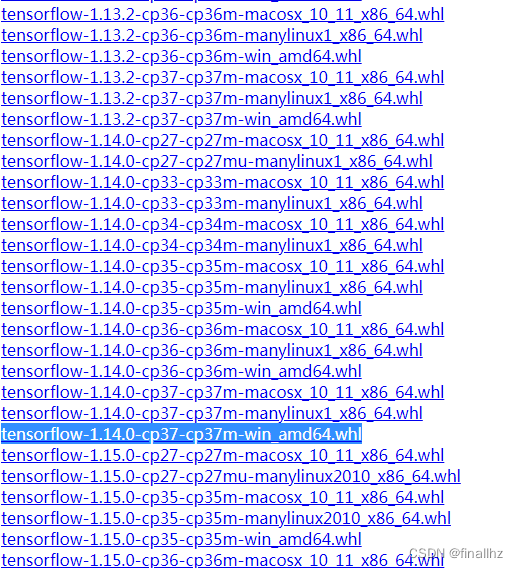
注意,这里首先是找TensorFlow版本,即1.14.0,然后是python版本号,对应cp37,如果是python3.5就是cp35;最后是平台,即win_amd64
下载完成后,在激活的虚拟环境中执行
pip install D:\tensorflow-1.14.0-cp37-cp37m-win_amd64.whl
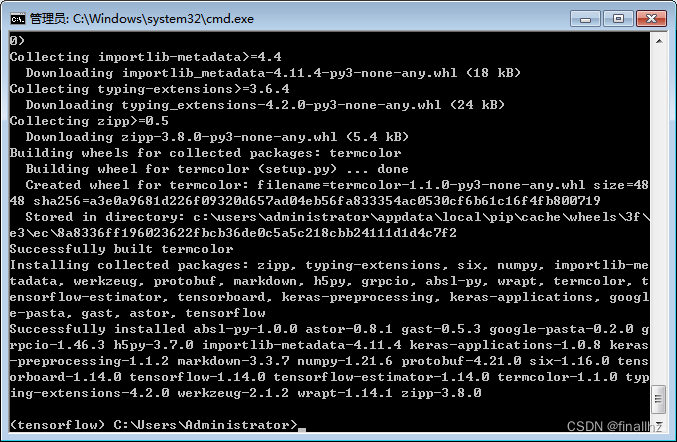
安装成功!!!
Original: https://blog.csdn.net/weixin_48289706/article/details/124981481
Author: finallhz
Title: conda安装指定版本TensorFlow